このクックブックでは、OAuth2.0 の アクセストークンを Google から取得する方法を説明します。
intra-mart Accel Platformでは、OAuth2.0 の アクセストークンをユーザ毎に取得・保存する機能が備わっています。主な機能は以下のとおりです。
- 初回のアクセストークン取得に必要な、認可要求に関する一連の画面や処理を共通化して提供
- アクセストークンの有効期限が切れていた場合、リフレッシュトークンを利用して自動的にアクセストークンを更新
これにより、開発者は、OAuth2.0関連の面倒な実装をすることなく、外部のサービスが提供する様々な Web API へのアクセスを簡単に作成することが可能となります。
今回は、Google Drive™ のファイル一覧を取得することを例として、詳細な手順を説明します。
完成サンプル
以下の完成サンプルをダウンロードしてご活用ください。
e builder プロジェクト : im_cookbook_113639_e_builder_prj.zip
imm ファイル : im_cookbook_113639_oauth_client_google-1.0.0.imm
なお、ベースURLである以下の部分は、環境に合わせて適宜変更してください。
http://localhost:8080/imart
レシピ
概要
Google側の手順
- 手順1. アプリケーション登録 - OAuth 2.0 クライアント ID の作成
intra-mart Accel Platform側の手順
- 手順2. OAuthプロバイダ設定の作成。(/conf/oauth-provider-config/*.xmlの作成)
- 手順3. 認可コード要求時のパラメータをGoogle用にカスタマイズ。(Google用のAuthzCodeRequestクラスの作成)
- 手順4. アクセストークン更新時の成功レスポンスに refresh_token が含まれていない場合のカスタマイズ。(OAuthRefreshAccessTokenRequestProcessorの実装クラスを作成)
- 手順5. カスタマイズしたクラスを利用するための OAuthRequestProcessorFactory を作成。
- 手順6. 動作確認用サンプルの作成
Google側の手順
手順1. OAuth 2.0 クライアント ID の作成
最初に OAuth 2.0 クライアント ID を作成します。
OAuth 2.0を利用したGoogleのAPIアクセス方法に関する詳細は、Using OAuth 2.0 to Access Google APIs を参照してください。
1. Google Developers Consoleにアクセスします。
https://console.developers.google.com/
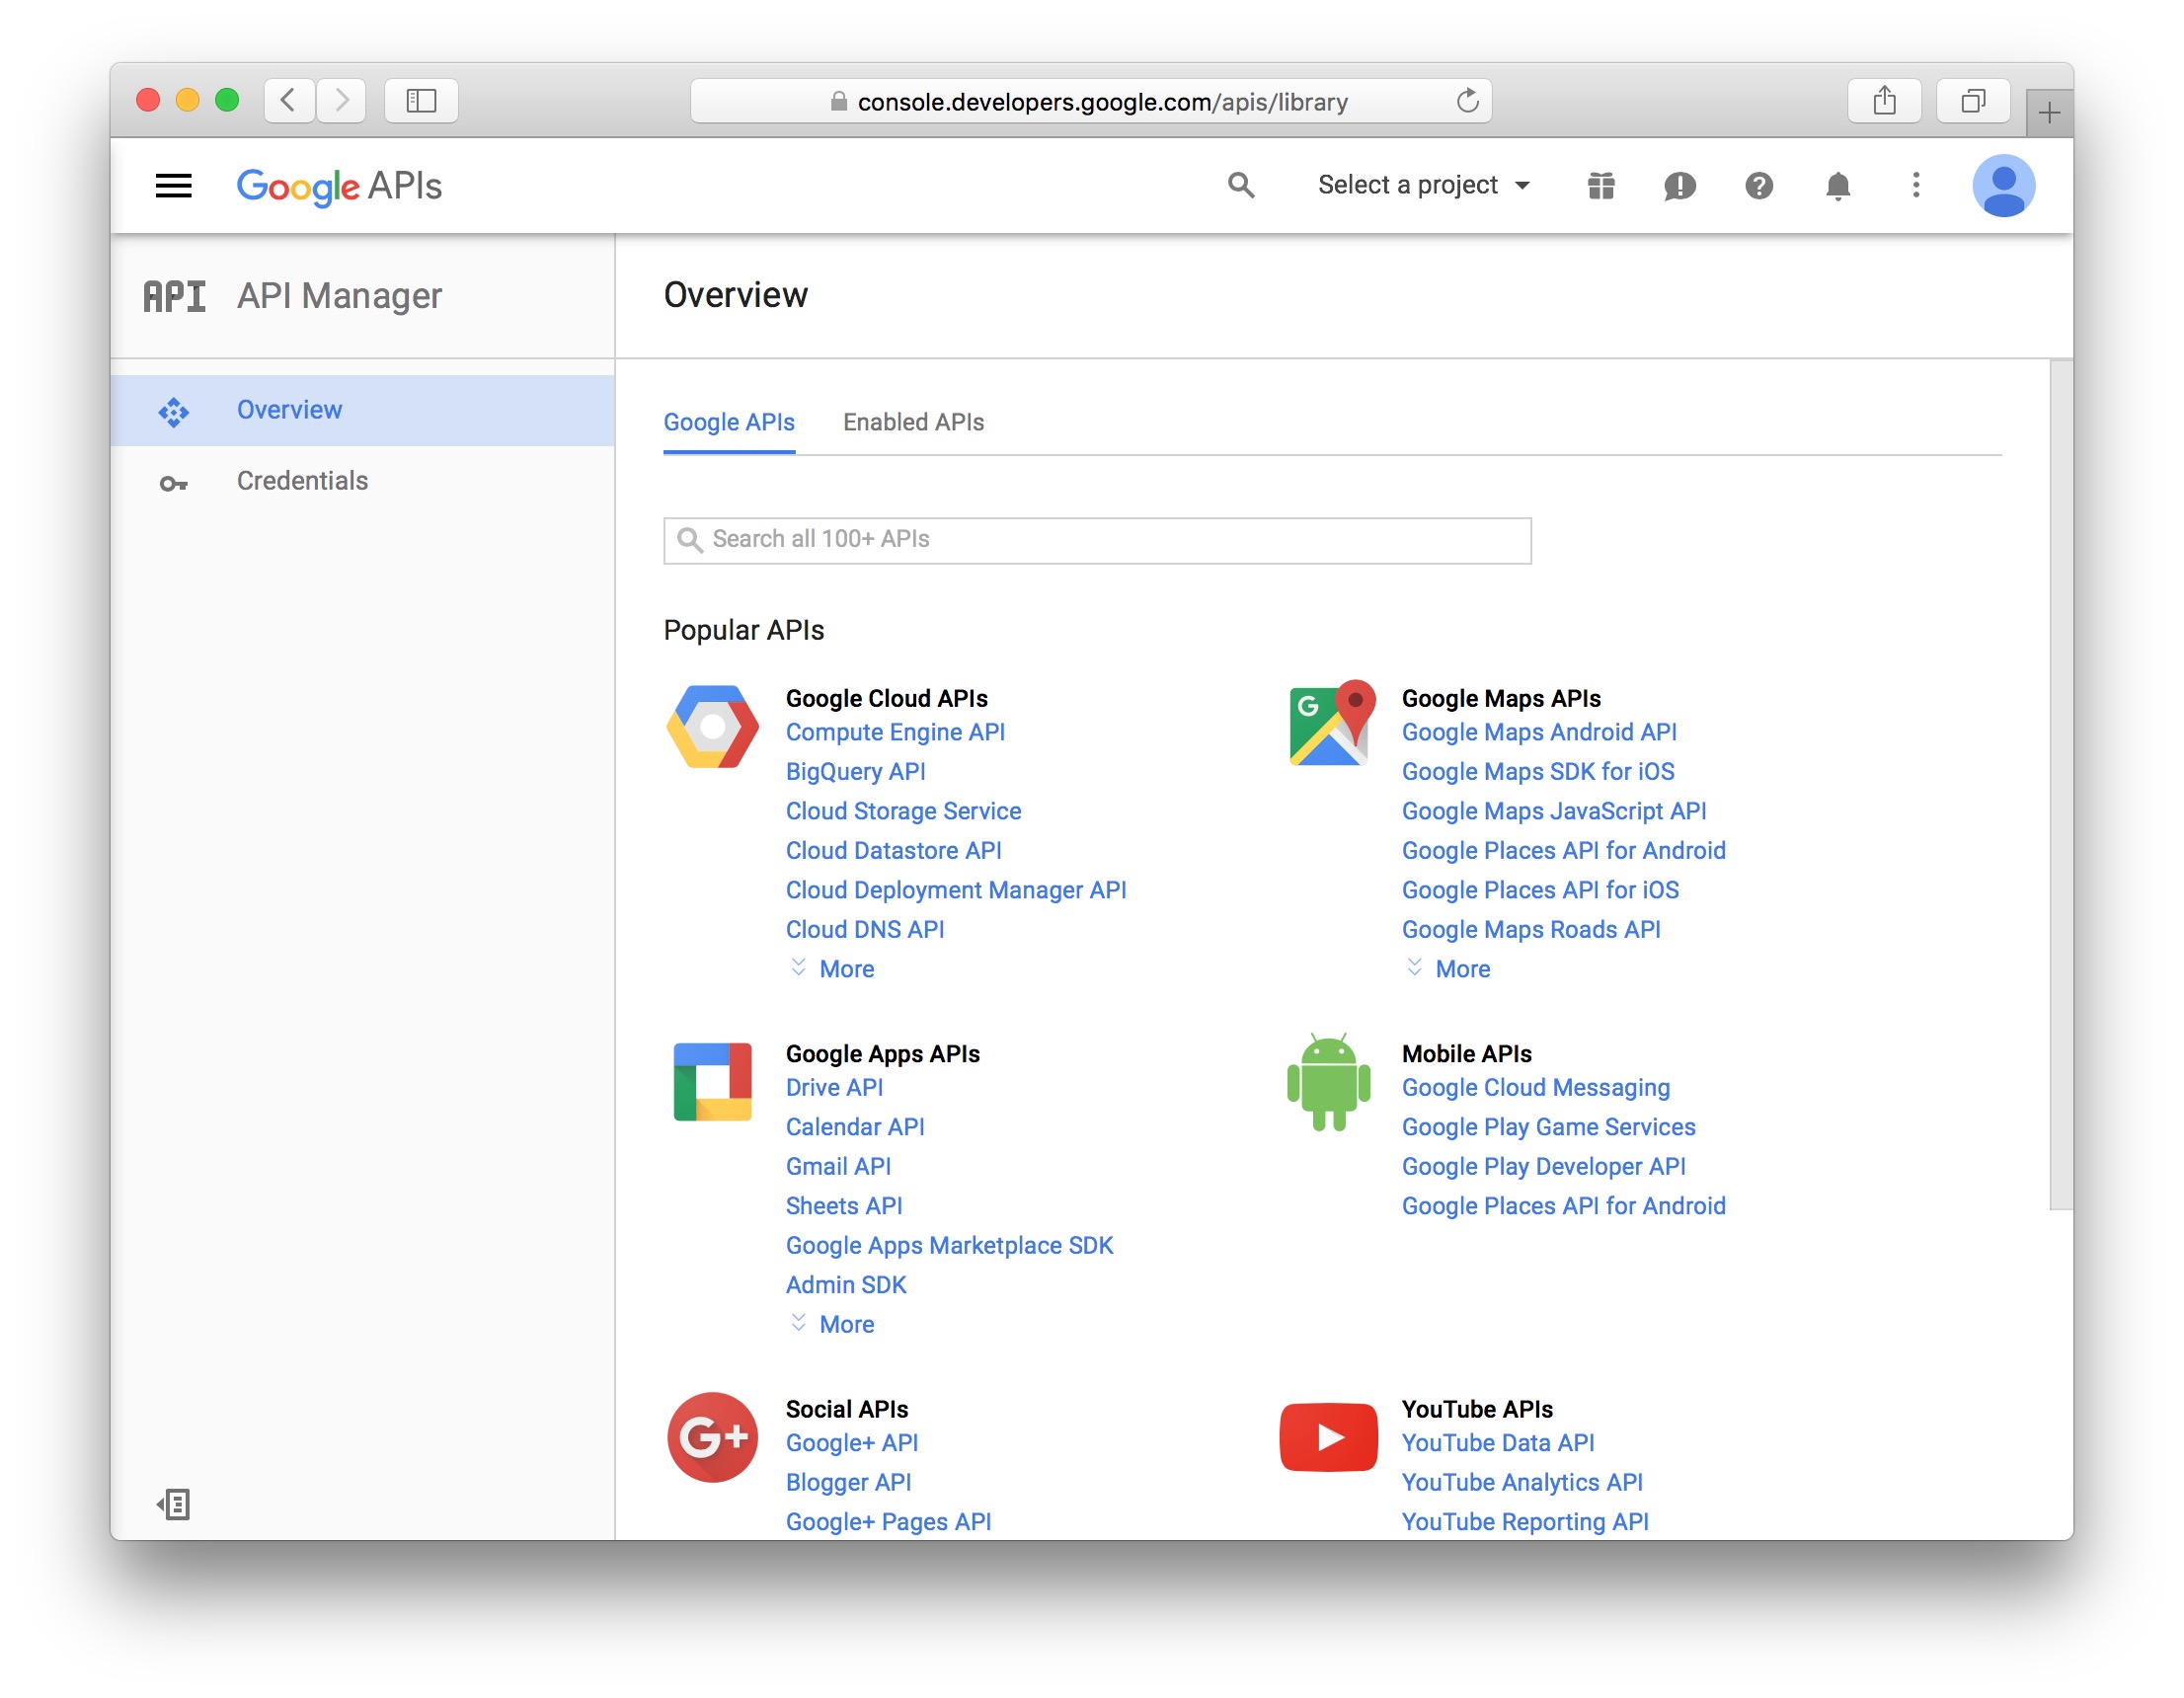
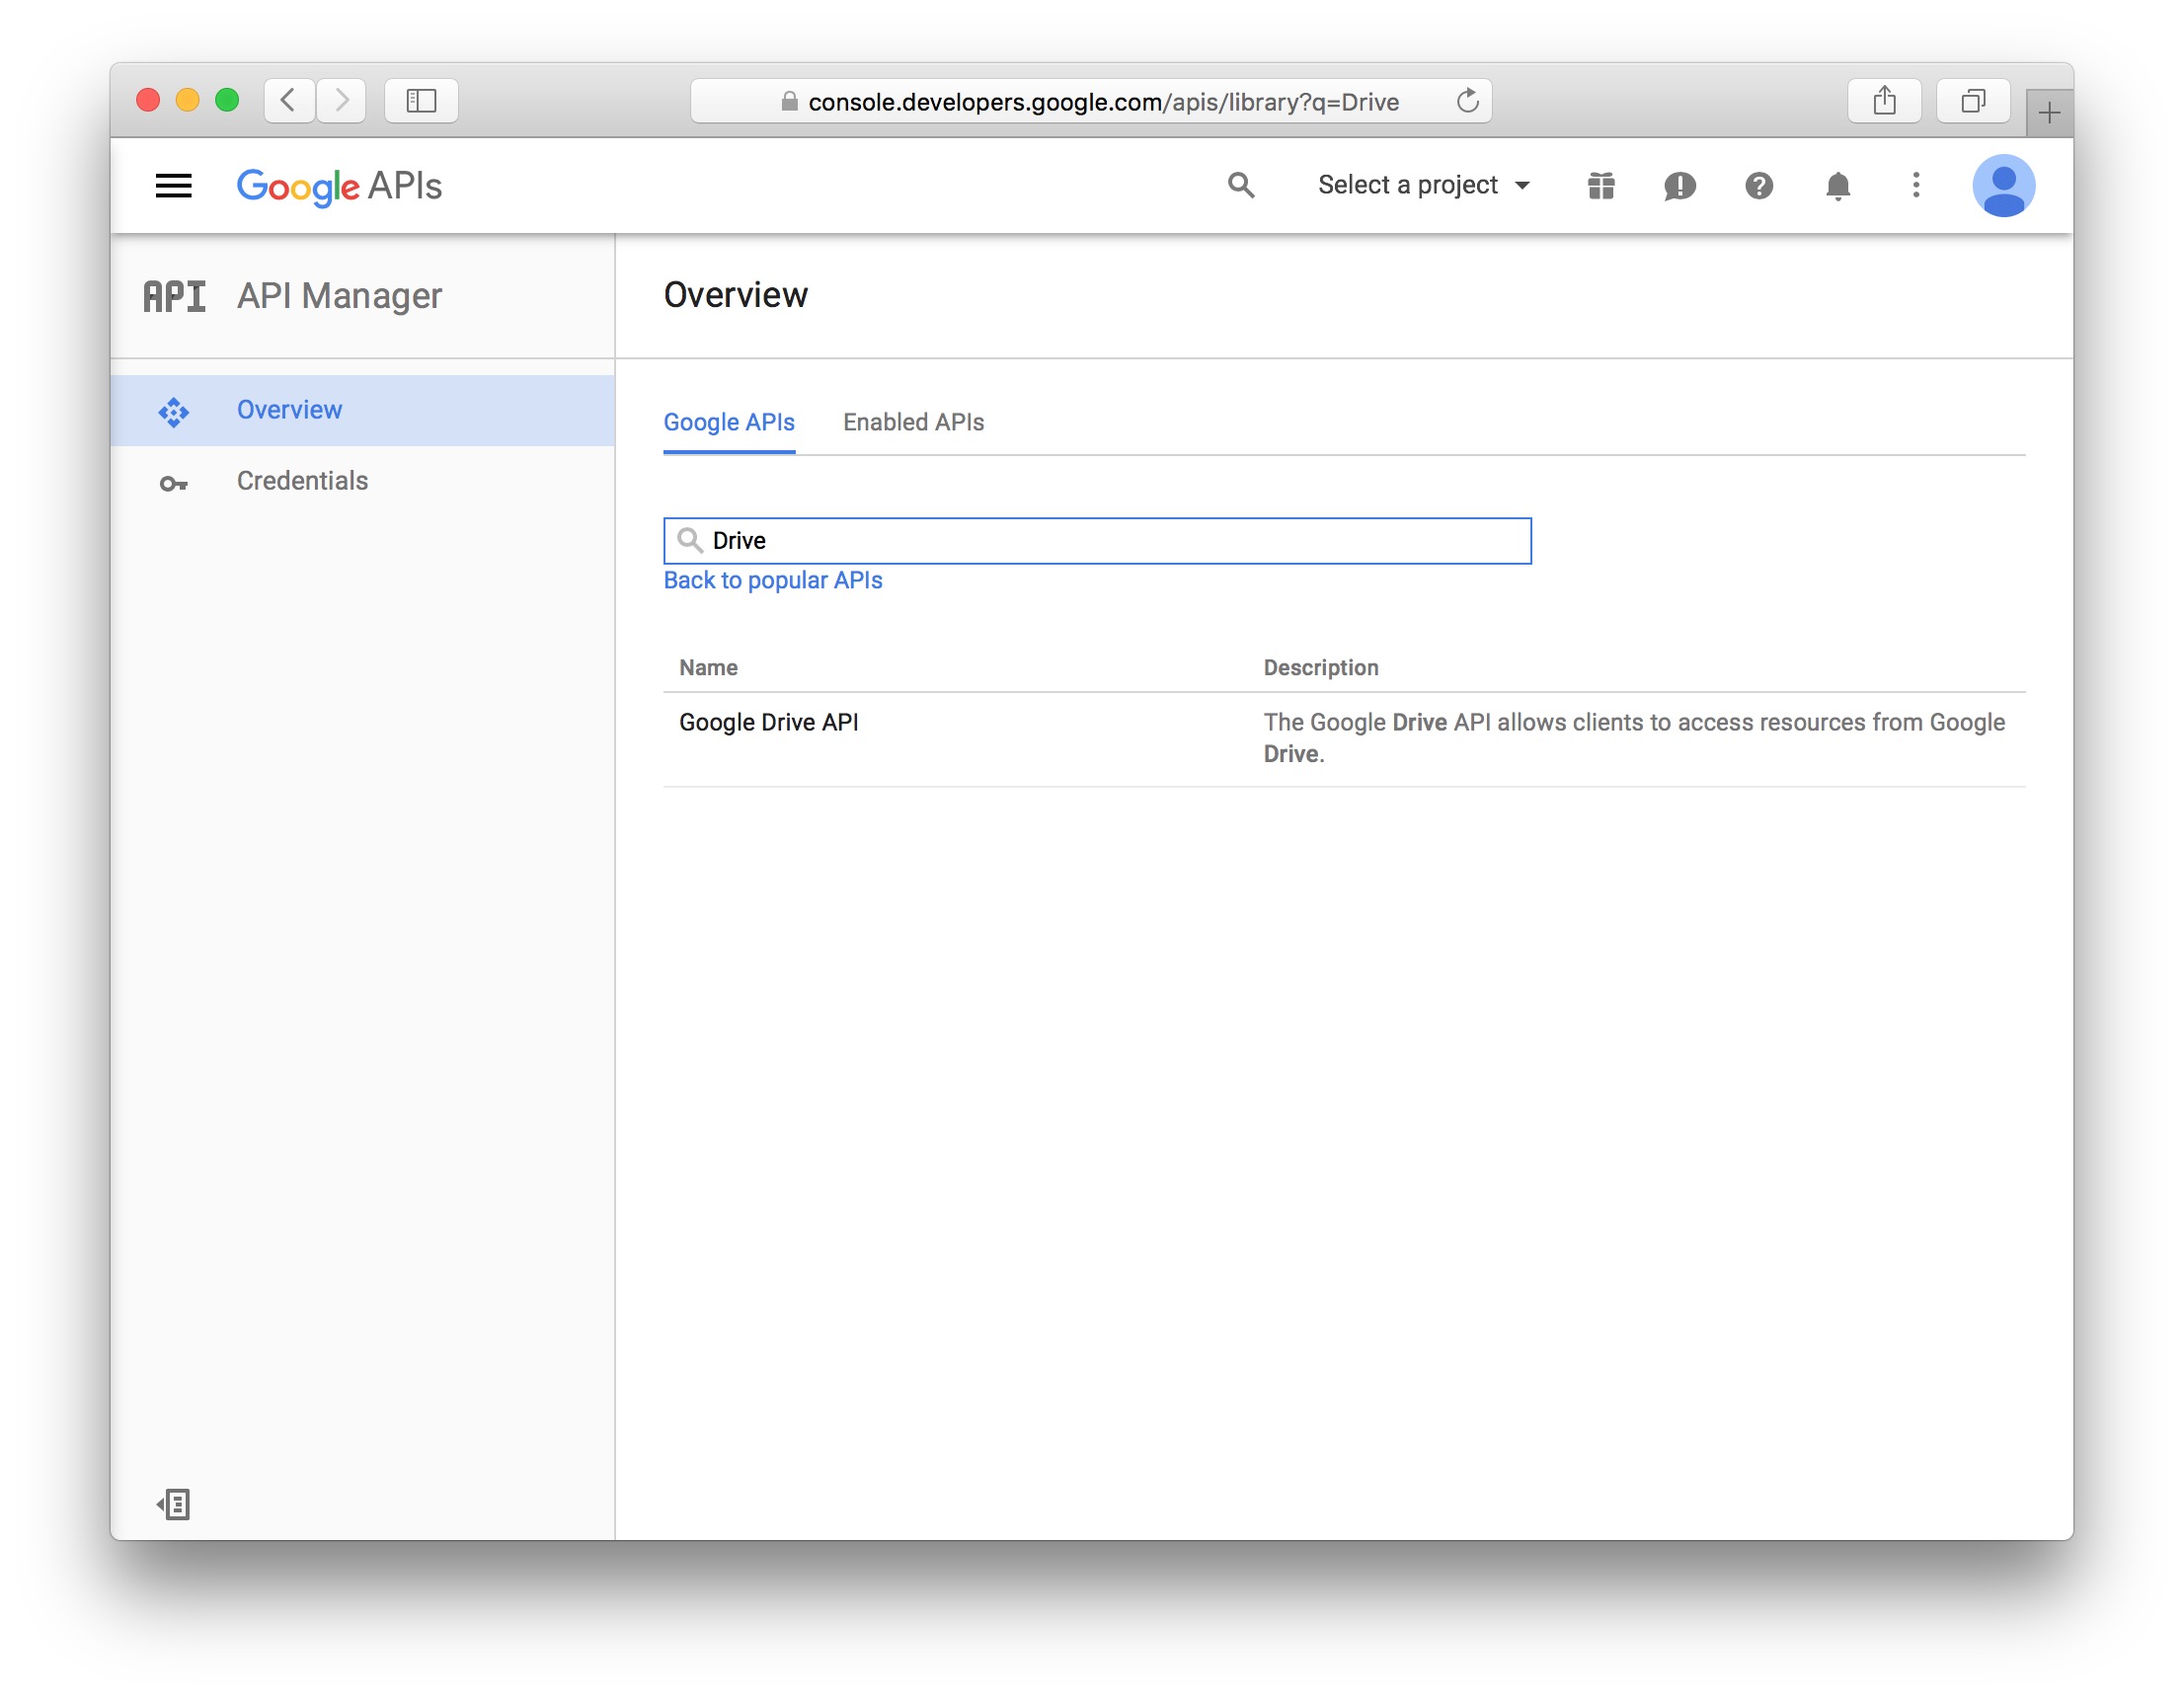
2. Google Drive API を検索します。
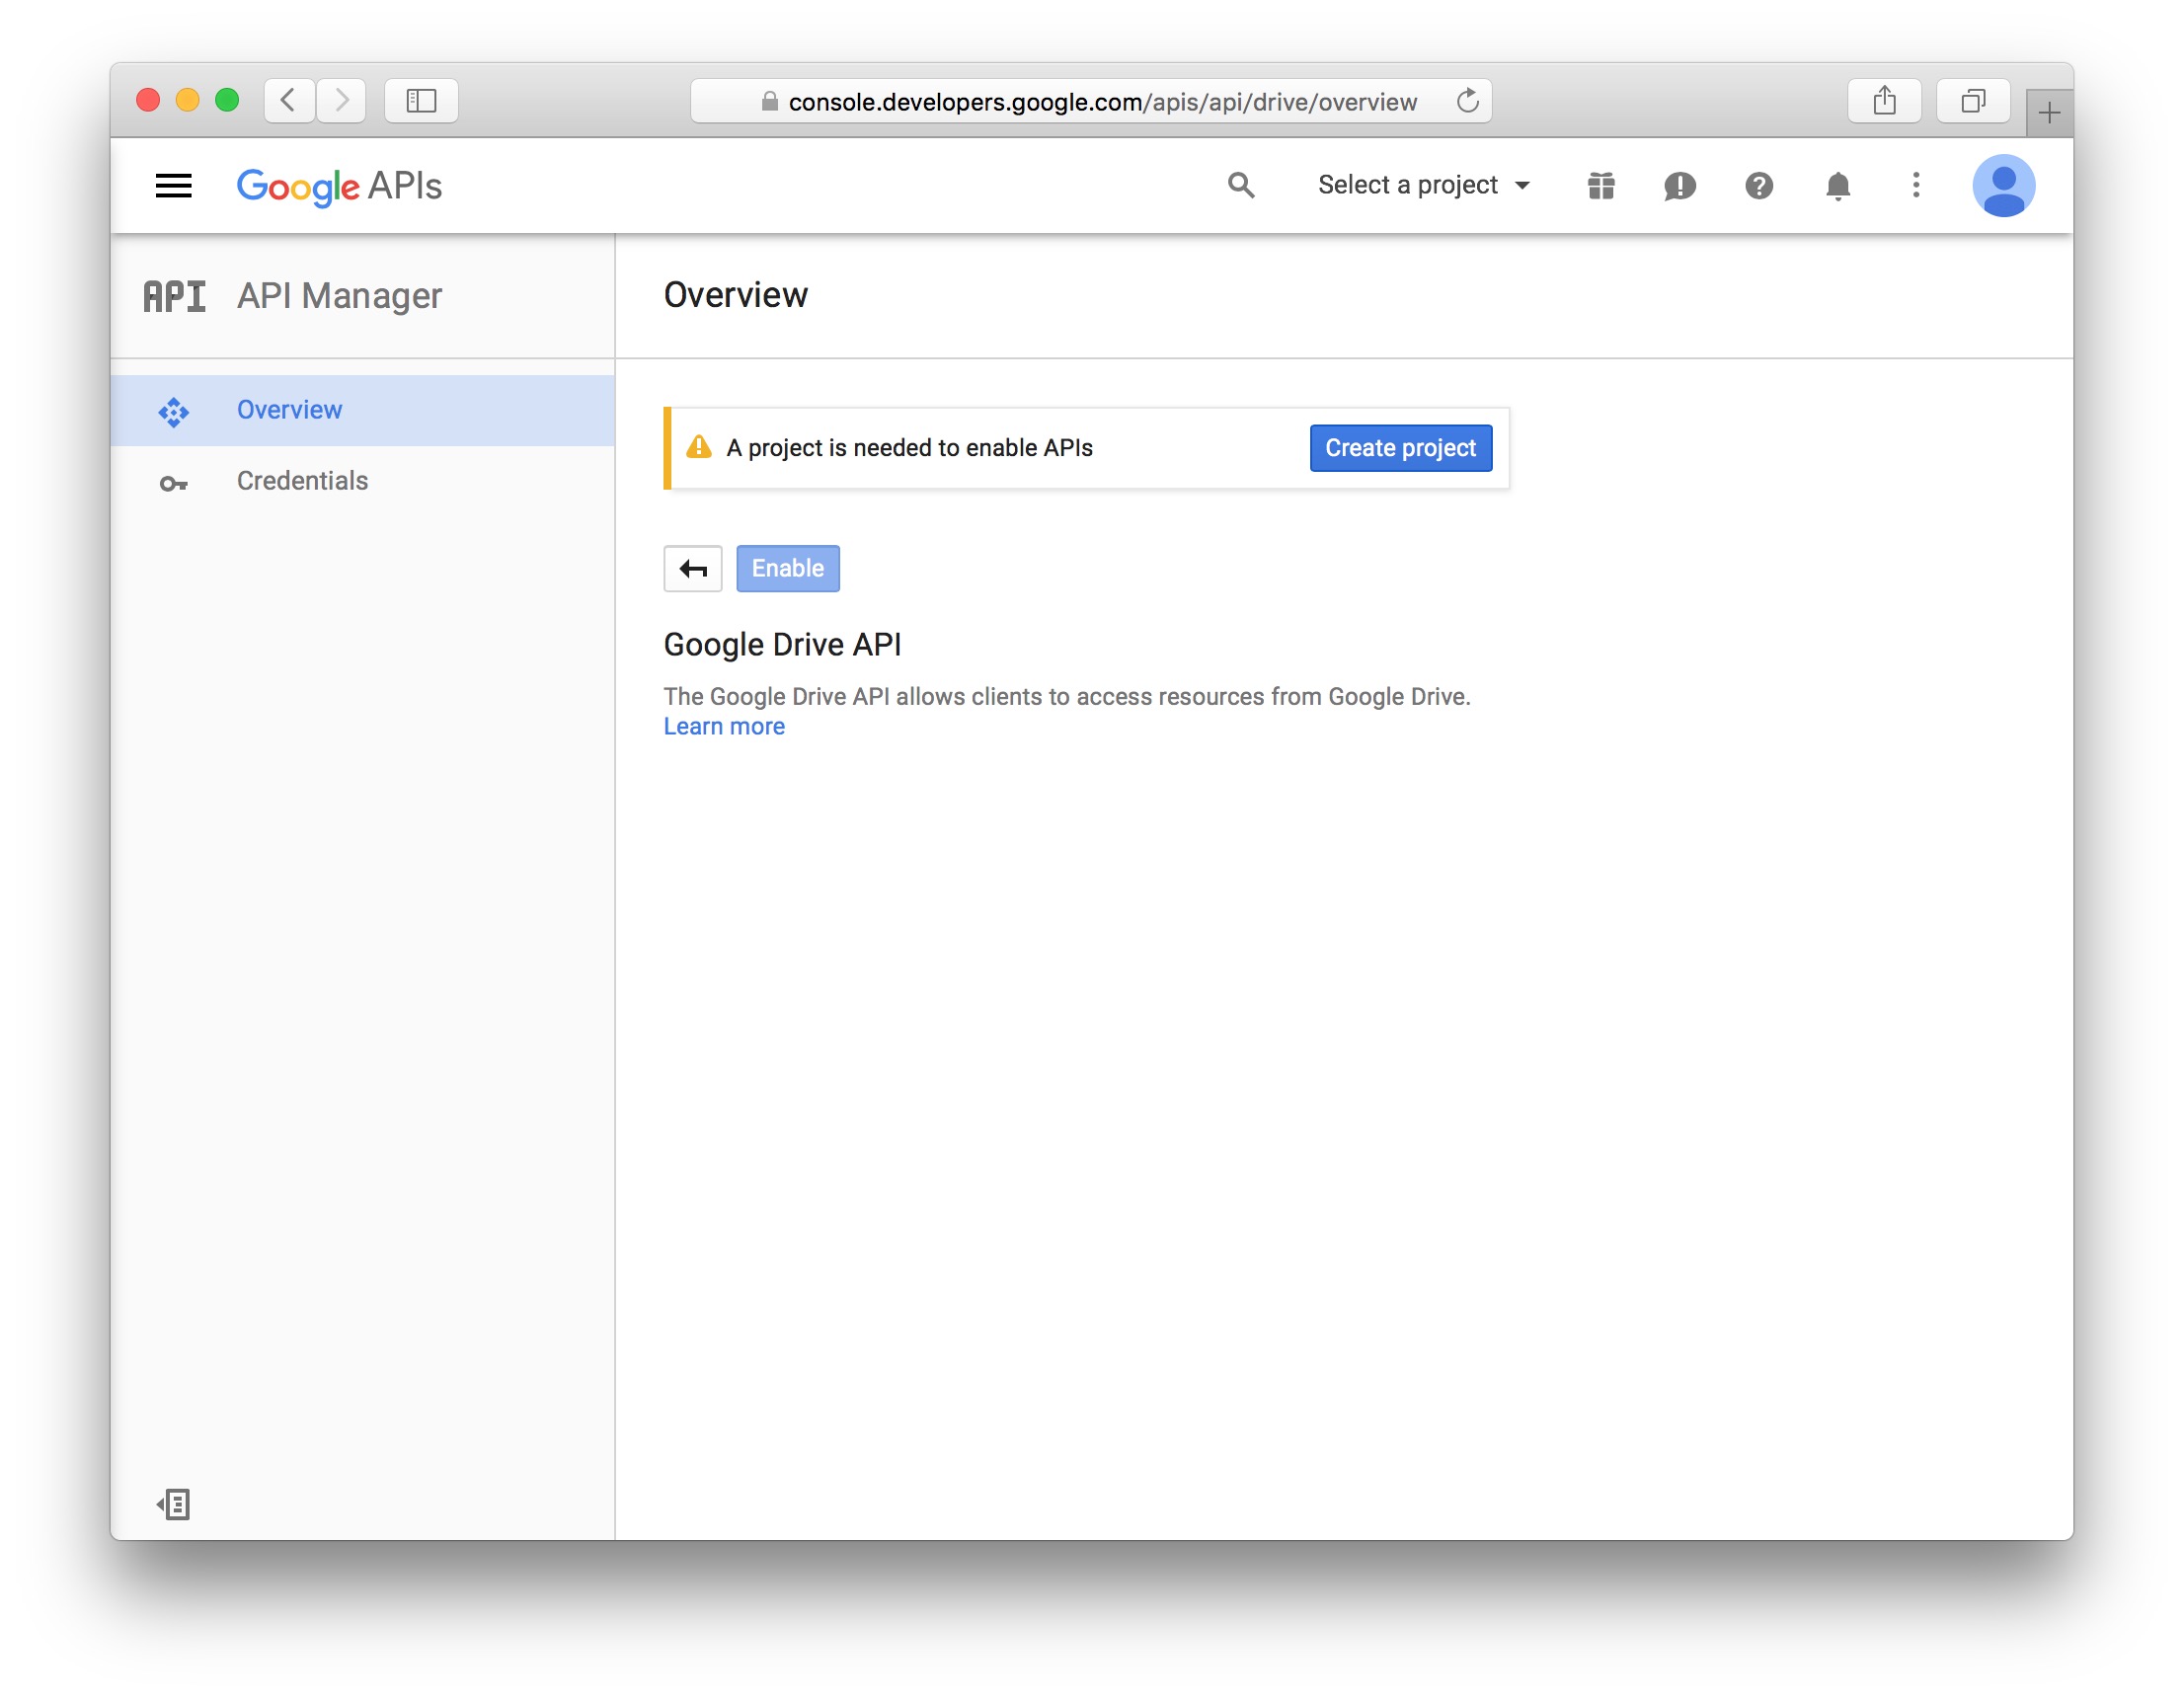
3. APIを有効にするためにプロジェクトを作成します。
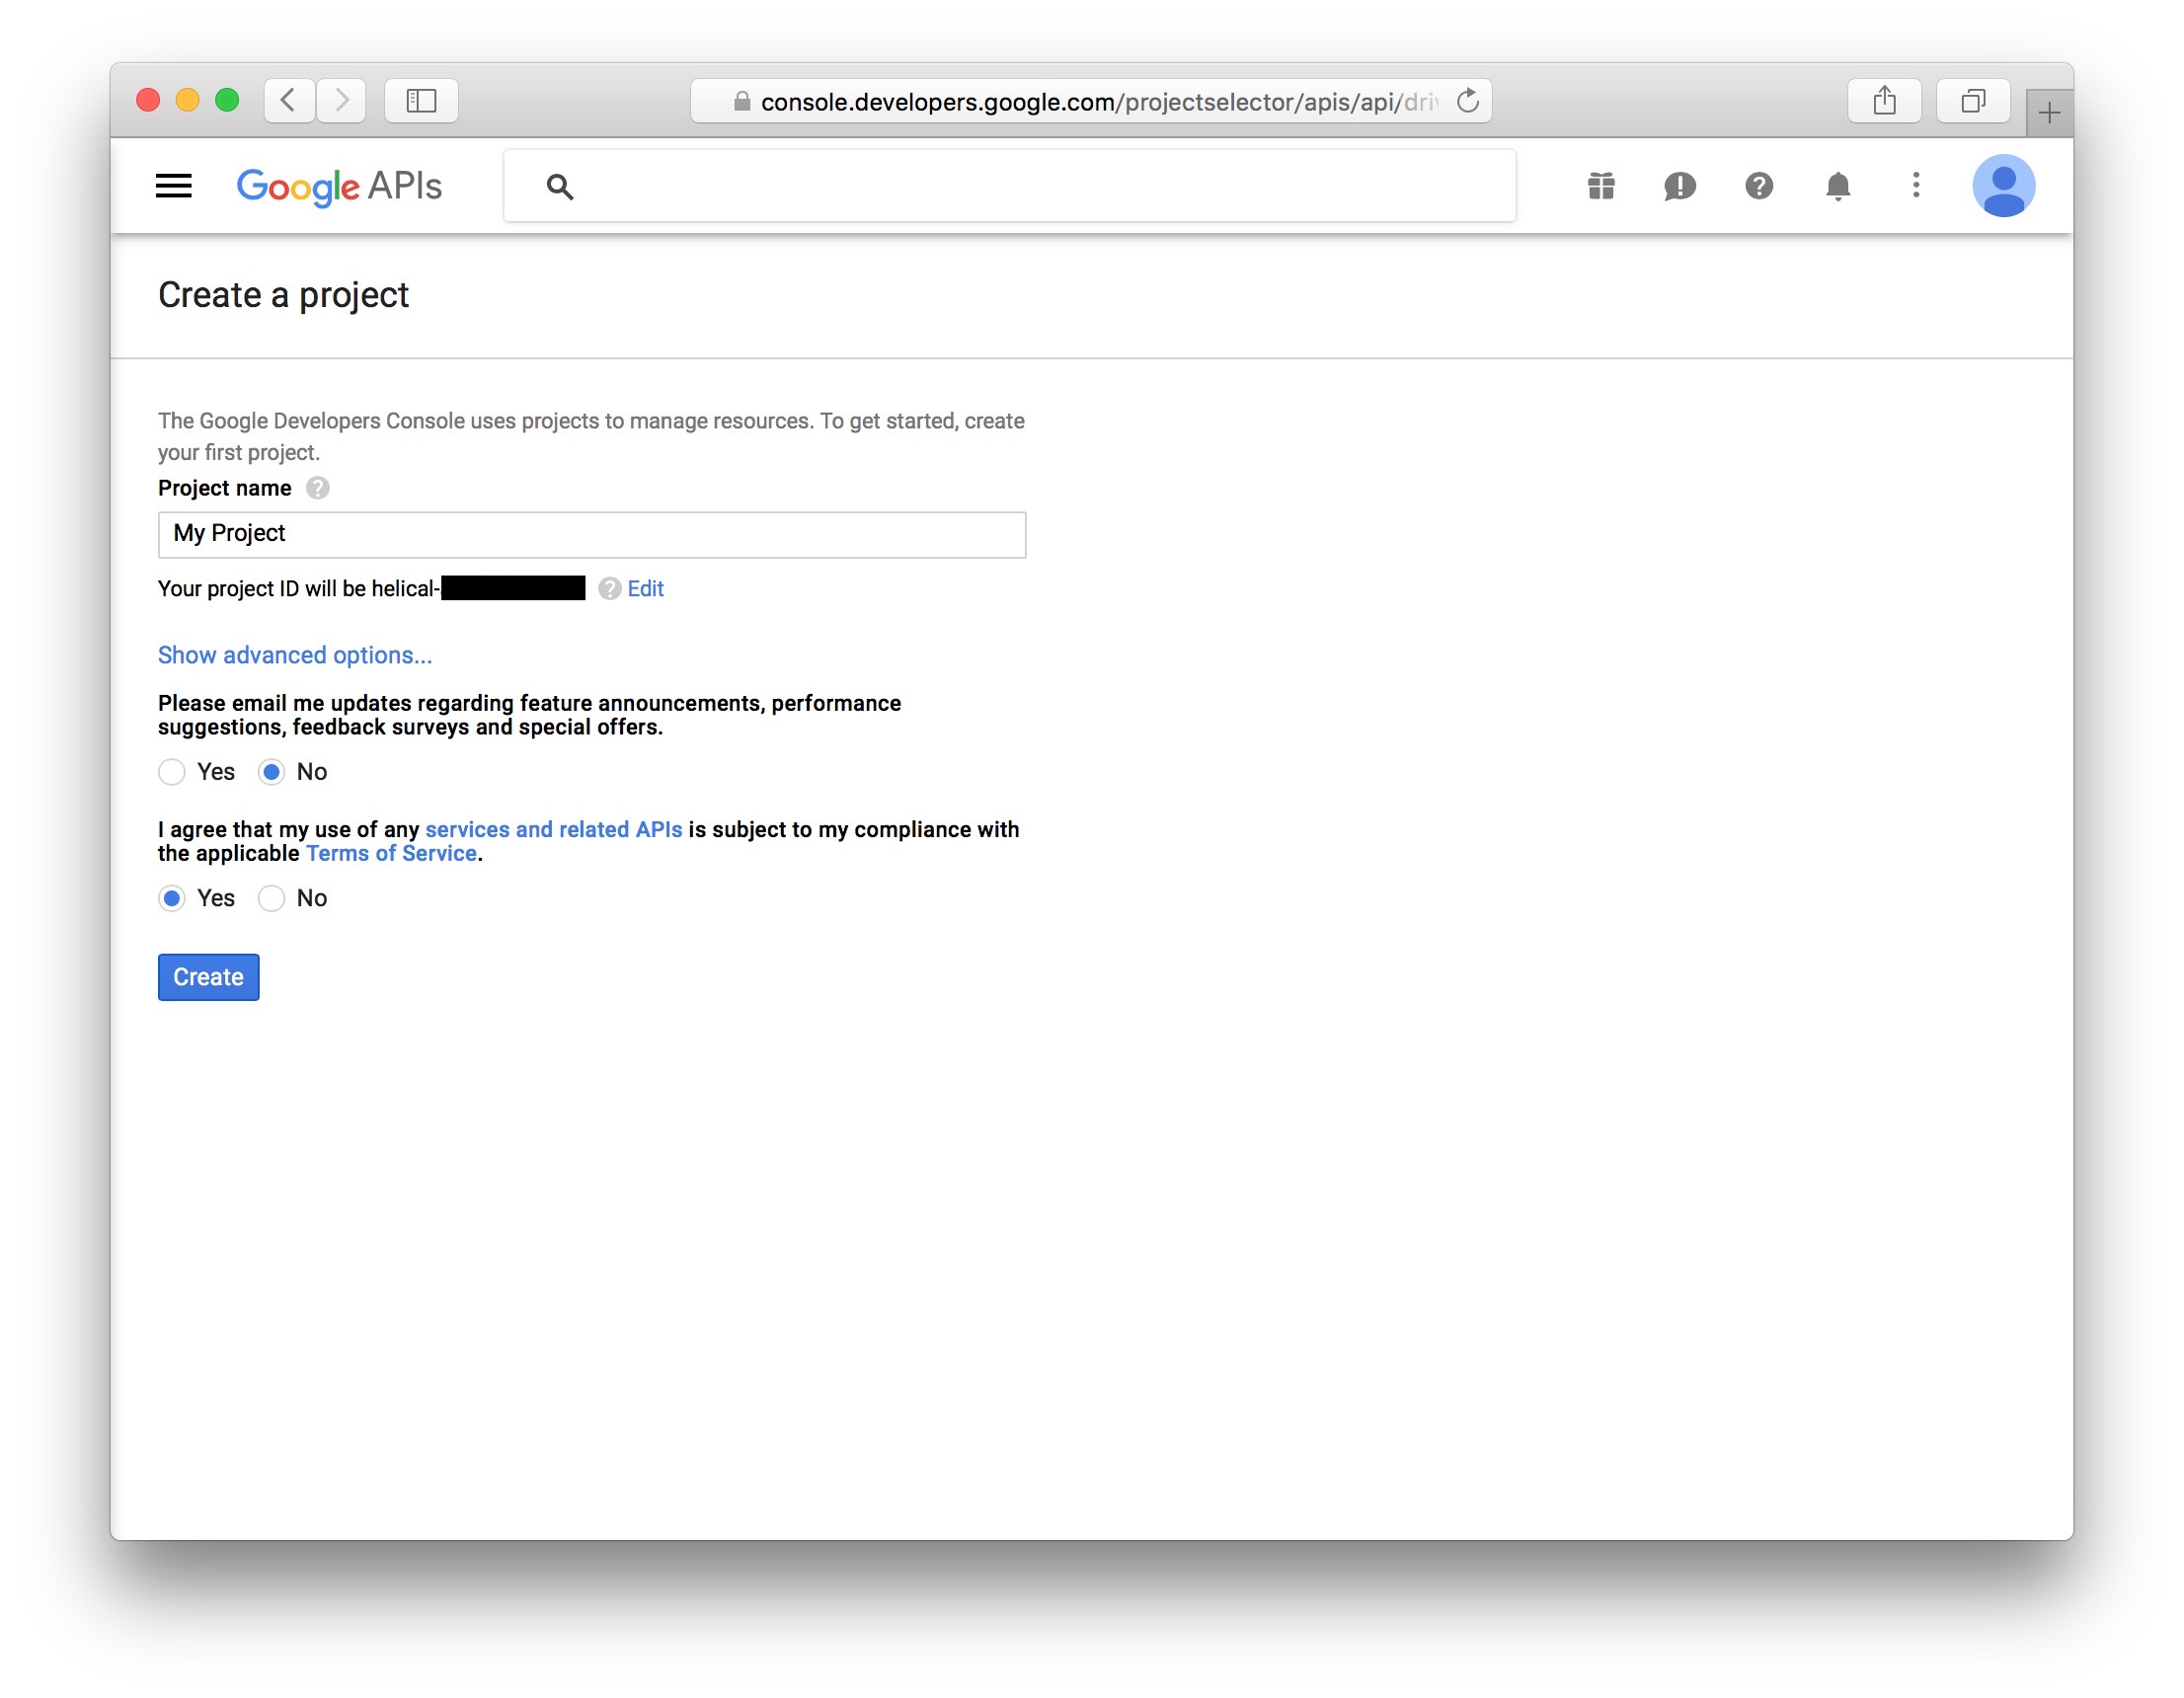
4. Google Drive API を有効にします。
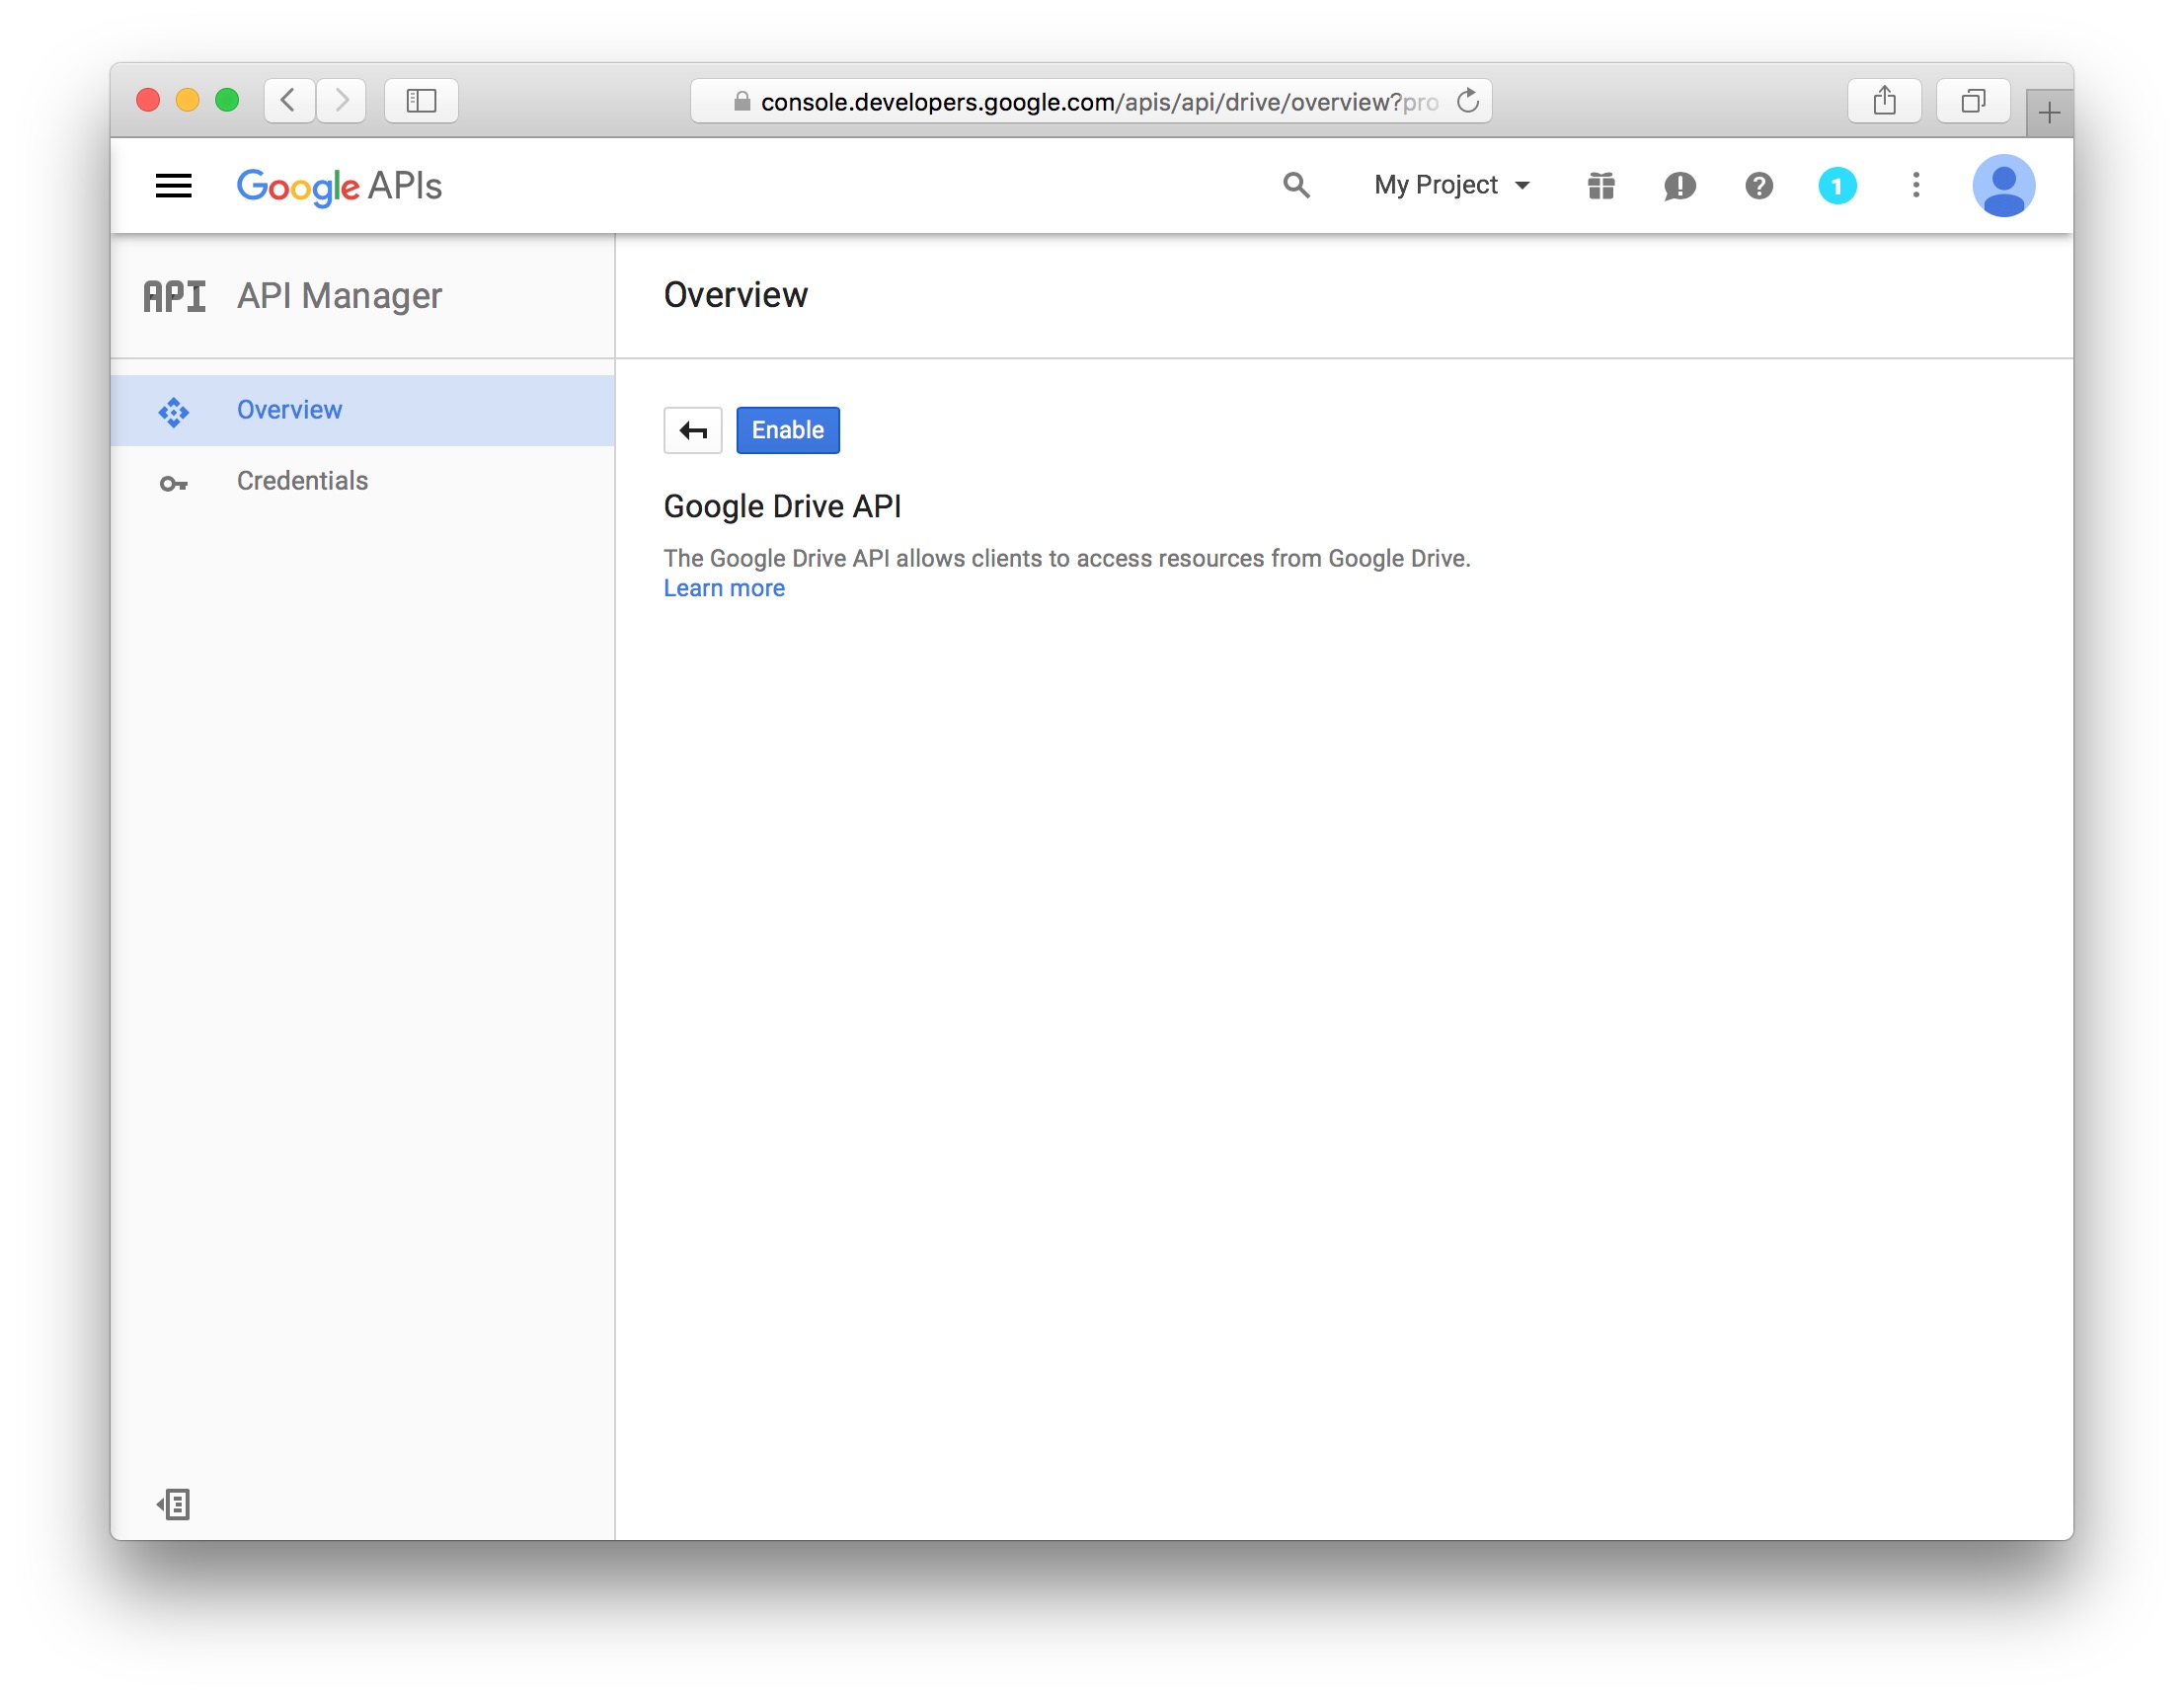
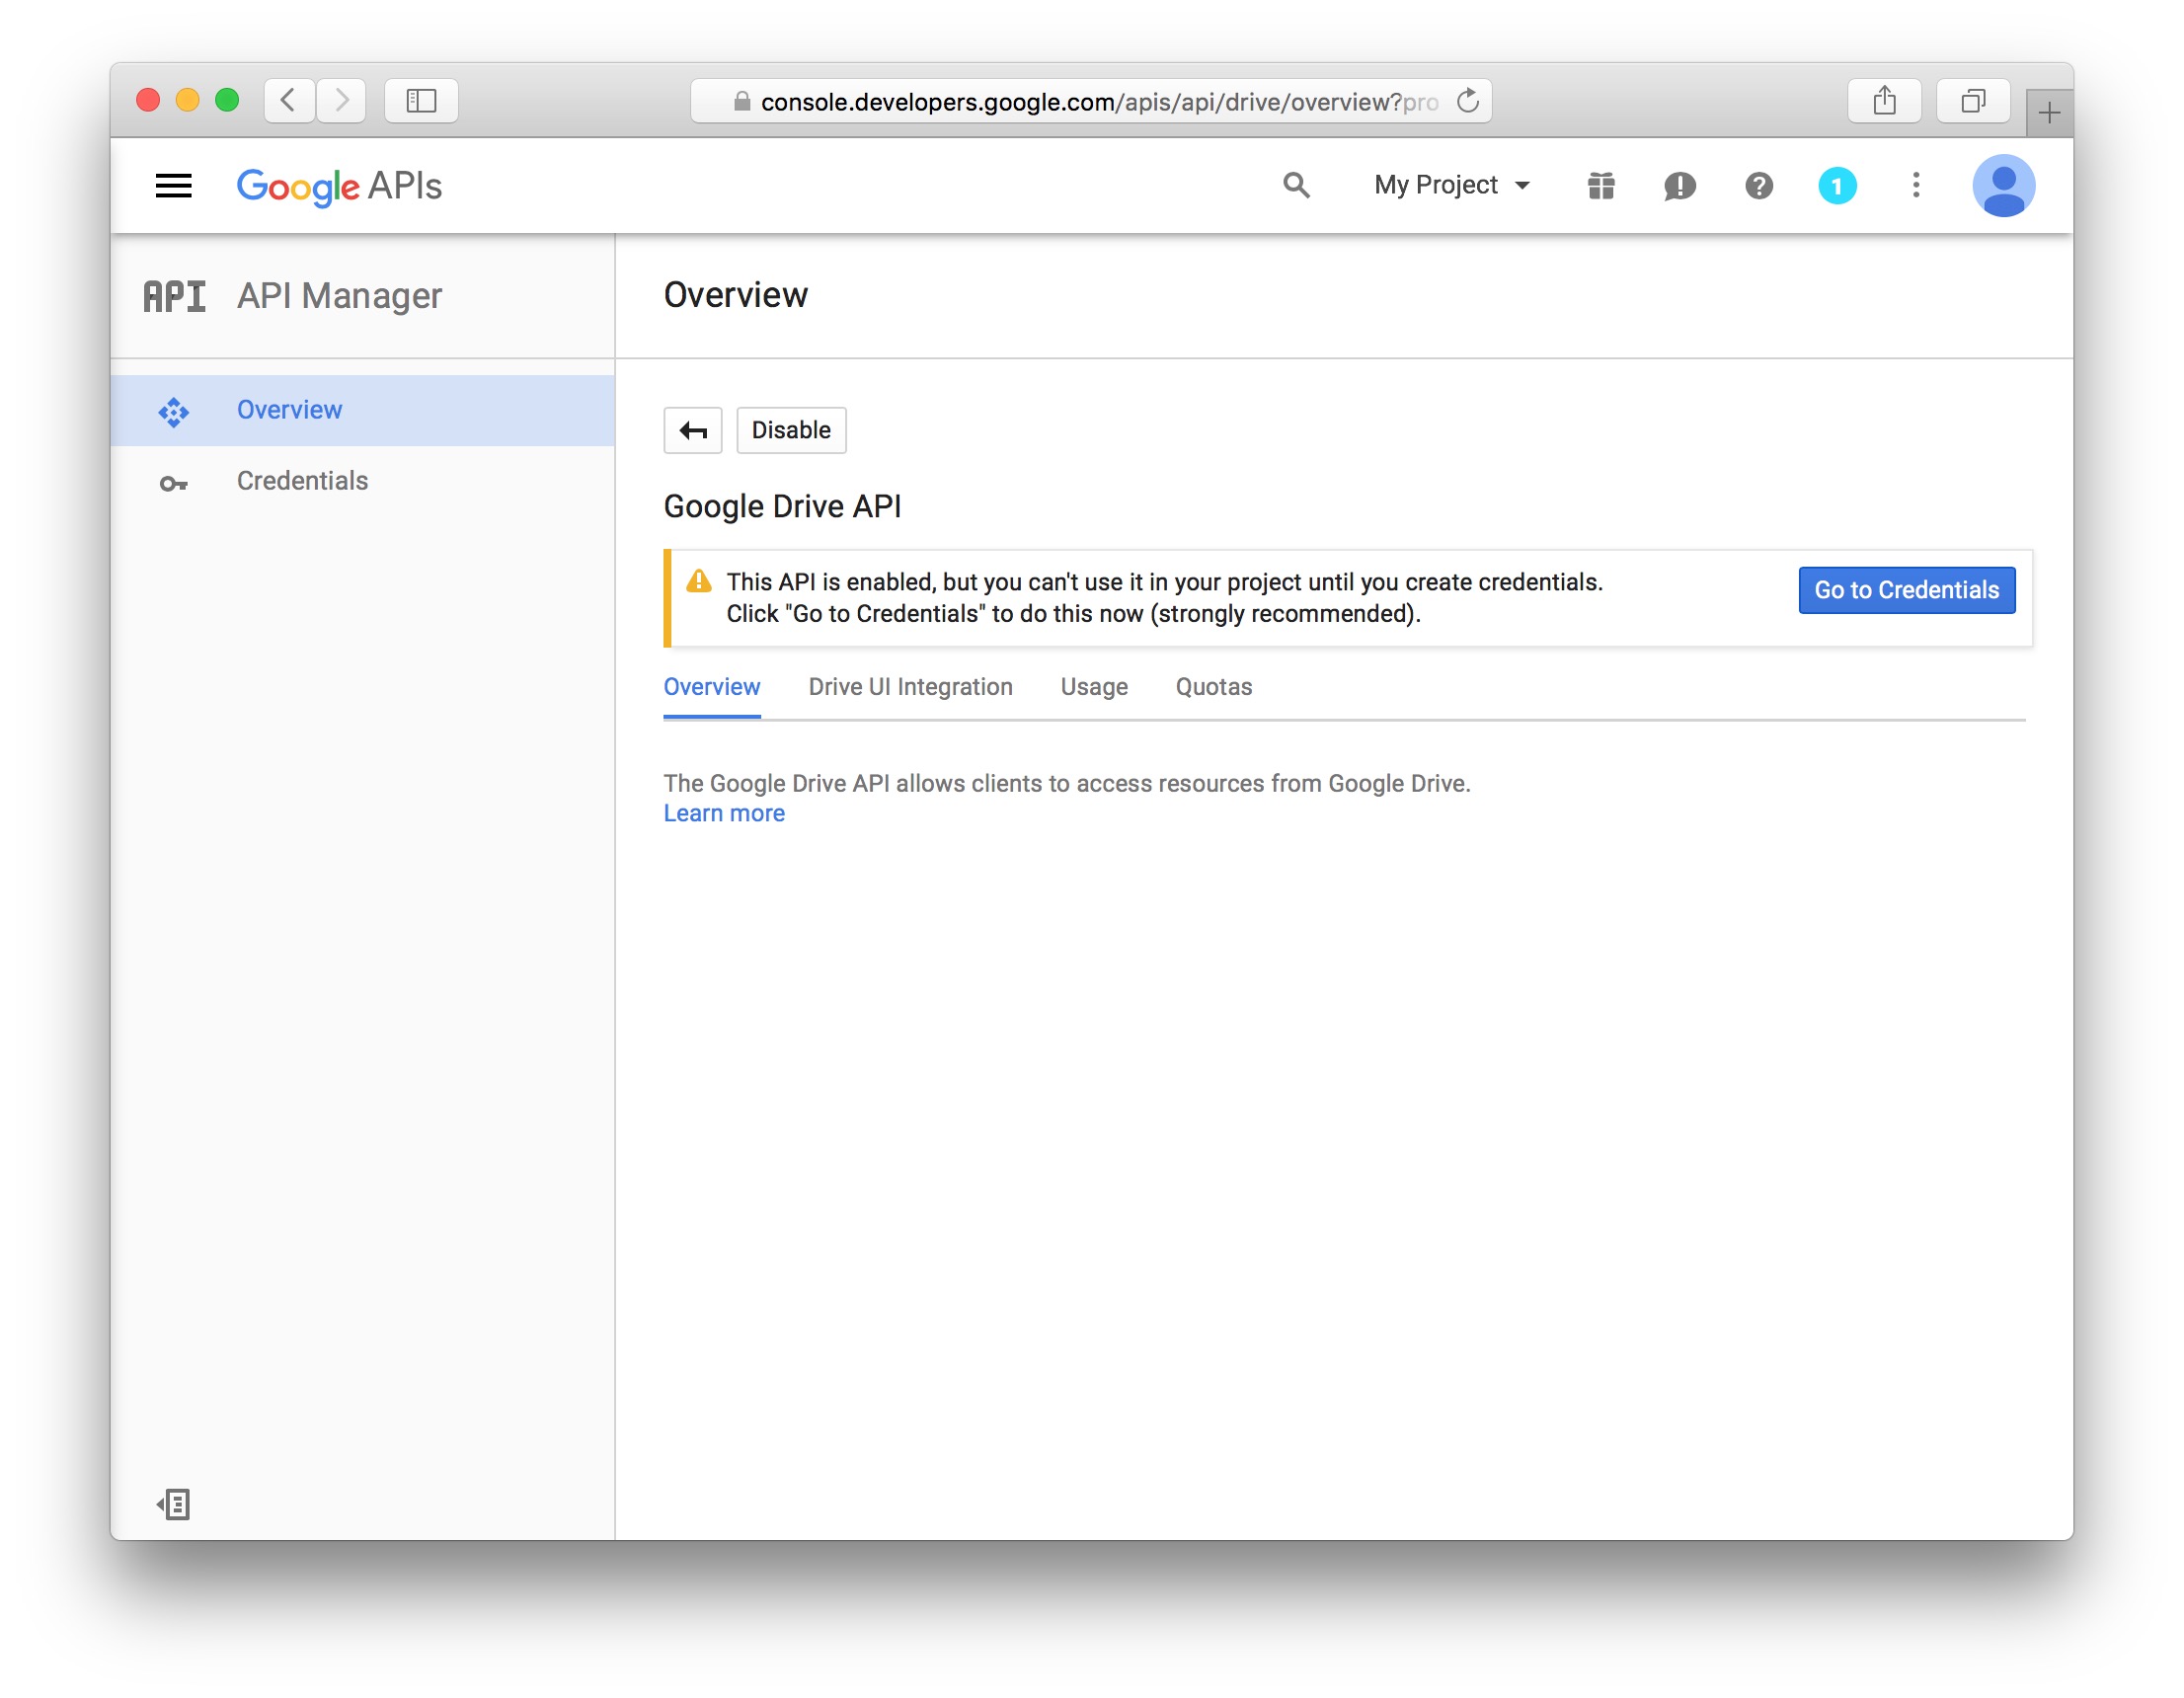
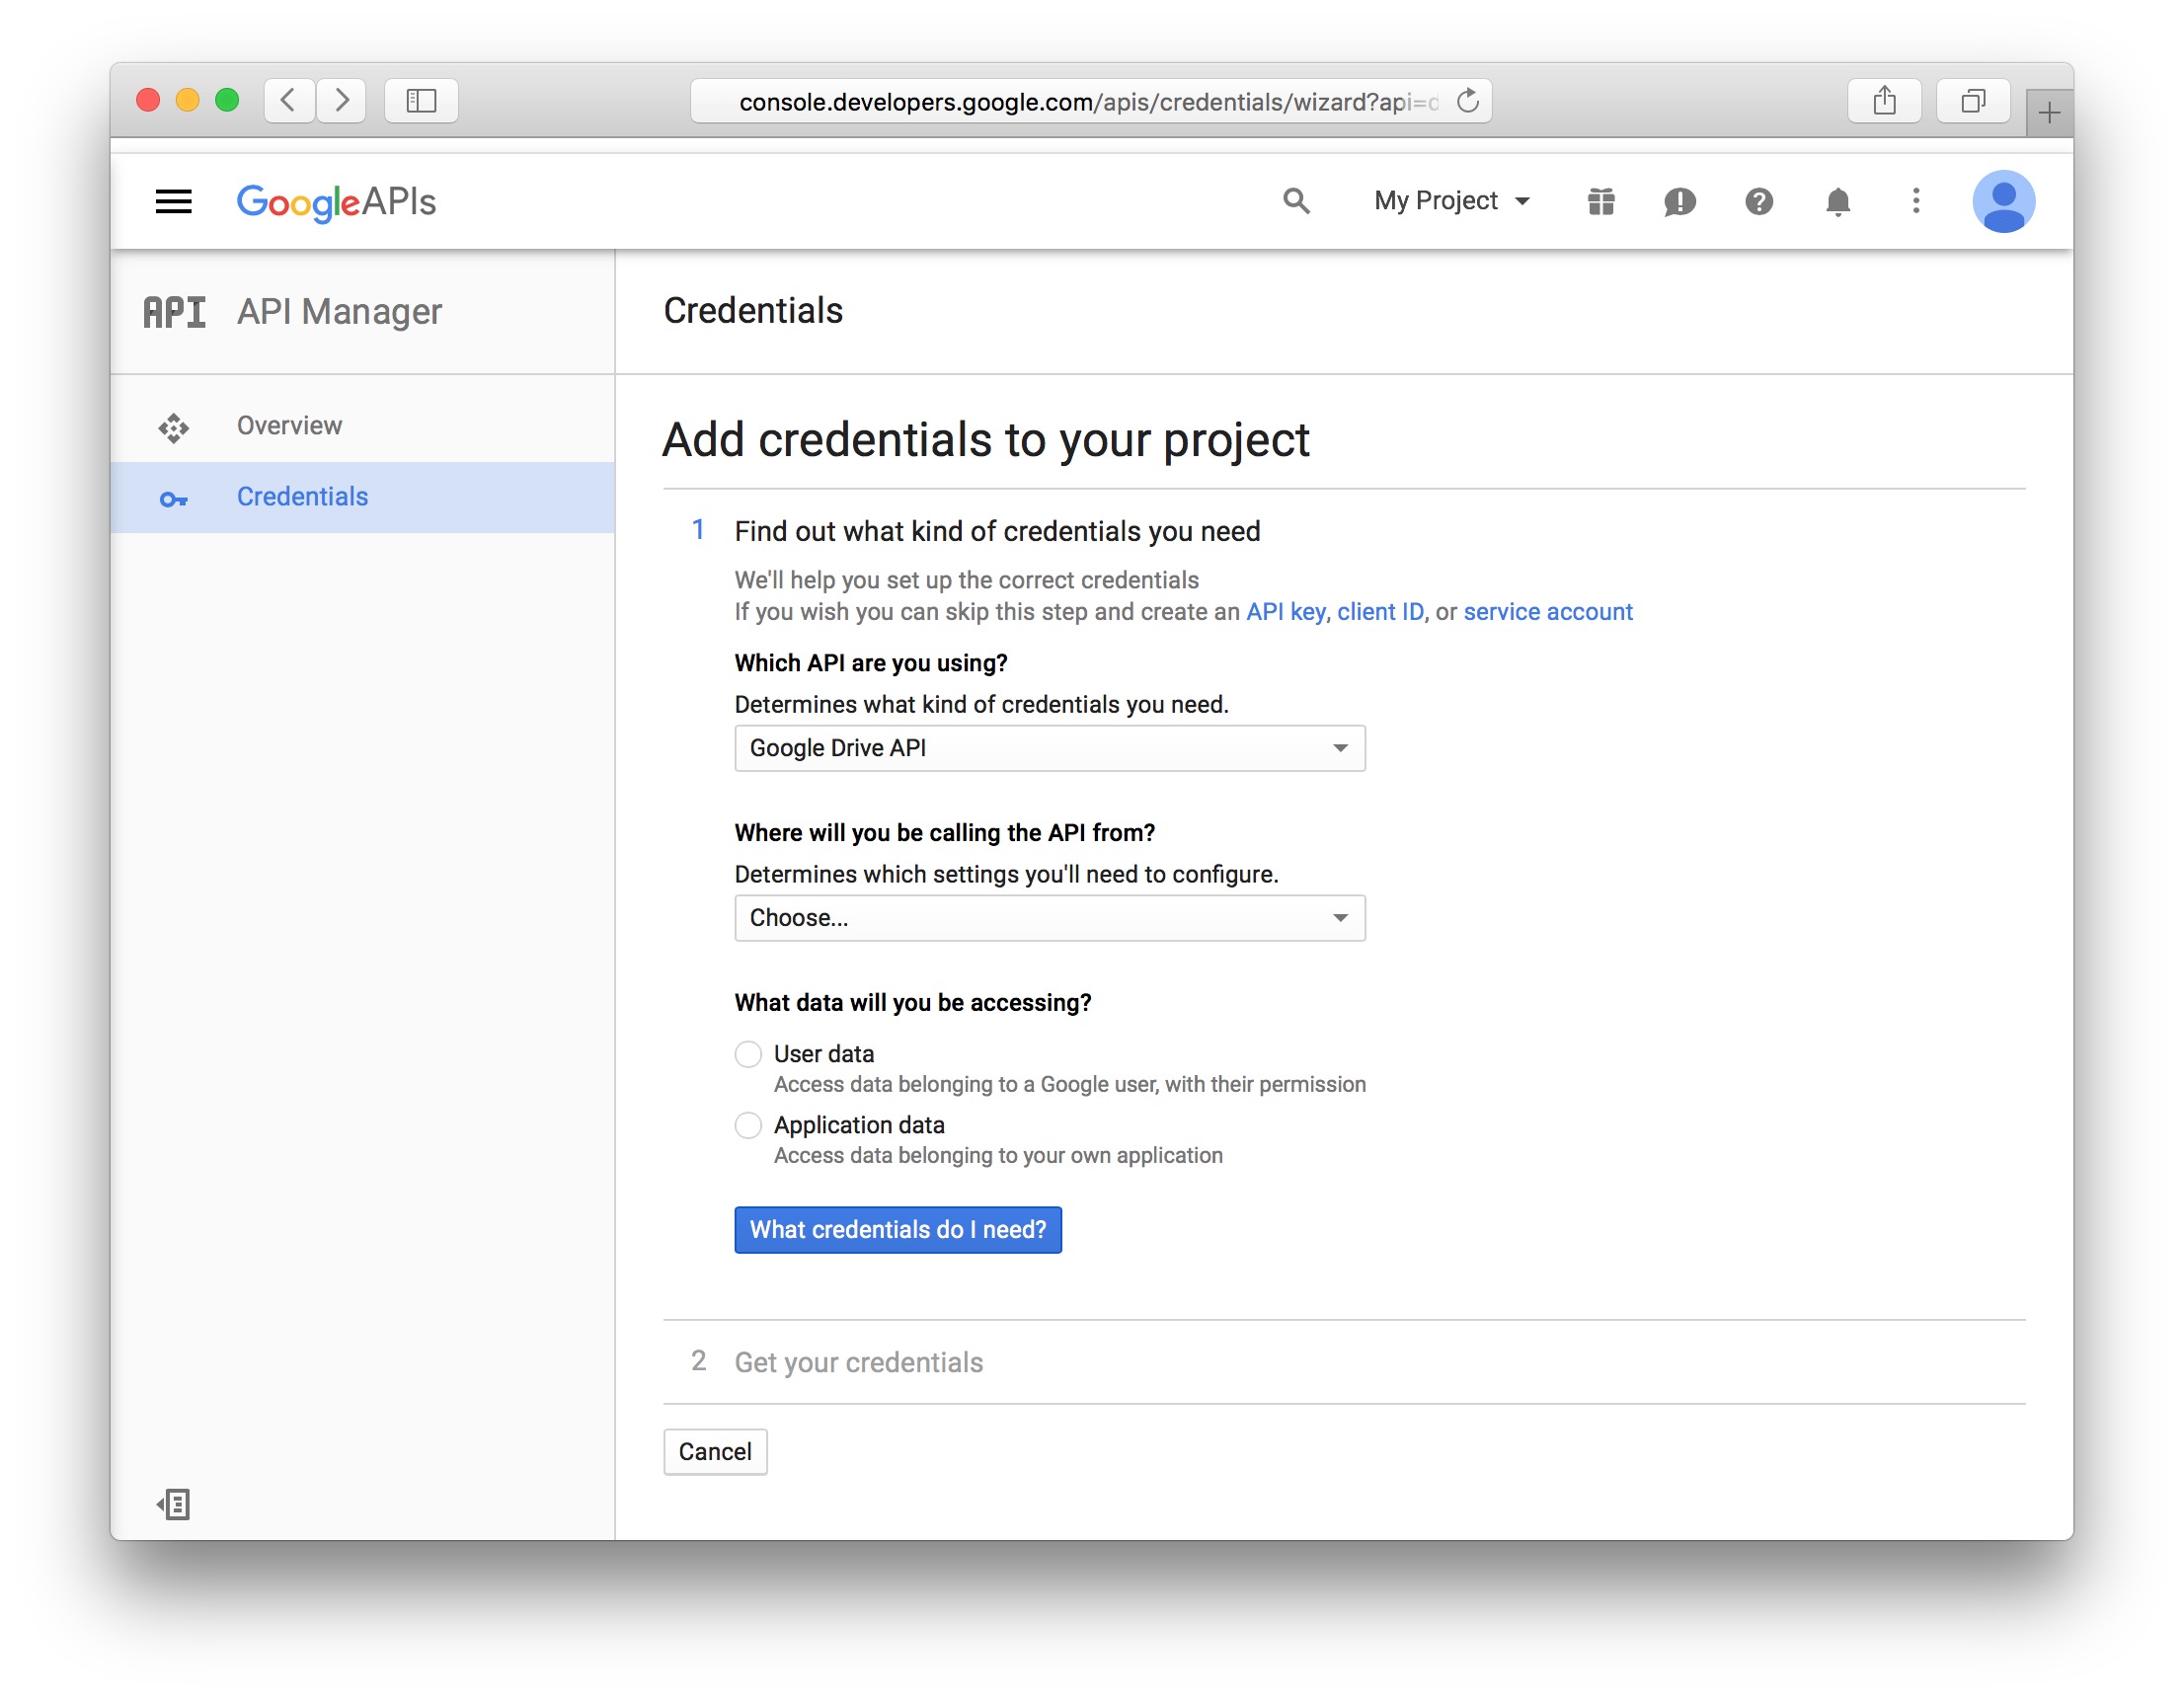
5. 認証情報を作成します。
[Go to Credentials]をクリックし、必要な認証情報の種類を指定します。
API を呼び出す場所(=Where will you be calling the API from?)は、
「ウェブサーバ(=Web Server)」を選択します。
アクセスするデータの種類(=What data will you be accessing?) は、
「ユーザデータ(=User data)」を選択します。
6. 必要な認証情報を入力します。
承認済みのリダイレクト URI(=Authorized redirect URIs) に「http://example.org/imart/oauth/redirect」を設定します。
http://example.org/imart 部分は、intra-mart Accel Platform が稼働しているURLを指定してください。
今回は、ローカルマシン上にintra-mart Accel Platform 環境を構築することを前提として、以下を入力してください。
http://localhost:8080/imart/oauth/redirect
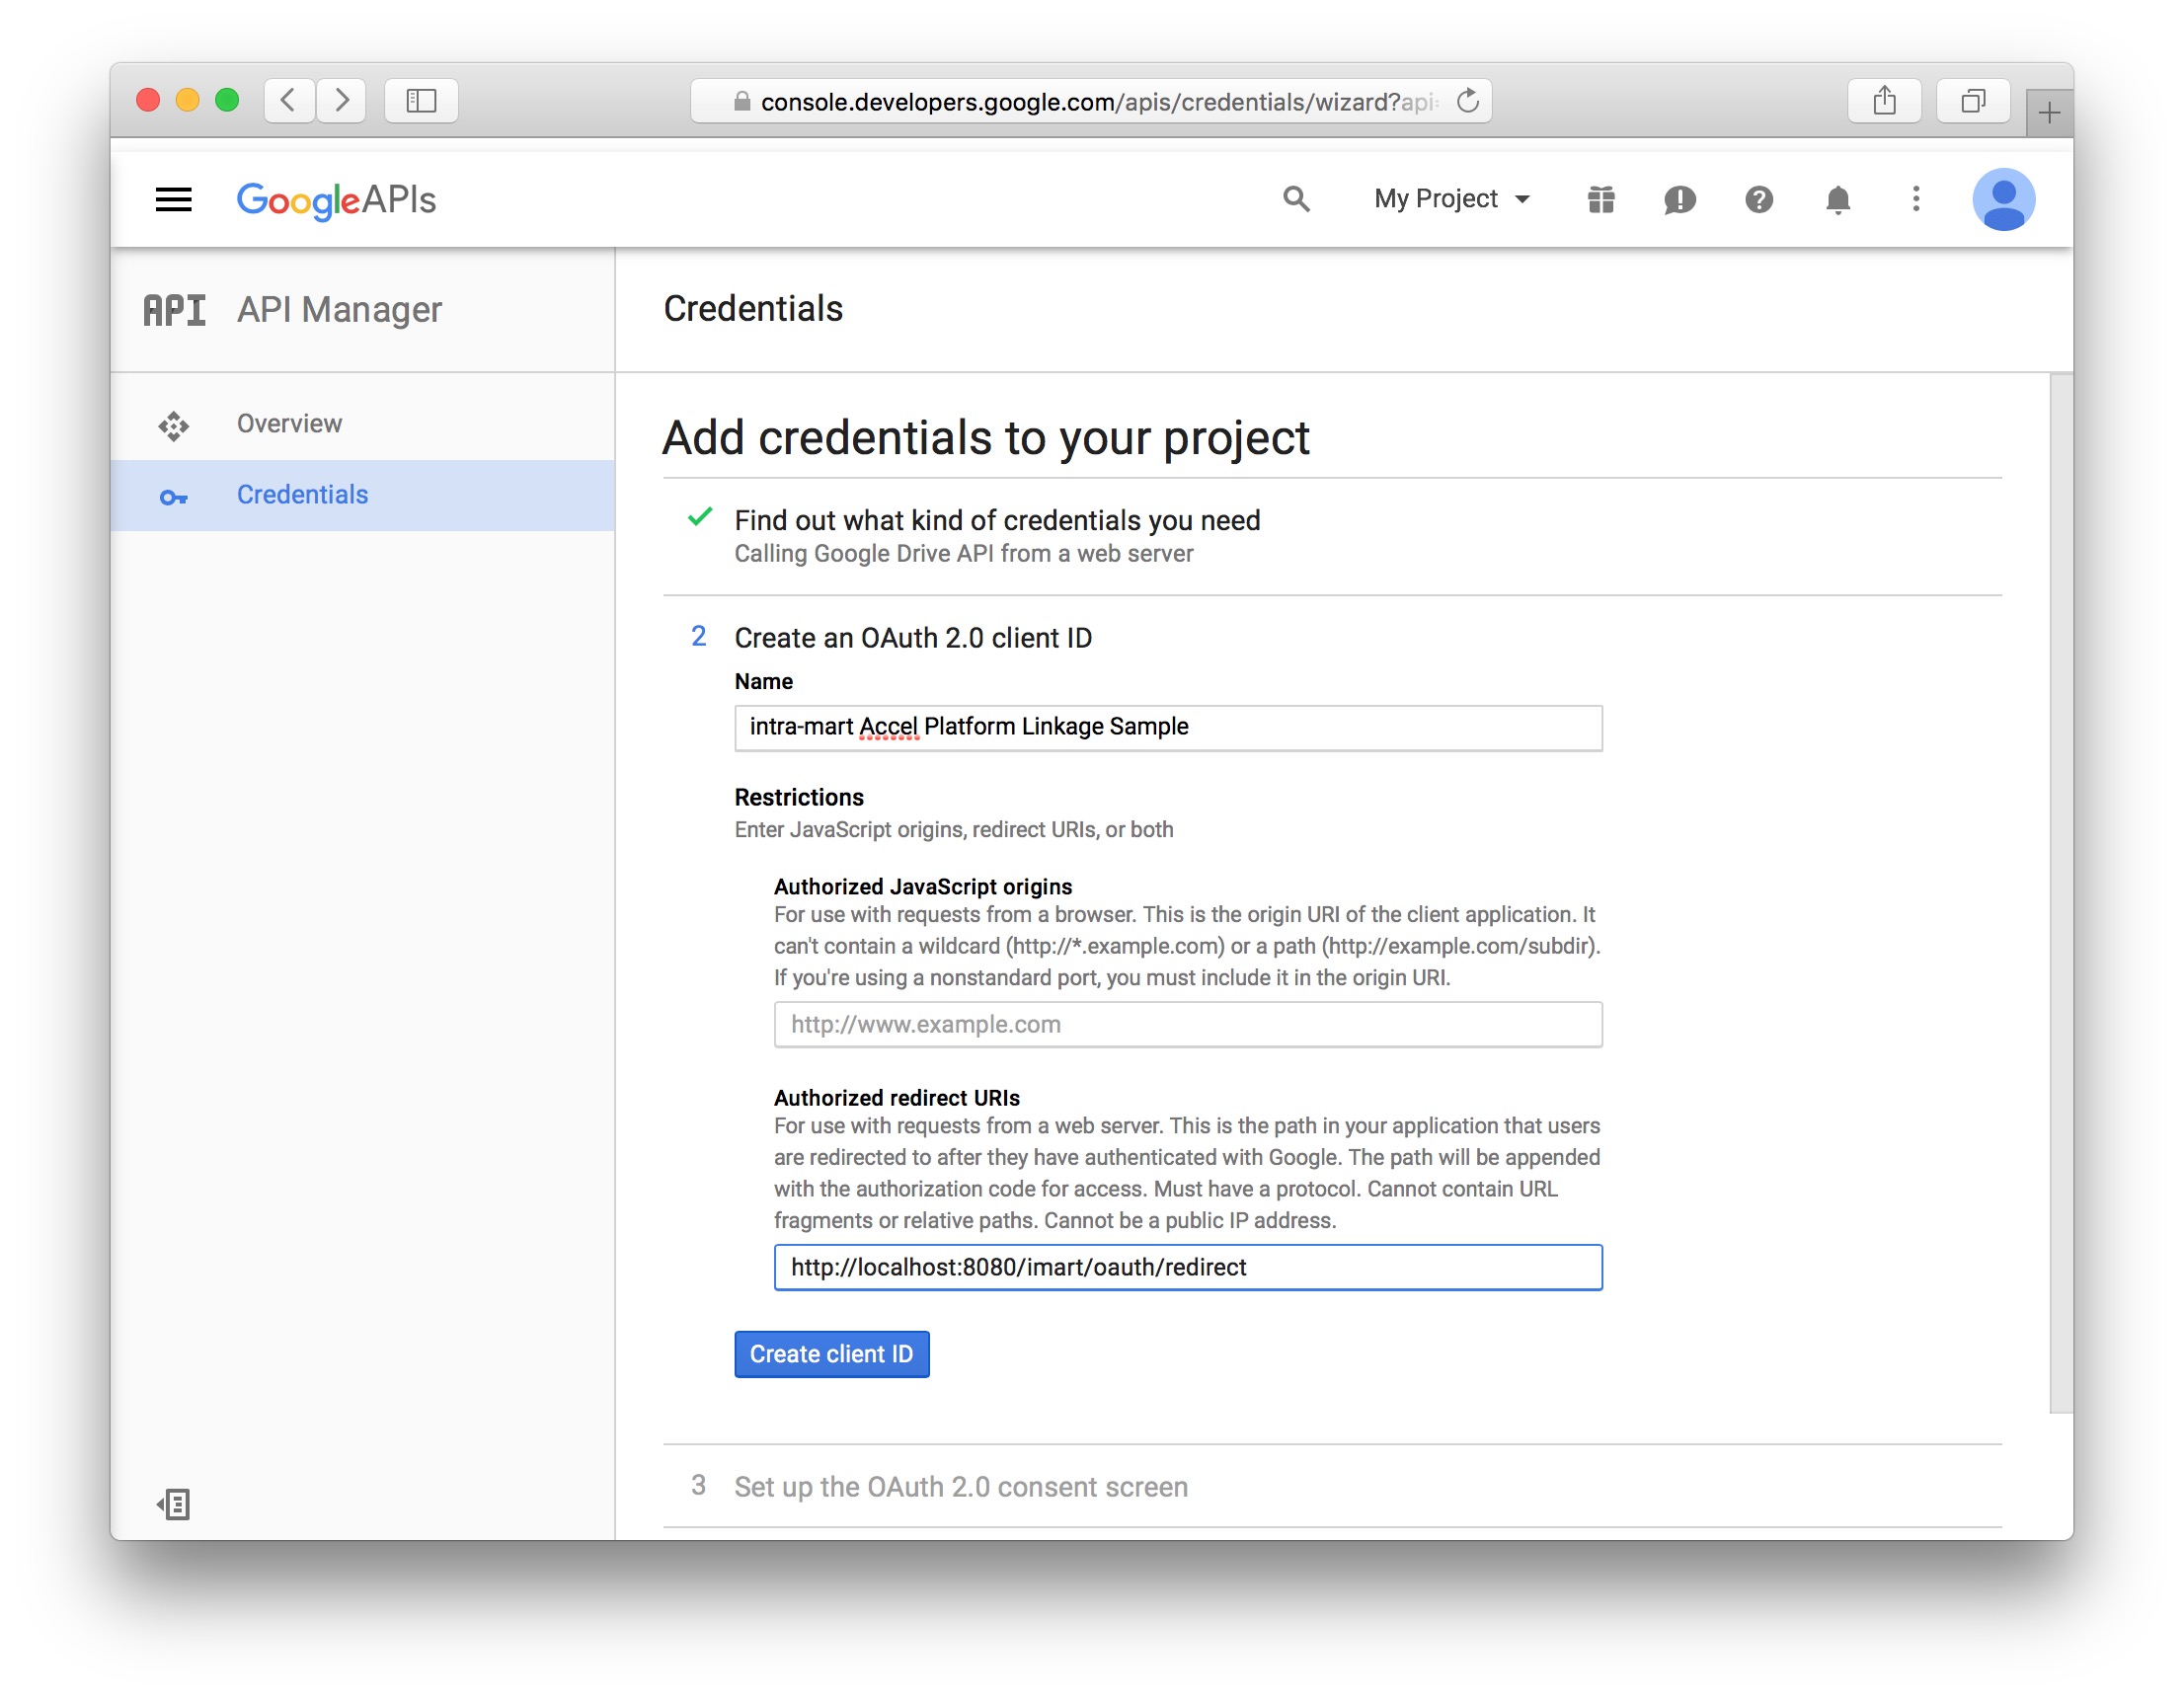
7. ユーザに表示するサービス名 を設定します。
今回は、「intra-mart Accel Platform Linkage Sample for Google」と入力します。
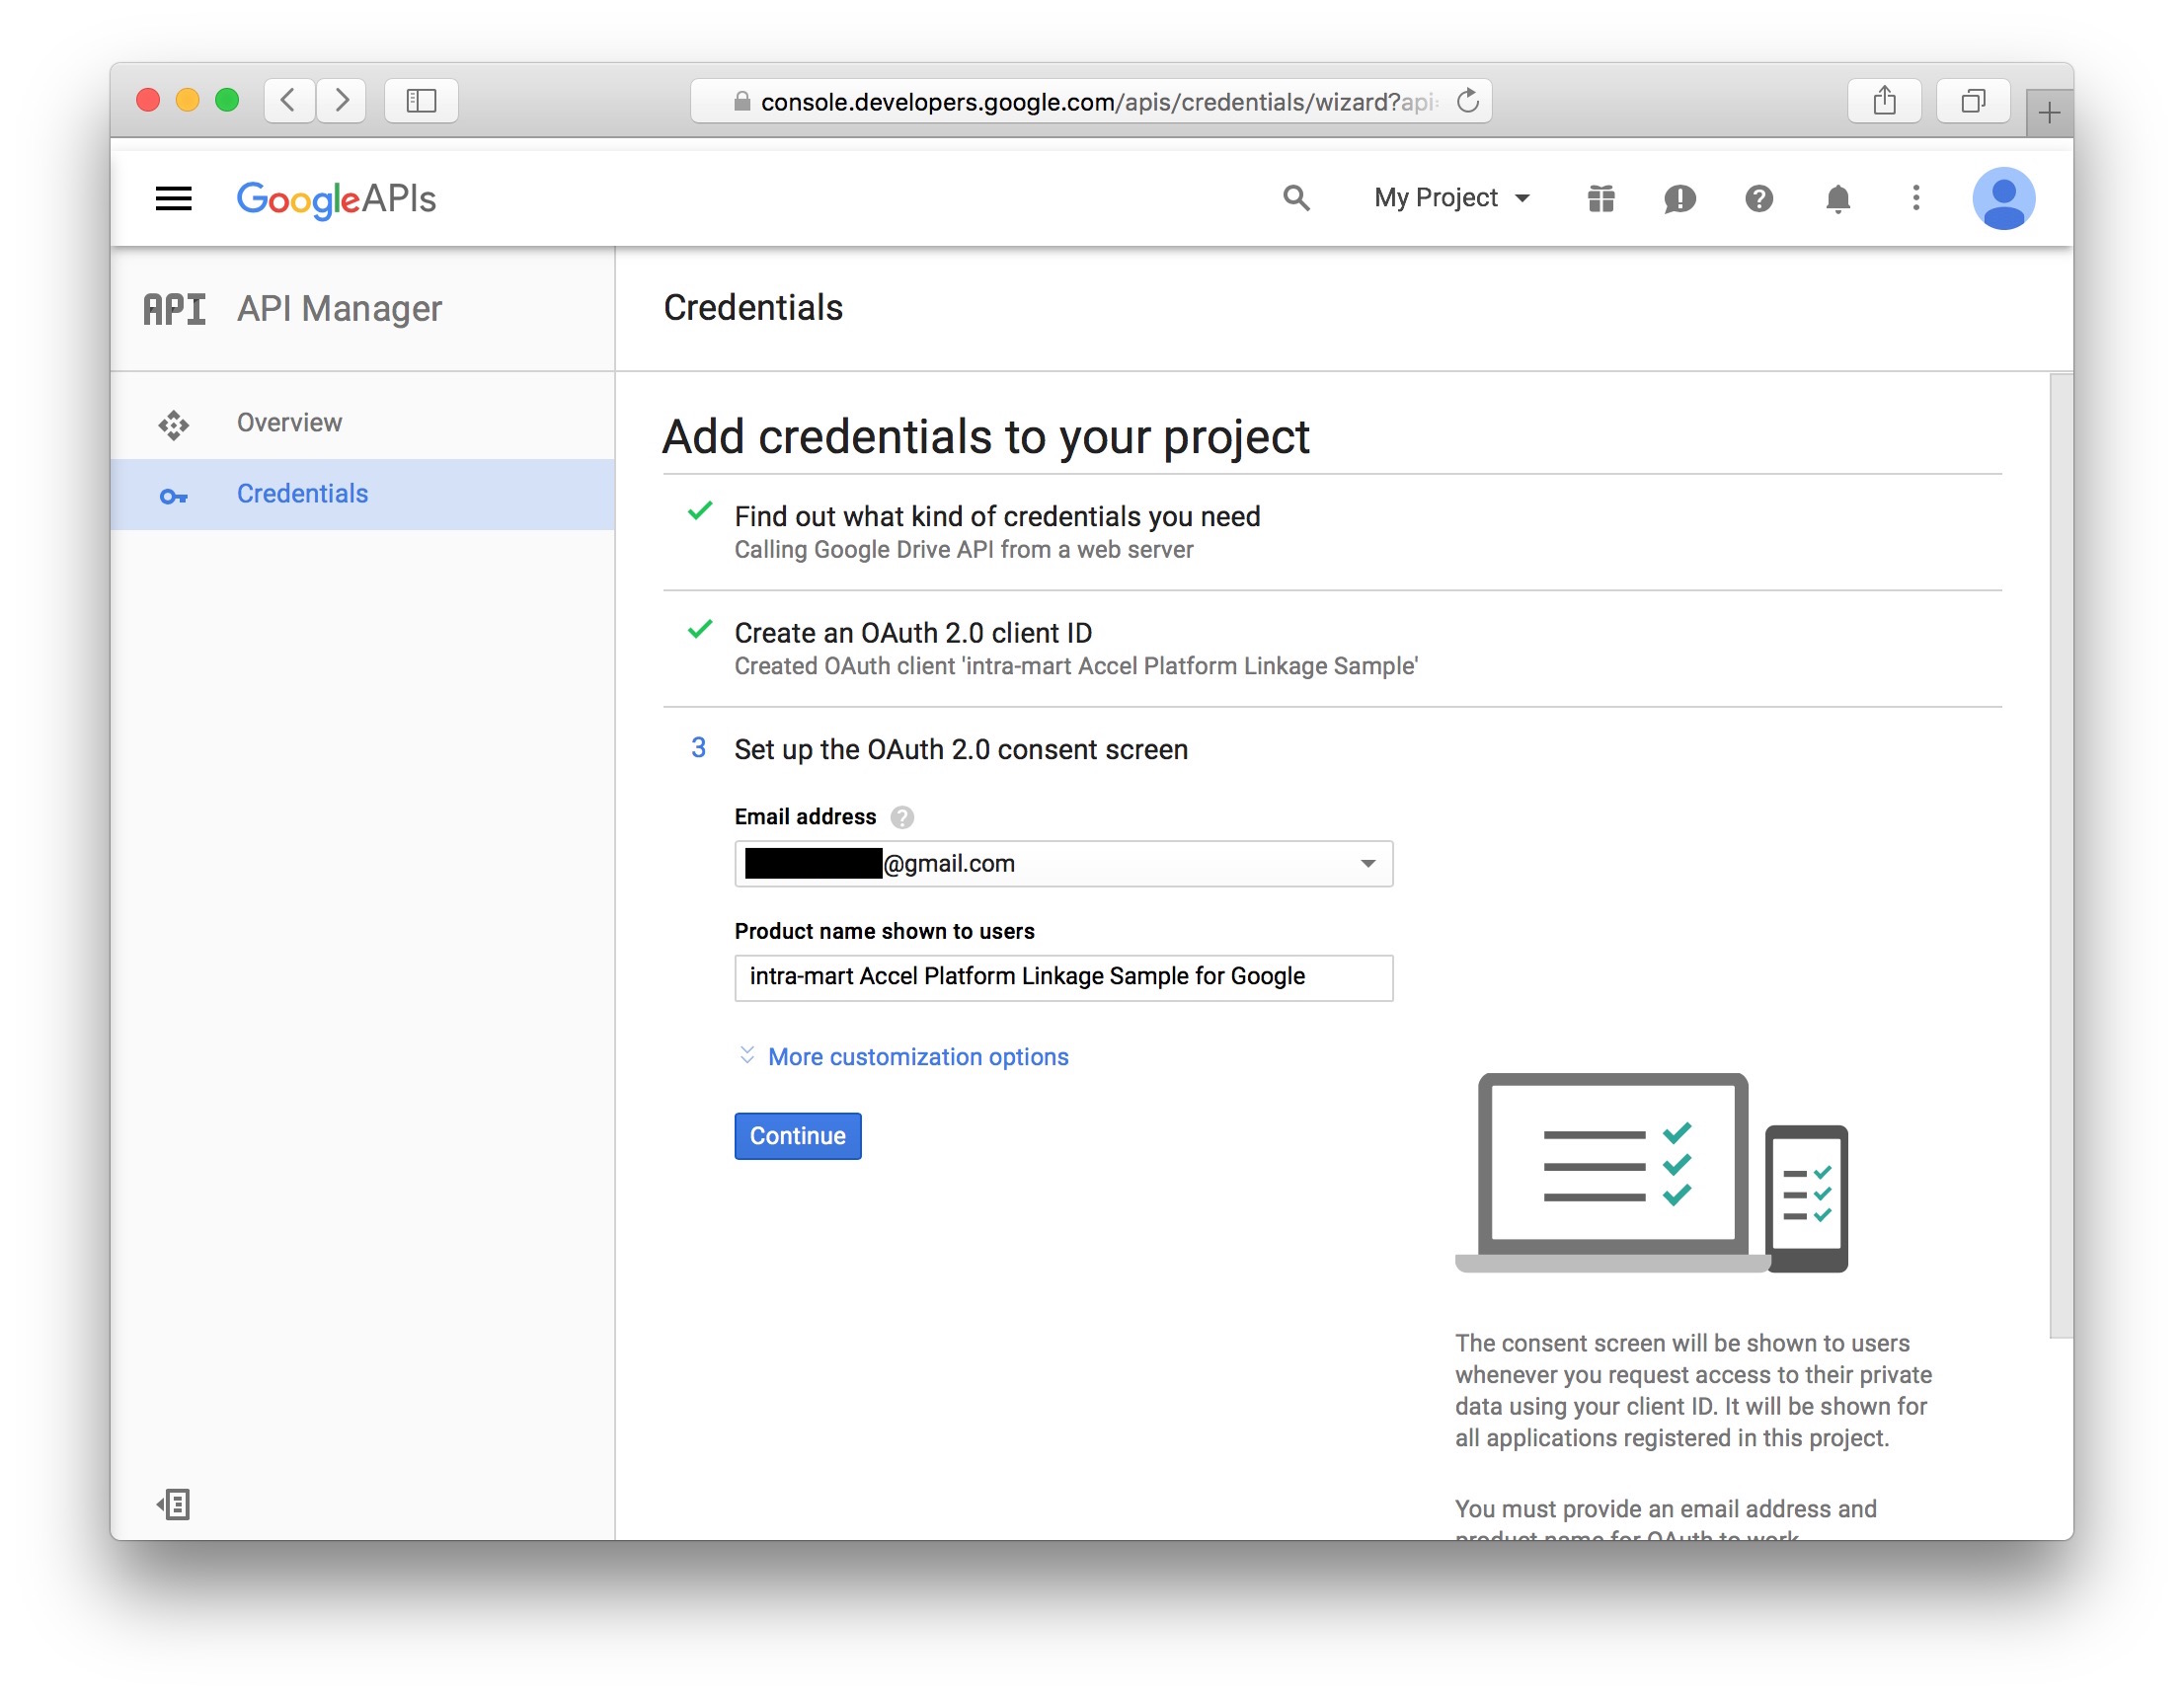
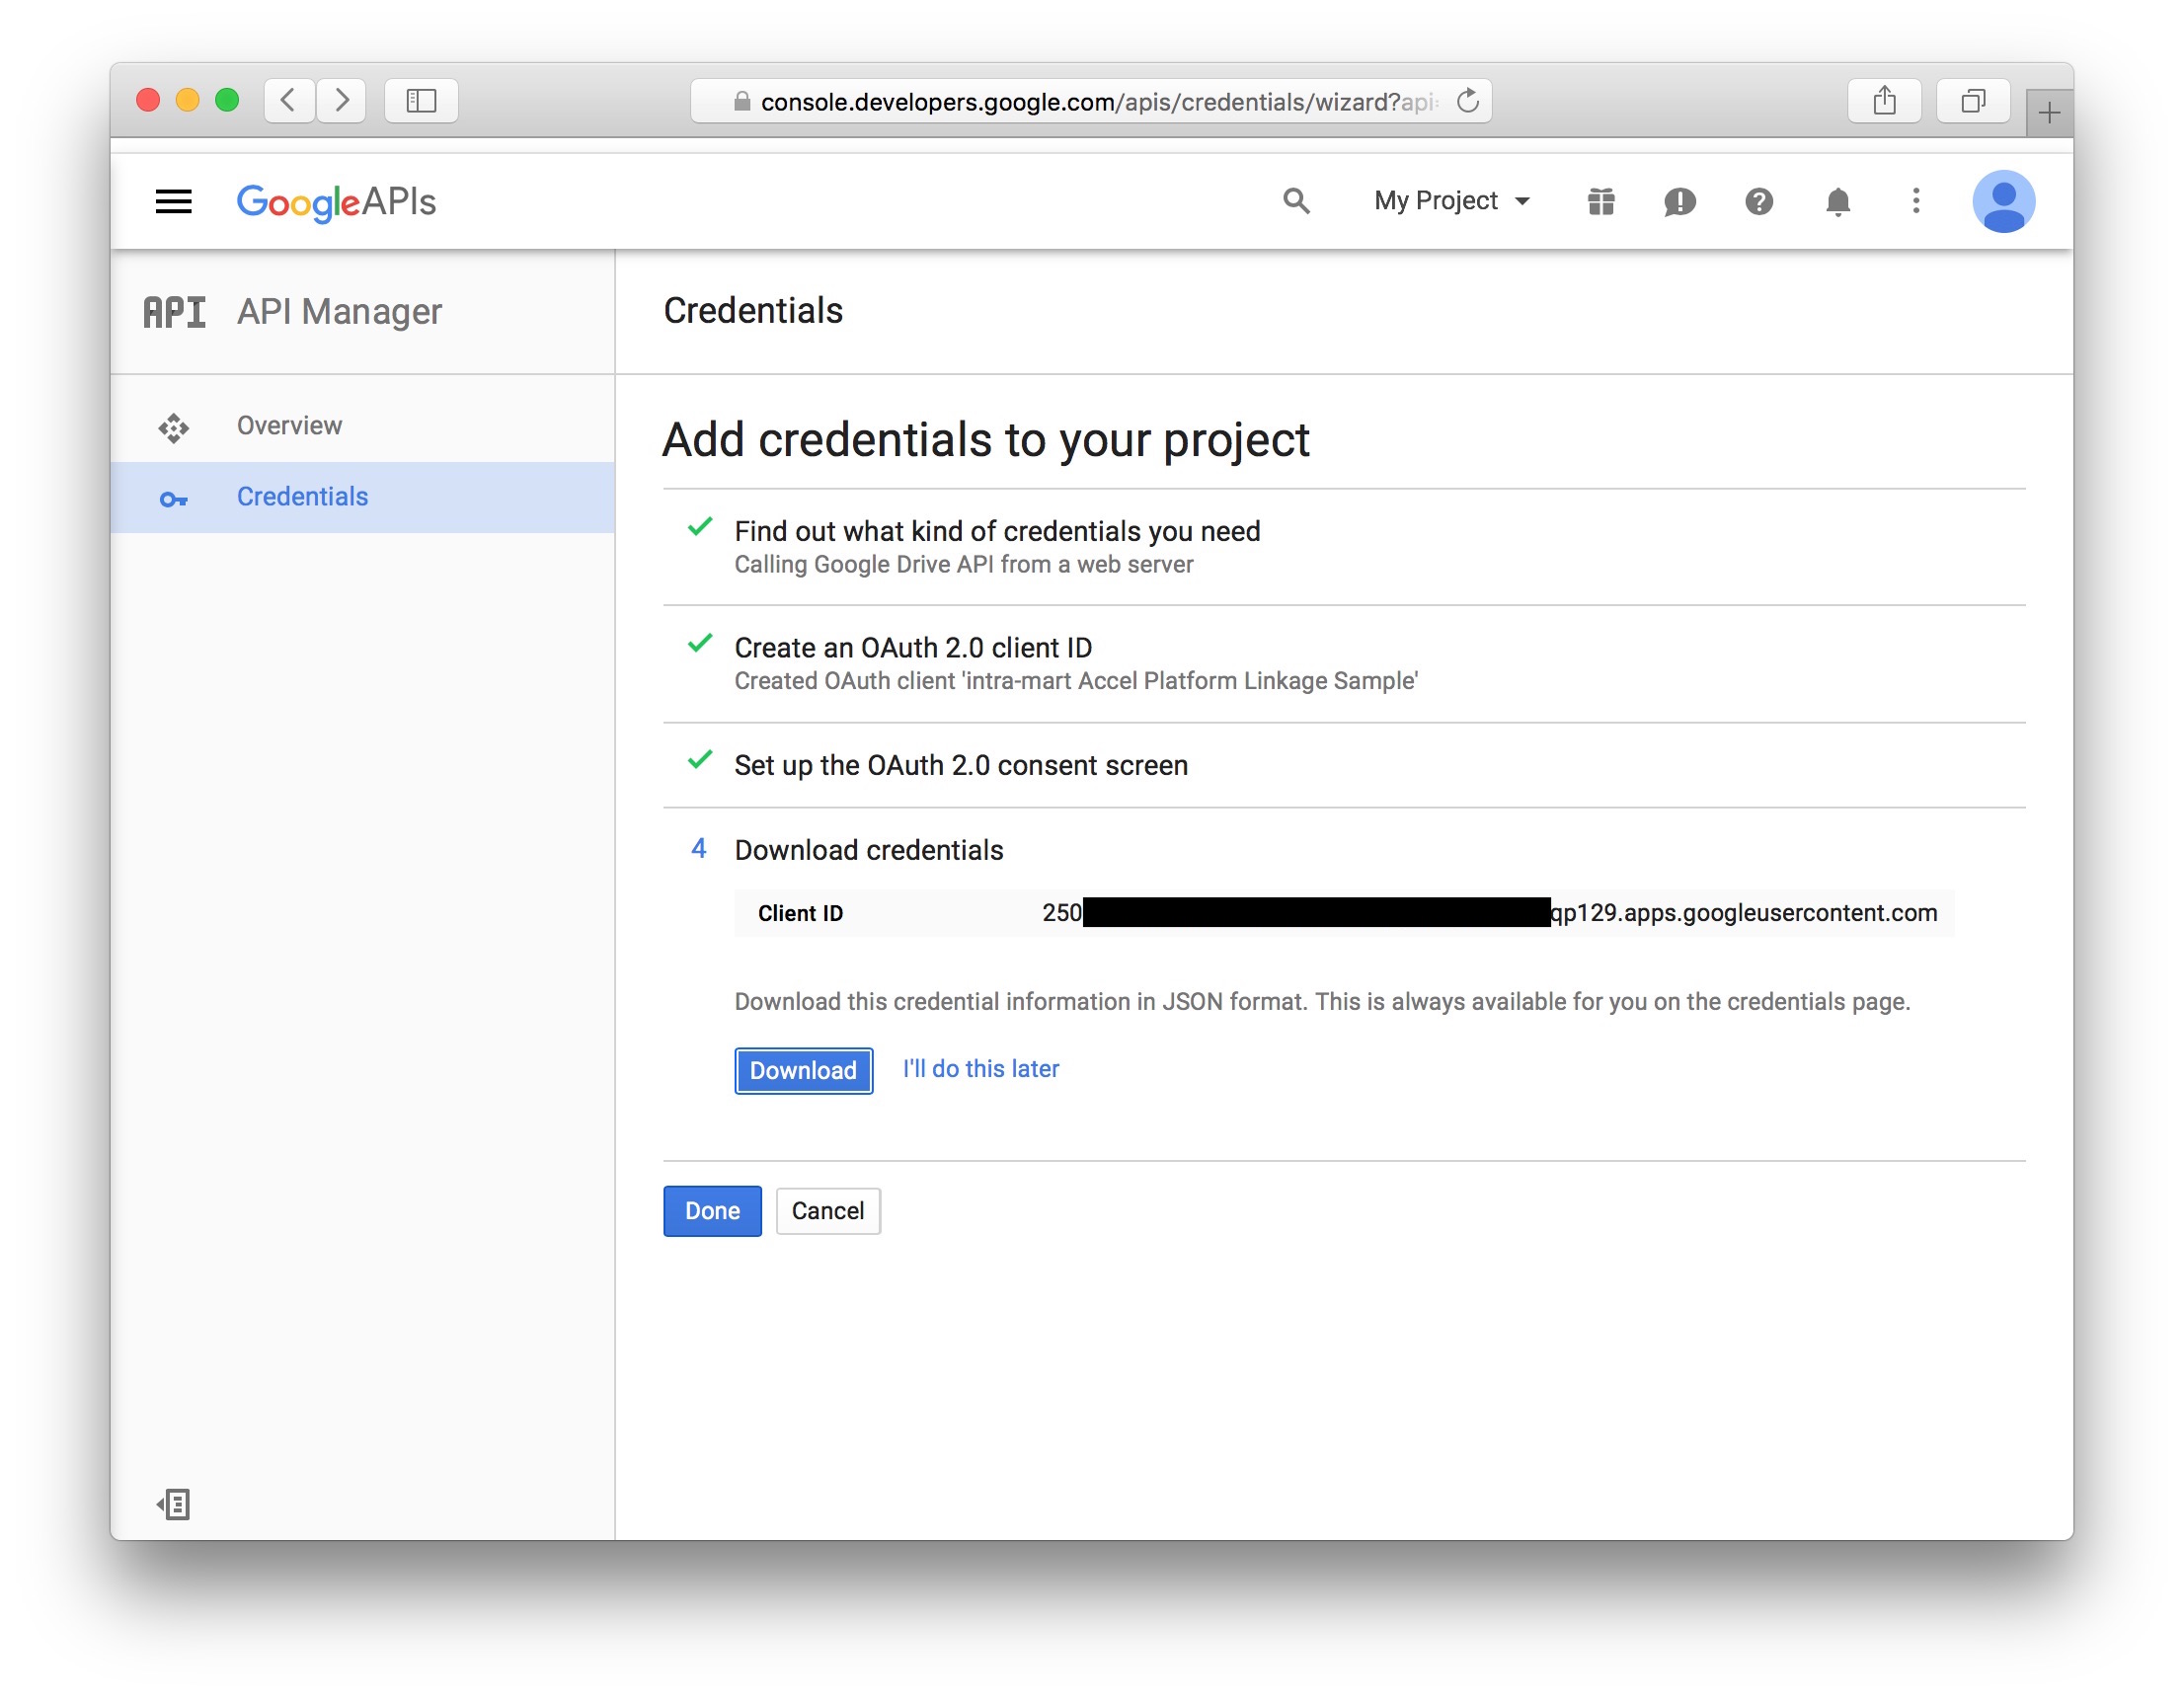
8. クライアントID と クライアント シークレット を取得します。
左側のメニュー「認証情報(=Credentials)」より、「intra-mart Accel Platform Linkage Sample」を選択します。
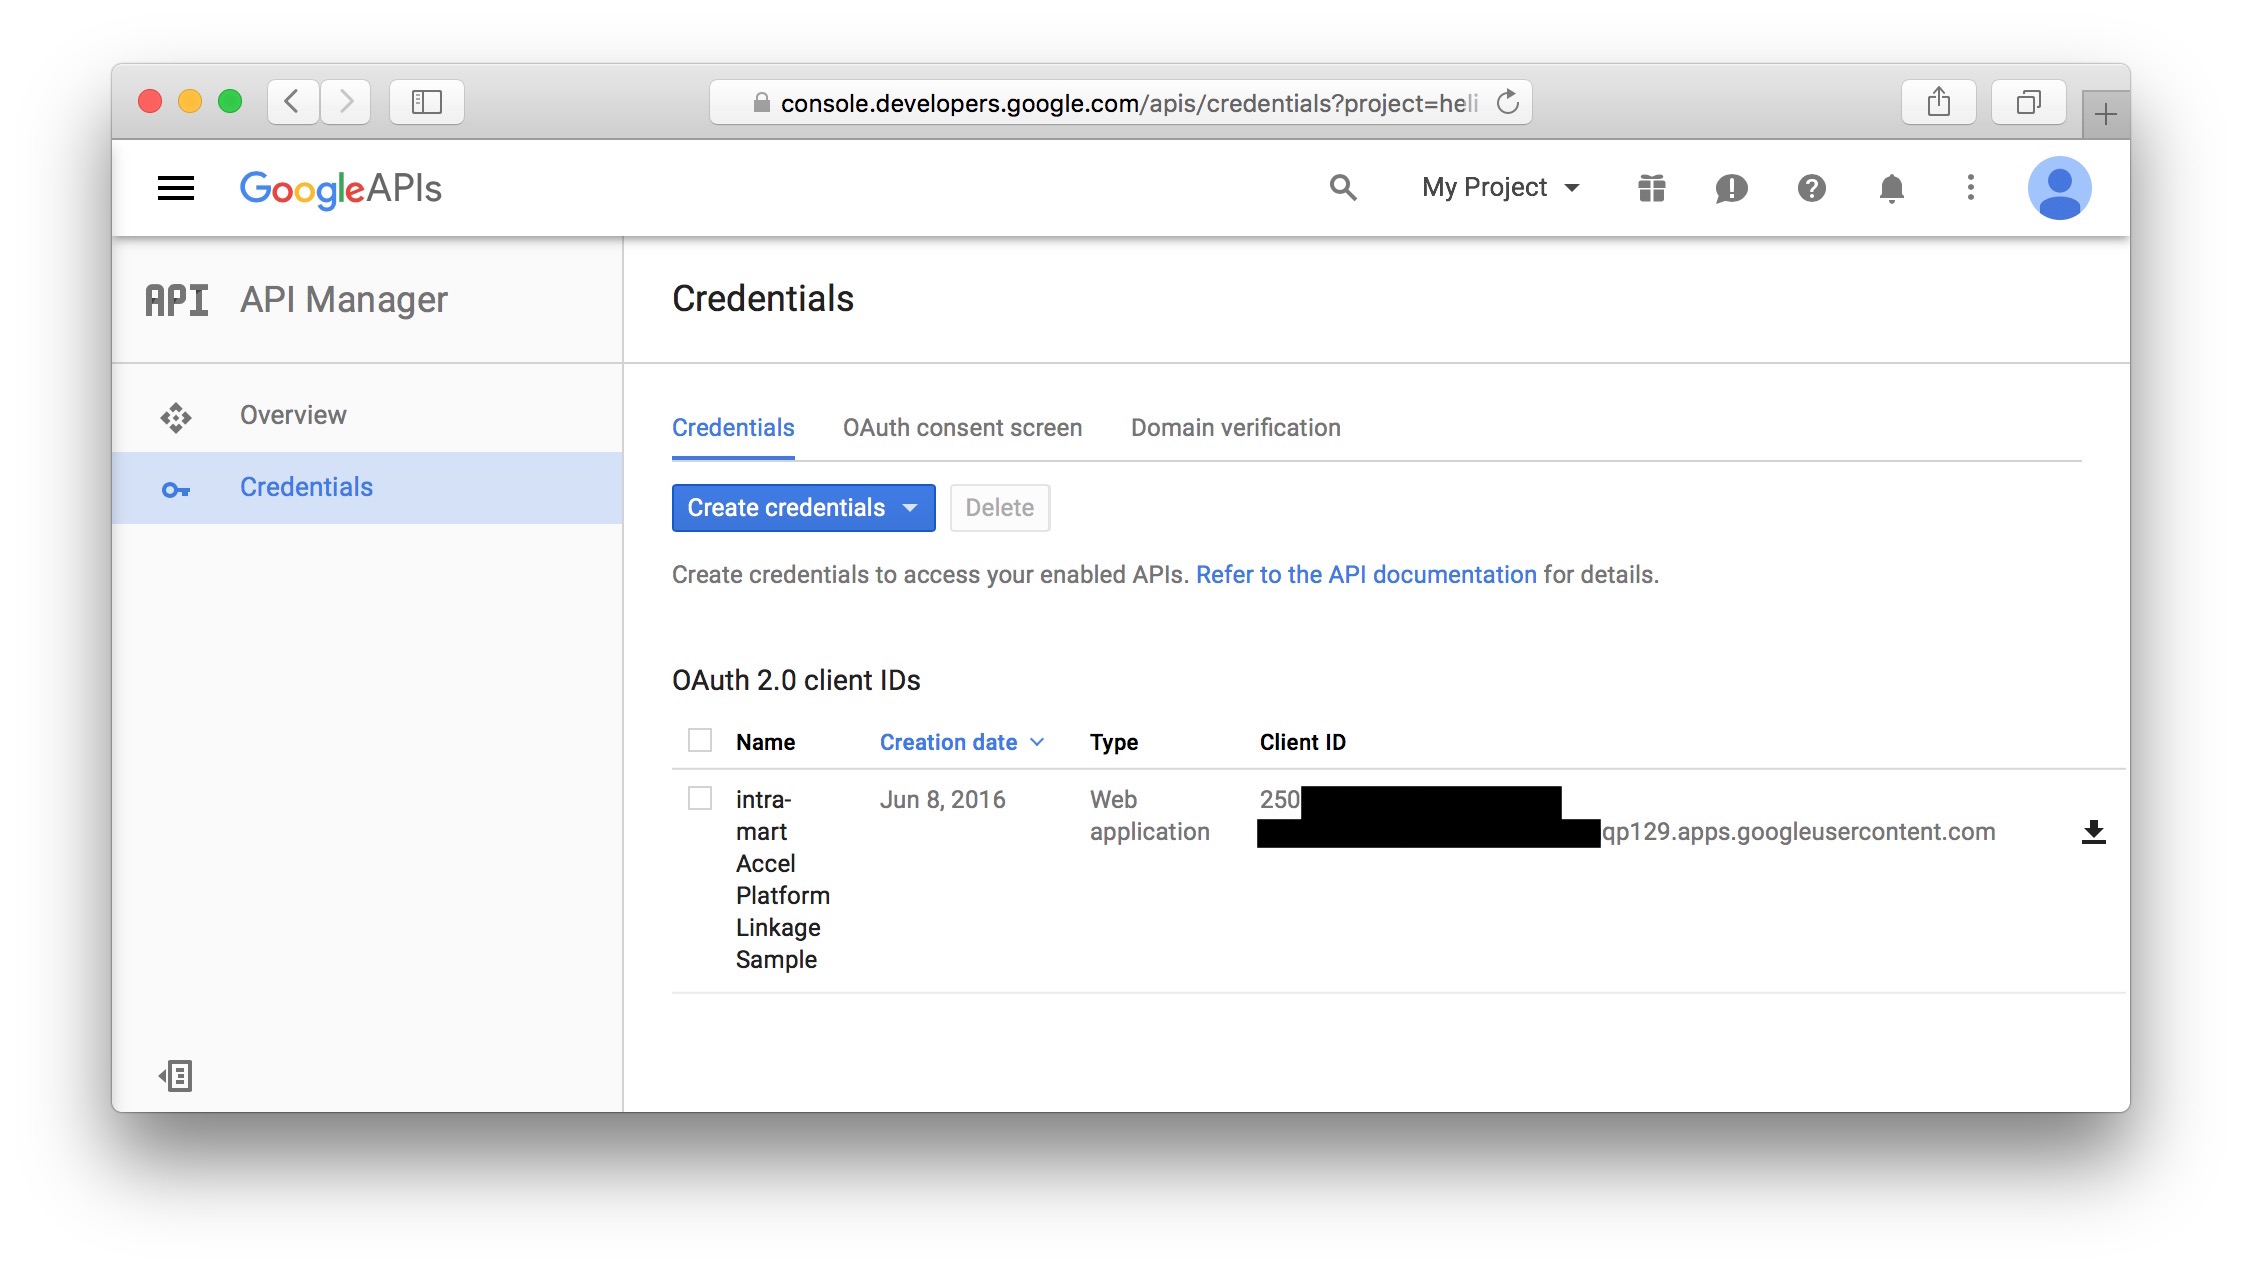
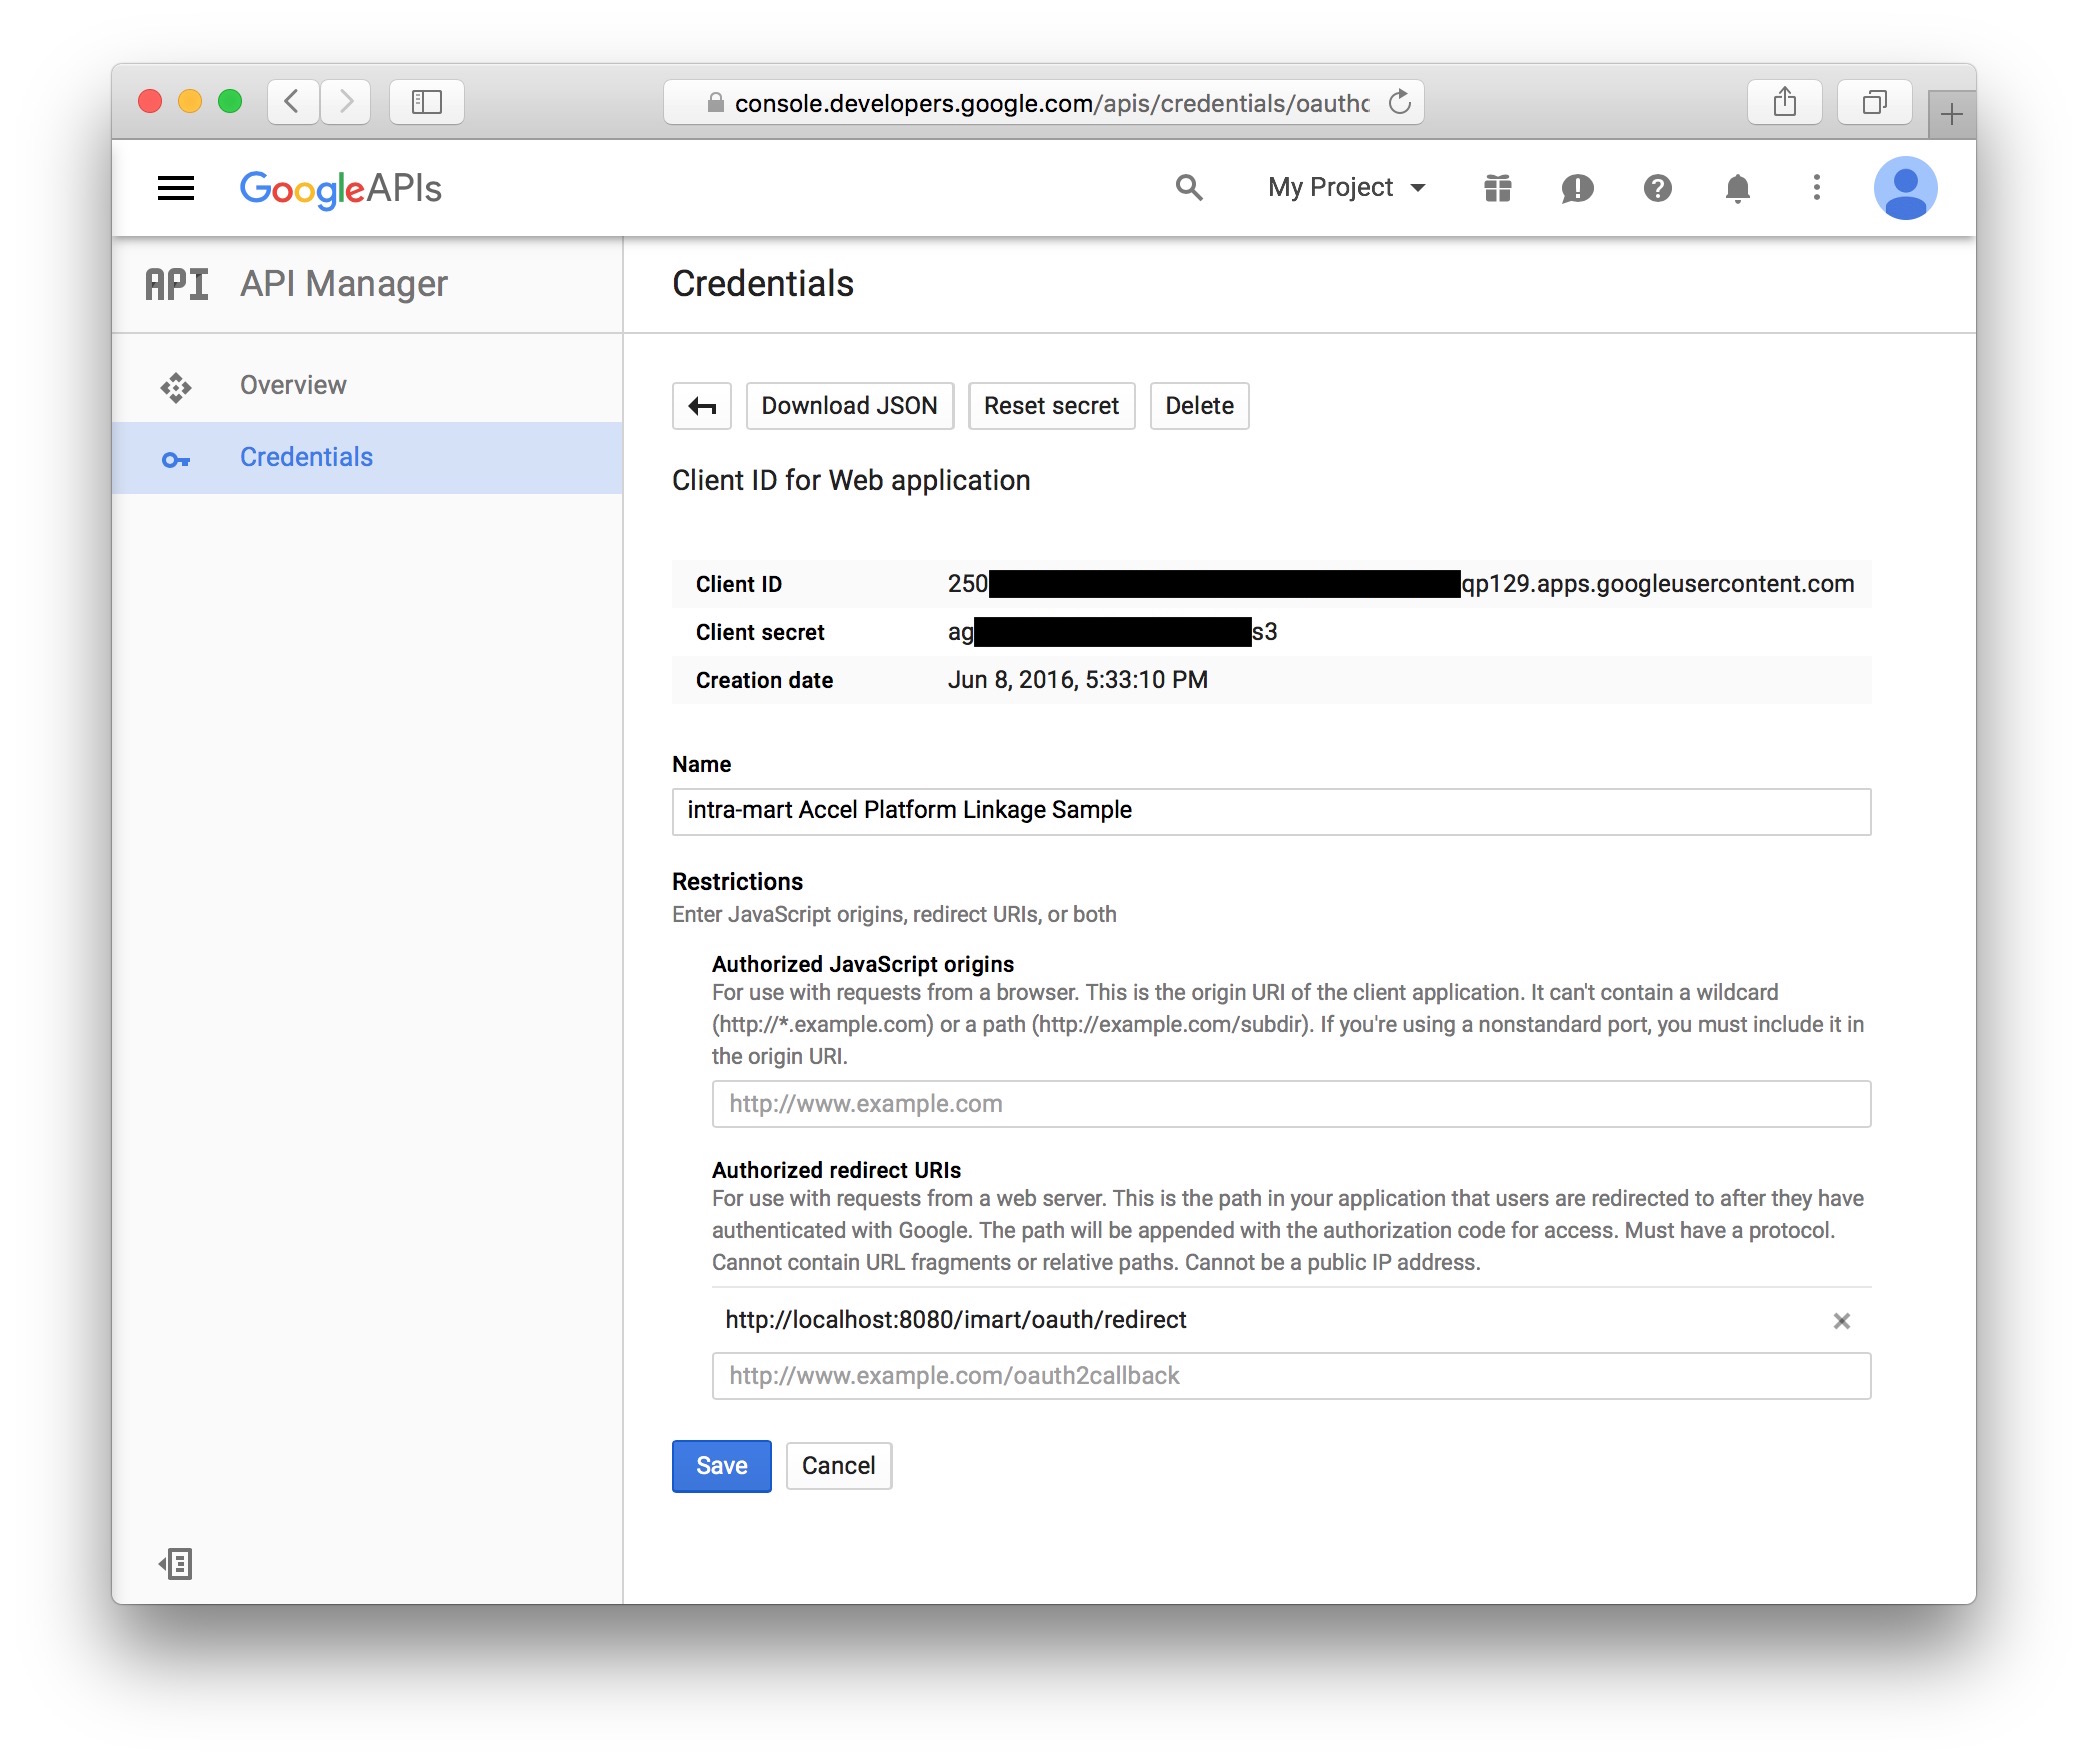
ここに表示された「クライアントID(=Client ID)」と「クライアント シークレット(=Client secret)」を覚えておいてください。
後述の OAuthプロバイダ設定の作成で利用します。
intra-mart Accel Platform側の手順
手順2. OAuthプロバイダ設定の作成。(/conf/oauth-provider-config/*.xmlの作成)
e Builder のモジュールプロジェクト内に「OAuthプロバイダ設定ファイル」を作成します。
OAuthプロバイダ設定ファイルには、外部連携アプリケーションで利用するOAuthプロバイダの情報を設定します。
詳しくは、 設定ファイルリファレンスを参照してください。
src/main/conf/oauth-provider-config/im_cookbook_113639_oauth_client_google.xml
|
1 2 3 4 5 6 7 8 9 10 11 12 13 14 15 16 17 18 19 20 21 22 23 24 25 26 27 28 29 |
<?xml version="1.0" encoding="UTF-8"?> <oauth-provider-config xmlns="http://www.intra-mart.jp/system/oauth/client/config/oauth-provider-config" xmlns:xsi="http://www.w3.org/2001/XMLSchema-instance" xsi:schemaLocation="http://www.intra-mart.jp/system/oauth/client/config/oauth-provider-config ../schema/oauth-provider-config.xsd "> <oauth-providers> <oauth-provider id="im_cookbook_113639_oauth_client_google"> <provider-type>google</provider-type> <name message-cd="CAP.Z.IWP.GOOGLE.OAUTH.PROVIDER.NAME">Google Drive™ API - im_cookbook_113639</name> <description message-cd="CAP.Z.IWP.GOOGLE.OAUTH.PROVIDER.DESCRIPTION">It is allow the use of the Google's Drive API.</description> <icon-path>im_cookbook_113639_oauth_client_google/images/google-drive-icon_48.png</icon-path> <oauth-config> <authz-end-point>https://accounts.google.com/o/oauth2/auth</authz-end-point> <token-end-point>https://accounts.google.com/o/oauth2/token</token-end-point> <client-id>[Please input your application's Client ID]</client-id> <client-secret>[Please input your application's Client Secret]</client-secret> <scope>https://www.googleapis.com/auth/drive.readonly https://www.googleapis.com/auth/drive.metadata.readonly https://www.googleapis.com/auth/drive.photos.readonly</scope> </oauth-config> <extra-config> </extra-config> </oauth-provider> </oauth-providers> </oauth-provider-config> |
行数|説明|
:--|:--|
18|先ほど取得した「クライアントID」を設定します。|
19|先ほど取得した「クライアント シークレット」を設定します。|
20|スコープを設定します。今回は、Google Drive 上のファイルを参照する為のスコープを設定します。
なお、Googleが公開しているスコープ一覧は、以下を参照してください。
OAuth 2.0 Scopes for Google APIs|
手順3. 認可コード要求時のパラメータをGoogle用にカスタマイズ。(Google用のAuthzCodeRequestクラスの作成)
iAPでは、OAuth2.0の認可コードグラントに対応しています。
OAuth 2.0 における 認可リクエスト のパラメータは以下の通りです。
(詳細は 4.1.1. Authorization Request を参照してください)
- response_type
- client_id
- redirect_uri
- scope
- state
認可サーバをGoogleとした場合、上記に加えて以下のパラメータが必要です。
| パラメータ名 | 説明 |
|---|---|
| access_type | refresh_token を取得するために「offline」と設定します。 |
| approval_prompt | 認証を強制するために「force」と設定します。 |
パラメータの詳細は、以下を参照してください。
そこで、この2つのパラメータを追加するためのクラスを作成します。
src/main/java/jp/co/intra_mart/cookbook/im_cookbook_113639/oauth/client/service/processor/impl/GoogleAuthzCodeRequest.java
|
1 2 3 4 5 6 7 8 9 10 |
public class GoogleAuthzCodeRequest extends AuthzCodeRequest { public GoogleAuthzCodeRequest(final String providerId, final OAuthConnectionInfo connectionInfo) { super(providerId, connectionInfo); addParameter(GoogleConstants.PARAM_NAME_4_ACCESS_TYPE, "offline"); addParameter(GoogleConstants.PARAM_NAME_4_APPROVAL_PROMPT, "force"); } } |
src/main/java/jp/co/intra_mart/cookbook/im_cookbook_113639/oauth/client/service/processor/impl/GoogleConstants.java
|
1 2 3 4 5 6 7 8 9 10 11 12 |
public final class GoogleConstants { public static final String PROVIDER_TYPE = "google"; //$NON-NLS-1$ public static final String PARAM_NAME_4_ACCESS_TYPE = "access_type"; //$NON-NLS-1$ public static final String PARAM_NAME_4_APPROVAL_PROMPT = "approval_prompt"; //$NON-NLS-1$ private GoogleConstants() { } } |
手順4. アクセストークン更新時の成功レスポンスに refresh_token が含まれていない場合のカスタマイズ。(OAuthRefreshAccessTokenRequestProcessorの実装クラスを作成)
OAuth 2.0 における 認可リクエスト のパラメータは以下の通りです。
(詳細は 5.1. Successful Response を参照してください)
- access_token
- token_type
- expires_in
- refresh_token
- scope
Googleでは、アクセストークン更新時の成功レスポンスに refresh_token が含まれていません。
そこで、以前のリフレッシュトークンを再利用するためのクラスを作成します。
src/main/java/jp/co/intra_mart/cookbook/im_cookbook_113639/oauth/client/service/processor/impl/RefreshAccessTokenRequestProcessorWithoutRefreshTokenOnSuccessResponse.java
|
1 2 3 4 5 6 7 8 9 10 11 12 13 14 15 16 17 18 19 20 21 22 23 24 25 26 27 28 29 30 31 32 33 34 35 36 37 38 39 40 41 42 43 44 45 46 |
public class RefreshAccessTokenRequestProcessorWithoutRefreshTokenOnSuccessResponse extends AbstractRefreshAccessTokenRequestProcessor { private final ThreadLocal previousRefreshTokens = new ThreadLocal(); protected RefreshAccessTokenRequestProcessorWithoutRefreshTokenOnSuccessResponse(final String providerType) { super(providerType); } @Override protected RefreshTokenRequest createRequest(final String providerId, final String refreshToken) throws OAuthClientException { previousRefreshTokens.set(refreshToken); return super.createRequest(providerId, refreshToken); } @Override protected AccessTokenInfo parseResponse(final String providerId, final ResponseModel<HttpEntityModel> response) throws OAuthClientException, OAuthRequestException { try { final AccessTokenInfo accessTokenInfo = super.parseResponse(providerId, response); final String refreshTokenOnResponse = accessTokenInfo.getRefreshToken(); // アクセストークン更新時の成功レスポンスに refresh_token が含まれていない場合は、以前のリフレッシュトークンを再利用する。 if (refreshTokenOnResponse == null || refreshTokenOnResponse.isEmpty()) { accessTokenInfo.setRefreshToken(previousRefreshTokens.get()); } return accessTokenInfo; } finally { previousRefreshTokens.remove(); } } @Override protected void validateToken(final AccessTokenInfo tokenInfo) throws OAuthResponseParseException { try { super.validateToken(tokenInfo); } catch (final OAuthResponseParseException e) { // アクセストークン更新時の成功レスポンスに refresh_token が含まれていない場合、エラーとしない。 if (e.getMessage().contains(OAuthClientLog.E_IWP_OAUTHCLIENT_PROCESSOR_00016.getWithCode())) { return; } else { throw e; } } } } |
手順5. カスタマイズしたクラスを利用するための OAuthRequestProcessorFactory を作成。
src/main/resources/META-INF/services/jp.co.intra_mart.system.oauth.client.service.processor.OAuthRequestProcessorFactory
|
1 |
jp.co.intra_mart.cookbook.im_cookbook_113639.oauth.client.service.processor.impl.GoogleOAuthRequestProcessorFactory |
src/main/java/jp/co/intra_mart/cookbook/im_cookbook_113639/oauth/client/service/processor/impl/GoogleOAuthRequestProcessorFactory.java
|
1 2 3 4 5 6 7 8 9 10 11 12 13 14 15 16 17 18 19 20 21 22 23 24 25 26 27 28 29 |
public class GoogleOAuthRequestProcessorFactory extends StandardOAuthRequestProcessorFactory { private final OAuthAuthzCodeRequestProcessor authzCodeProcessor; private final OAuthRefreshAccessTokenRequestProcessor refreshTokneProcessor; public GoogleOAuthRequestProcessorFactory() { authzCodeProcessor = new GoogleAuthzCodeRequestProcessor(); // Googleの場合、アクセストークン更新時の成功レスポンスには refresh_token が含まれない(2016年4月現在) refreshTokneProcessor = new RefreshAccessTokenRequestProcessorWithoutRefreshTokenOnSuccessResponse(GoogleConstants.PROVIDER_TYPE); } @Override public OAuthAuthzCodeRequestProcessor getAuthzCodeRequestProcessor() { return authzCodeProcessor; } @Override public String getProviderType() { return GoogleConstants.PROVIDER_TYPE; } @Override public OAuthRefreshAccessTokenRequestProcessor getRefreshAccessTokenRequestProcessor() { return refreshTokneProcessor; } } |
src/main/java/jp/co/intra_mart/cookbook/im_cookbook_113639/oauth/client/service/processor/impl/GoogleAuthzCodeRequestProcessor.java
|
1 2 3 4 5 6 7 8 9 10 11 12 13 |
public class GoogleAuthzCodeRequestProcessor extends AbstractAuthzCodeRequestProcessor { public GoogleAuthzCodeRequestProcessor() { super(GoogleConstants.PROVIDER_TYPE); } @Override protected AuthzCodeRequest createRequestInstance(final String providerId) throws OAuthClientException { final OAuthConnectionInfo connectionInfo = OAuthProviderConfigurationFactory.getInstance().getConnectionInfoAccessor().getConnectionInfo(providerId); return new GoogleAuthzCodeRequest(providerId, connectionInfo); } } |
手順6. 動作確認用サンプルの作成
Google Drive 上のファイル一覧を表示するJSPを作成します。
src/main/webapp/im_cookbook_113639_oauth_client_google/google_drive_file_lists.jsp
|
1 2 3 4 5 6 7 8 9 10 11 12 13 14 15 16 17 18 19 20 21 22 23 24 25 26 27 28 29 30 31 32 33 34 35 36 37 38 39 40 41 42 43 44 45 46 47 48 49 50 51 52 53 54 55 56 57 58 59 60 61 62 63 64 |
<%@ page contentType="text/html; charset=UTF-8" pageEncoding="UTF-8" %> <%@ page import="java.util.LinkedHashMap"%> <%@ page import="java.util.Map"%> <%@ page import="jp.co.intra_mart.cookbook.im_cookbook_113639.oauth.client.service.processor.impl.GoogleConstants"%> <%@ page import="jp.co.intra_mart.foundation.context.Contexts"%> <%@ page import="jp.co.intra_mart.foundation.context.model.AccountContext"%> <%@ page import="jp.co.intra_mart.foundation.oauth.client.model.AccessTokenInfo"%> <%@ page import="jp.co.intra_mart.foundation.oauth.client.service.OAuthClientService"%> <%@ page import="jp.co.intra_mart.foundation.oauth.client.service.OAuthClientServiceFactory"%> <%@ page import="org.apache.commons.httpclient.Header"%> <%@ page import="org.apache.commons.httpclient.HttpClient"%> <%@ page import="org.apache.commons.httpclient.methods.GetMethod"%> <% final String uri = "https://www.googleapis.com/drive/v3/files"; final String userCd = Contexts.get(AccountContext.class).getUserCd(); final String providerId = "im_cookbook_113639_oauth_client_google"; final OAuthClientService oAuthClient = OAuthClientServiceFactory.getInstance().getOAuthClientService(GoogleConstants.PROVIDER_TYPE); final AccessTokenInfo token = oAuthClient.getAccessToken(userCd, providerId); int status; Map responseHeaders; String responseBodyAsString; final GetMethod httpRequest = new GetMethod(uri); try{ httpRequest.addRequestHeader("Authorization", token.getTokenType() + " " + token.getAccessToken()); // <-- Set AccessToken httpRequest.addRequestHeader("Content-Type", "application/json; charset=UTF-8"); httpRequest.addRequestHeader("Accept", "application/json"); status = new HttpClient().executeMethod(httpRequest); responseHeaders = new LinkedHashMap(); for (final Header header : httpRequest.getResponseHeaders()) { responseHeaders.put(header.getName(), header.getValue()); } responseBodyAsString = httpRequest.getResponseBodyAsString(); } finally { httpRequest.releaseConnection(); } %> <table border="1"> <tr> <th>status</th> <td><%=status%></td> </tr> <tr> <th>responseHeaders</th> <td><pre><%=responseHeaders%></pre></td> </tr> <tr> <th>responseBodyAsString</th> <td><pre><%=responseBodyAsString%></pre></td> </tr> </table> |
| 行数 | 説明 |
|---|---|
| 19 | Google Drive の ファイル一覧を取得為のURIを指定します。 |
| Google Drive APIの詳細は、こちら を参照してください。 | |
| 24〜25 | OAuthClientServiceを使う事で、アクセストークンが簡単に取得可能となります。 |
動作確認
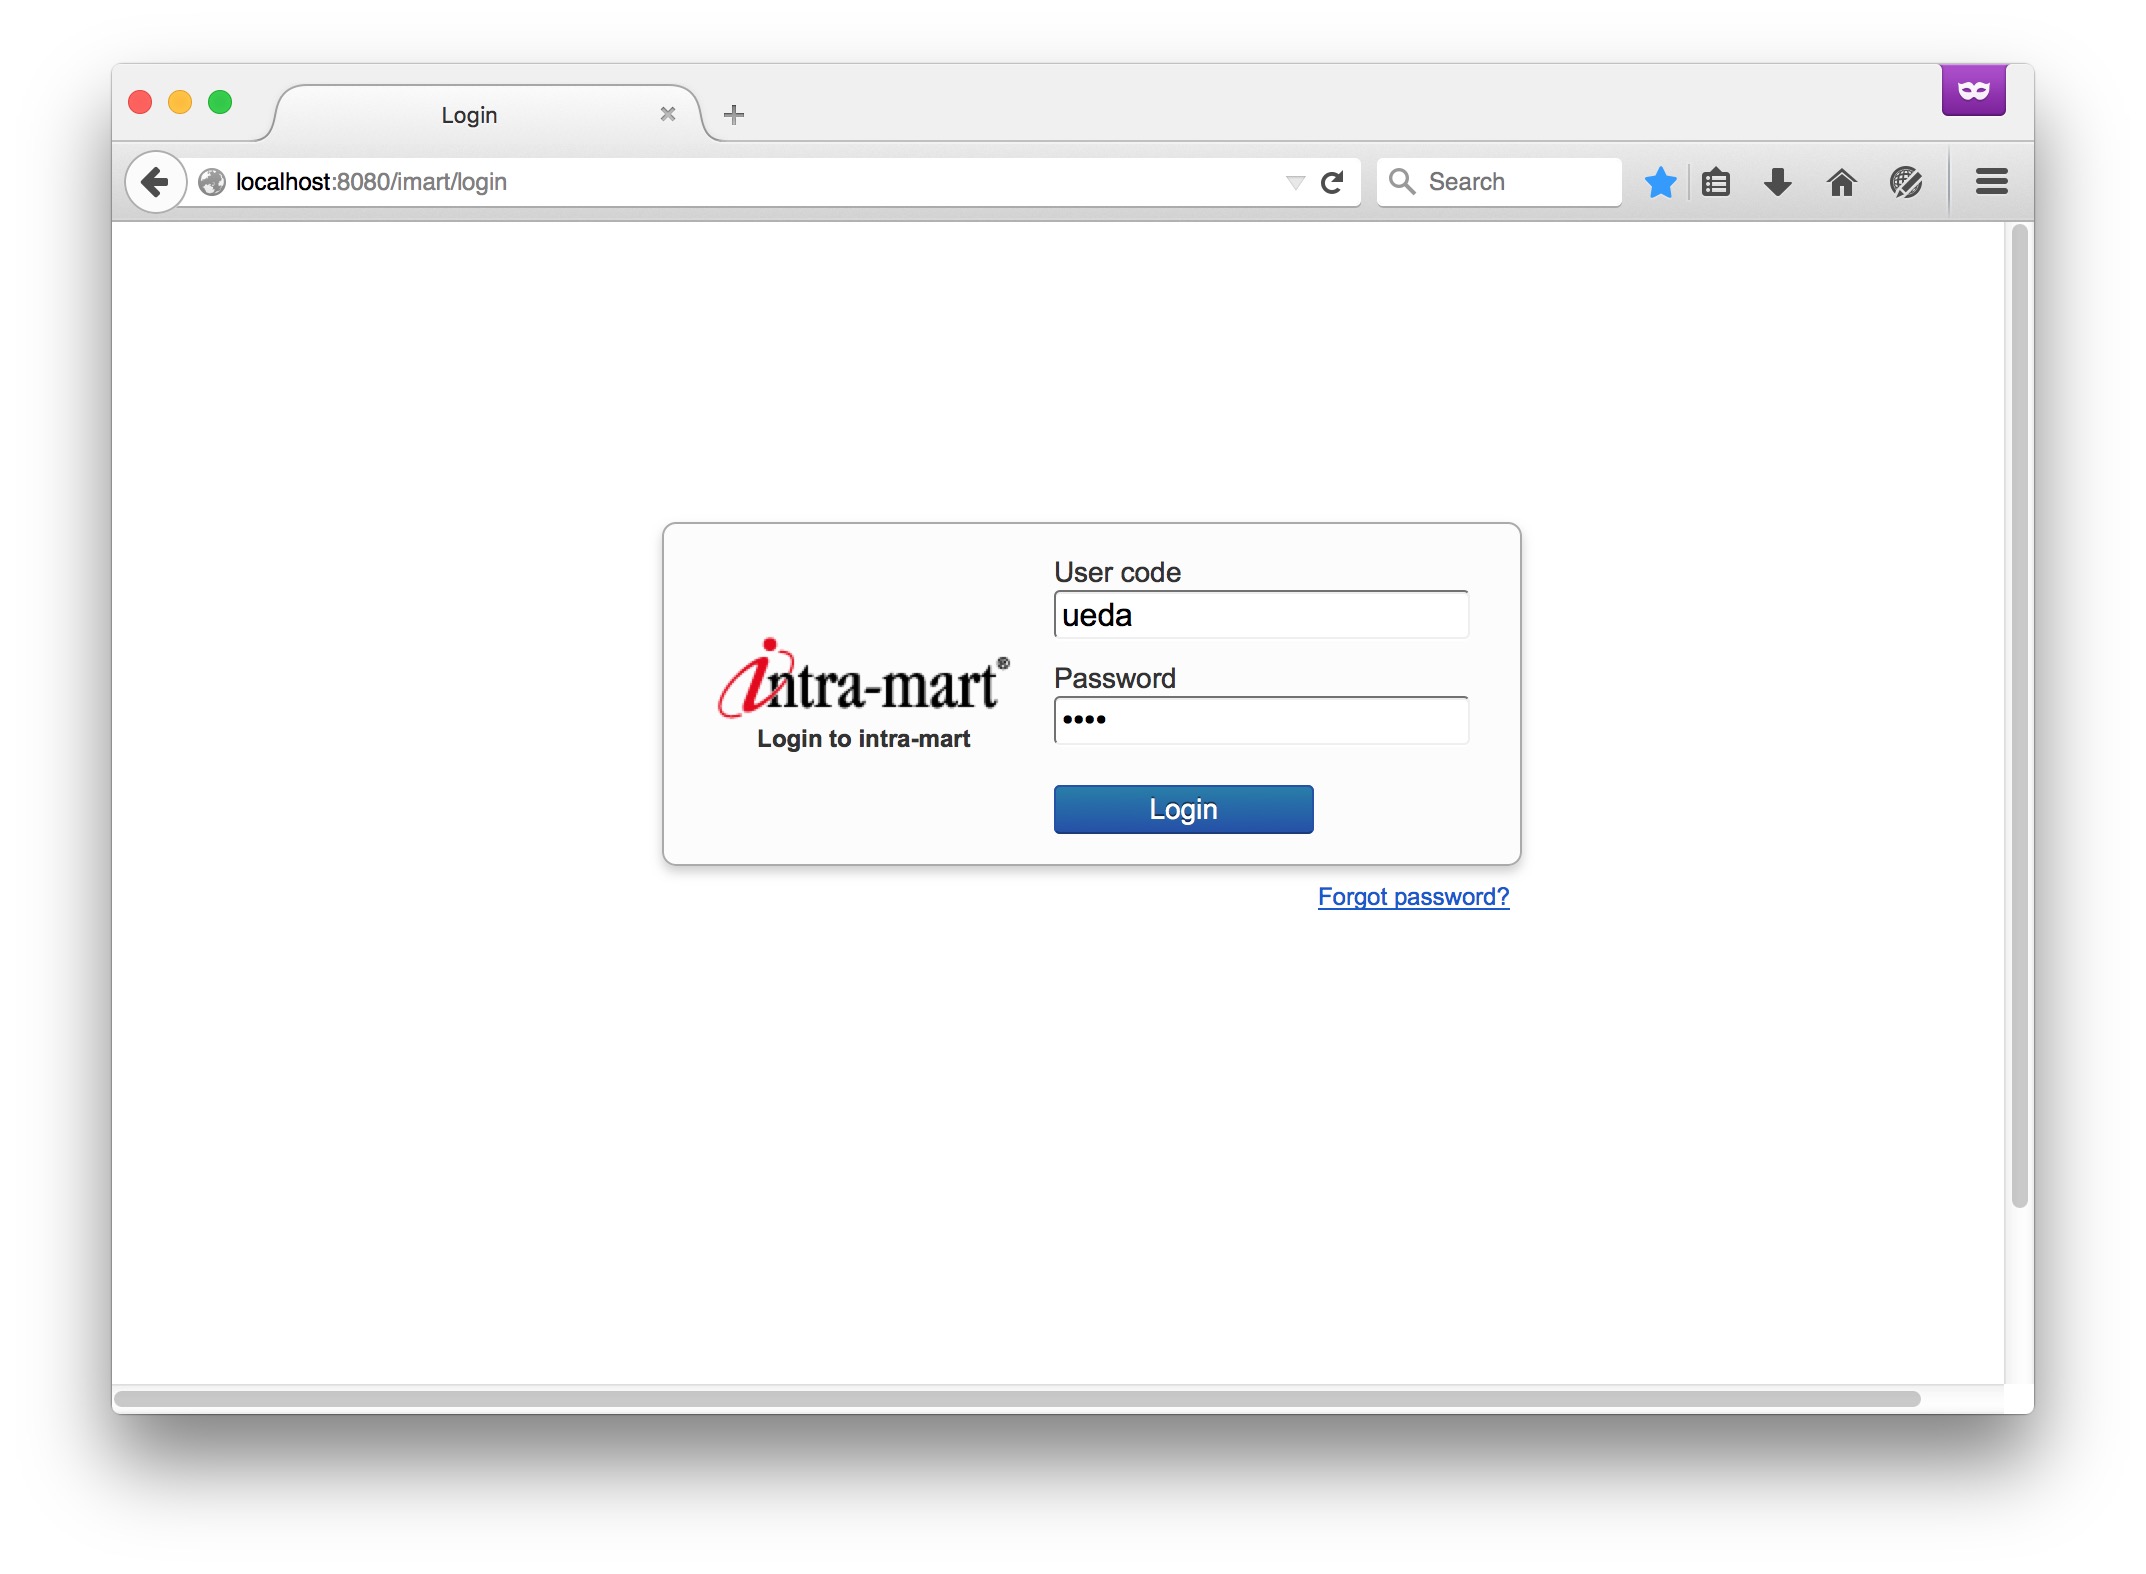
1. intra-mart Accel Platformにログインします。
ここでは、サンプルユーザ「ueda」でログインします。
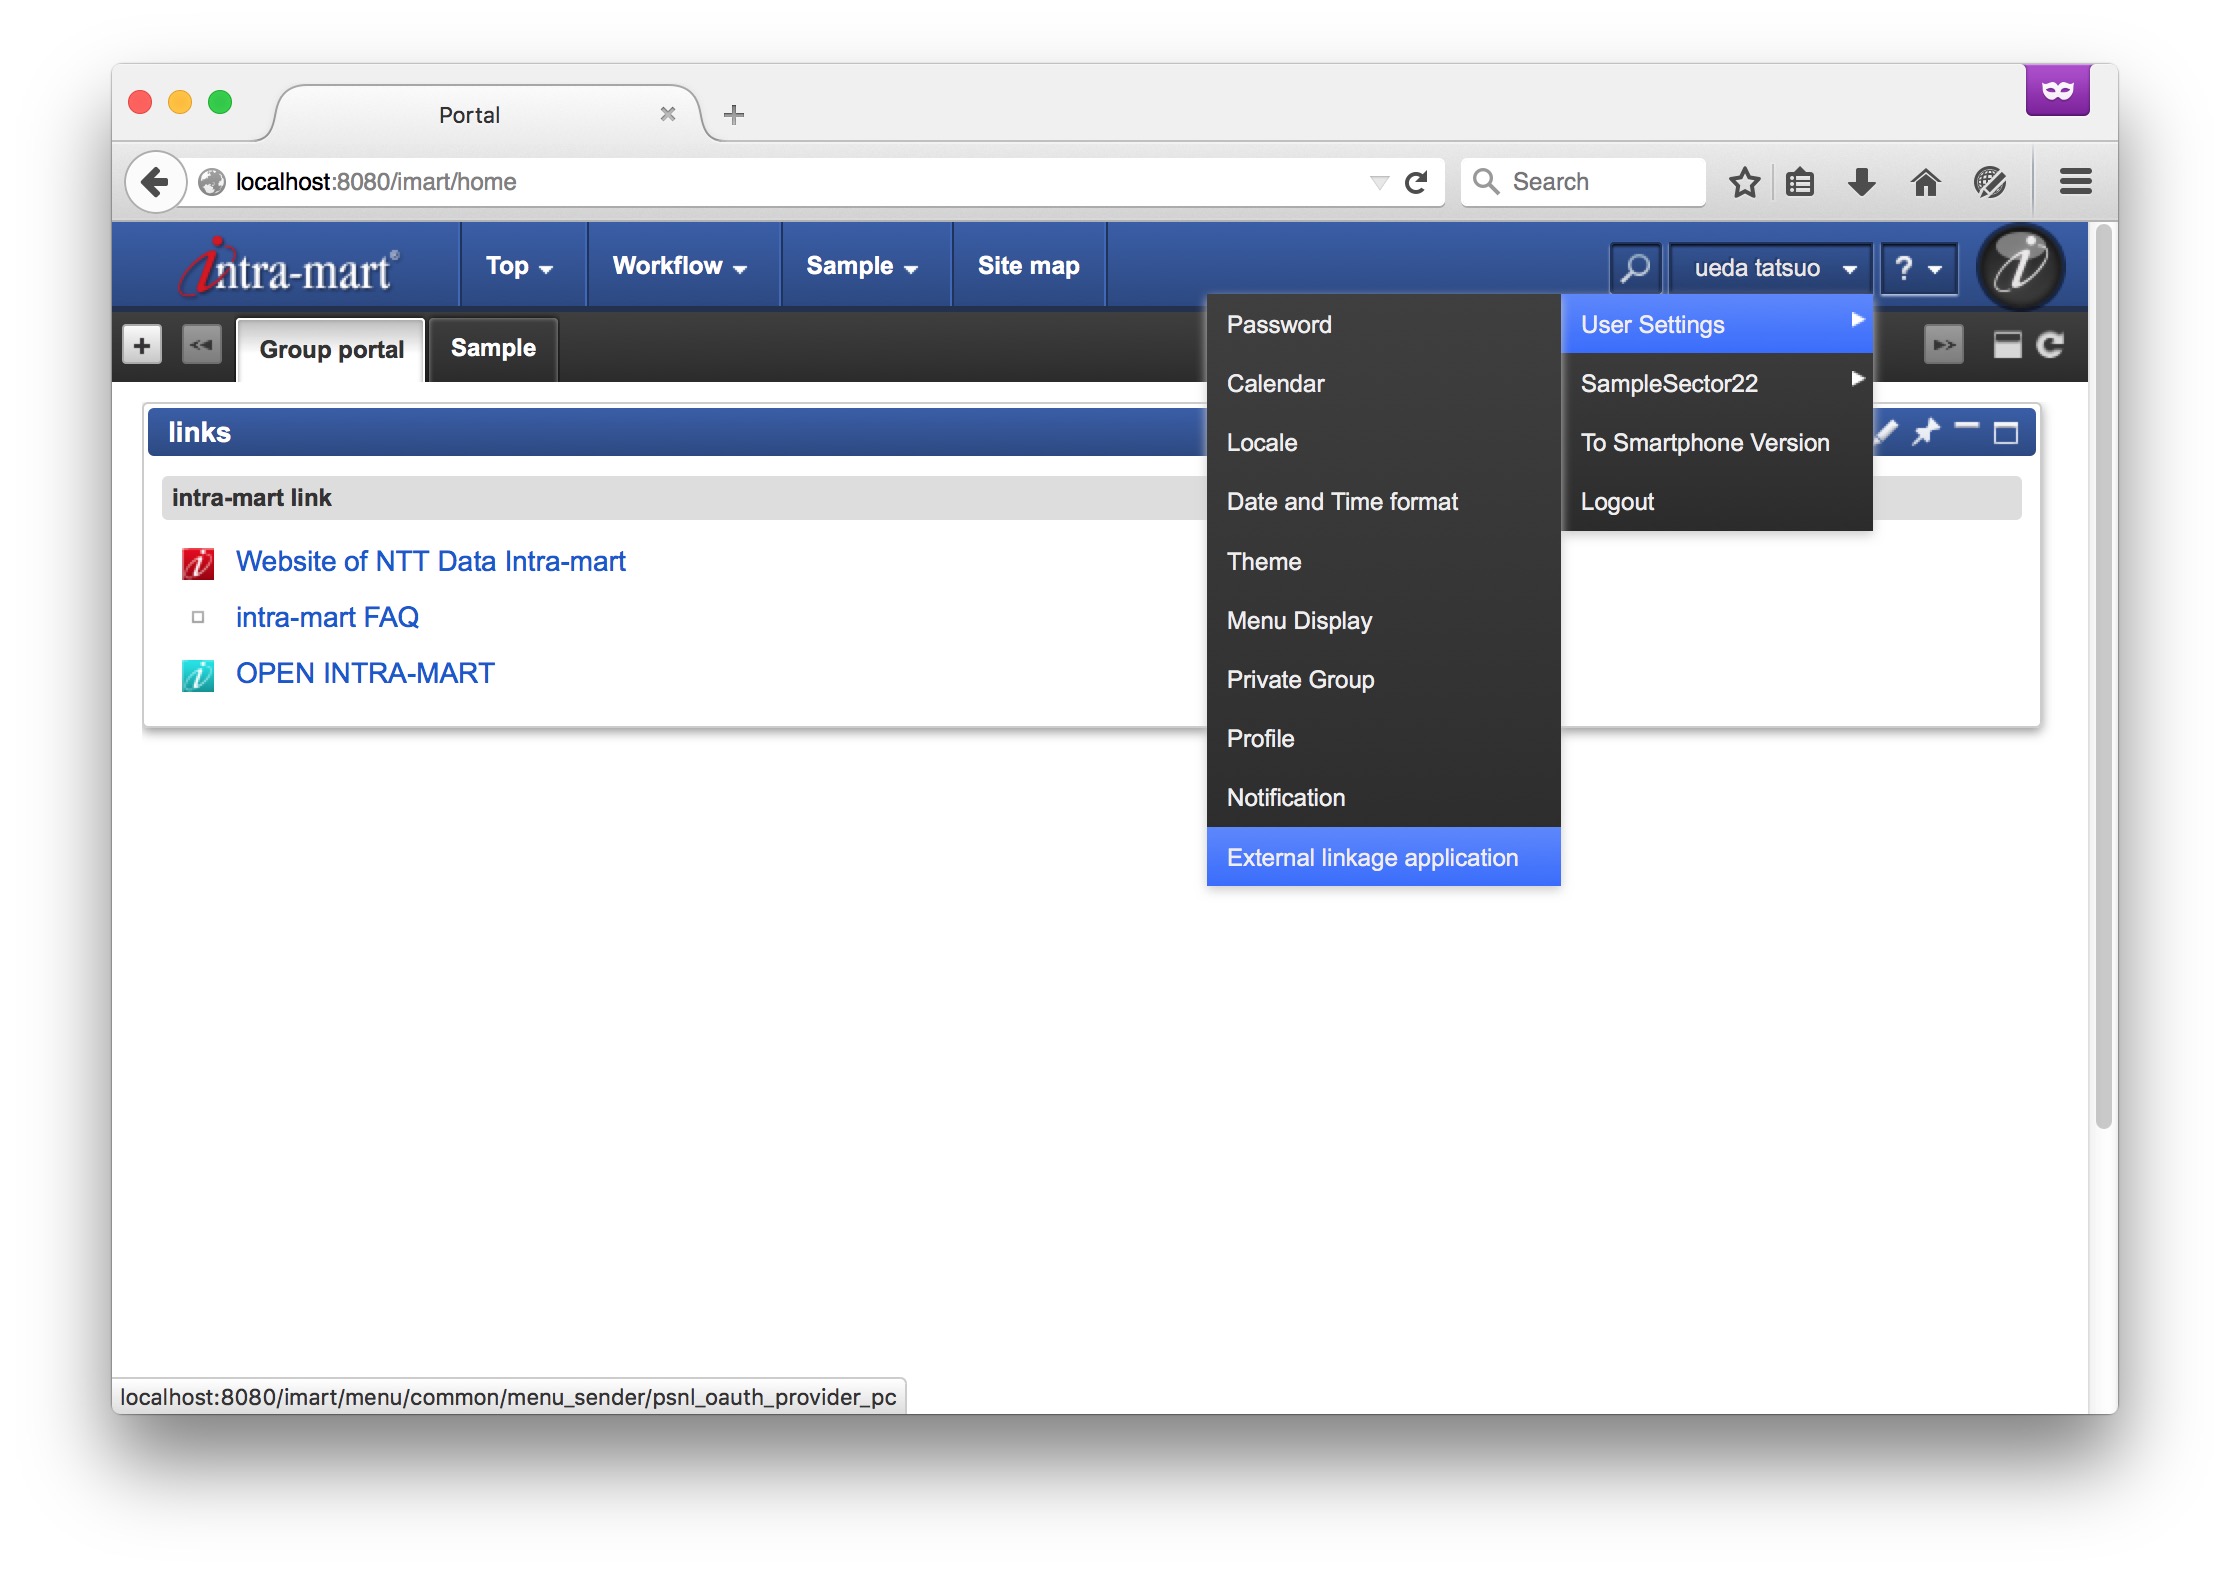
2. 右上のユーティリティメニューより、[個人設定] - [外部連携アプリケーション]を選択します。
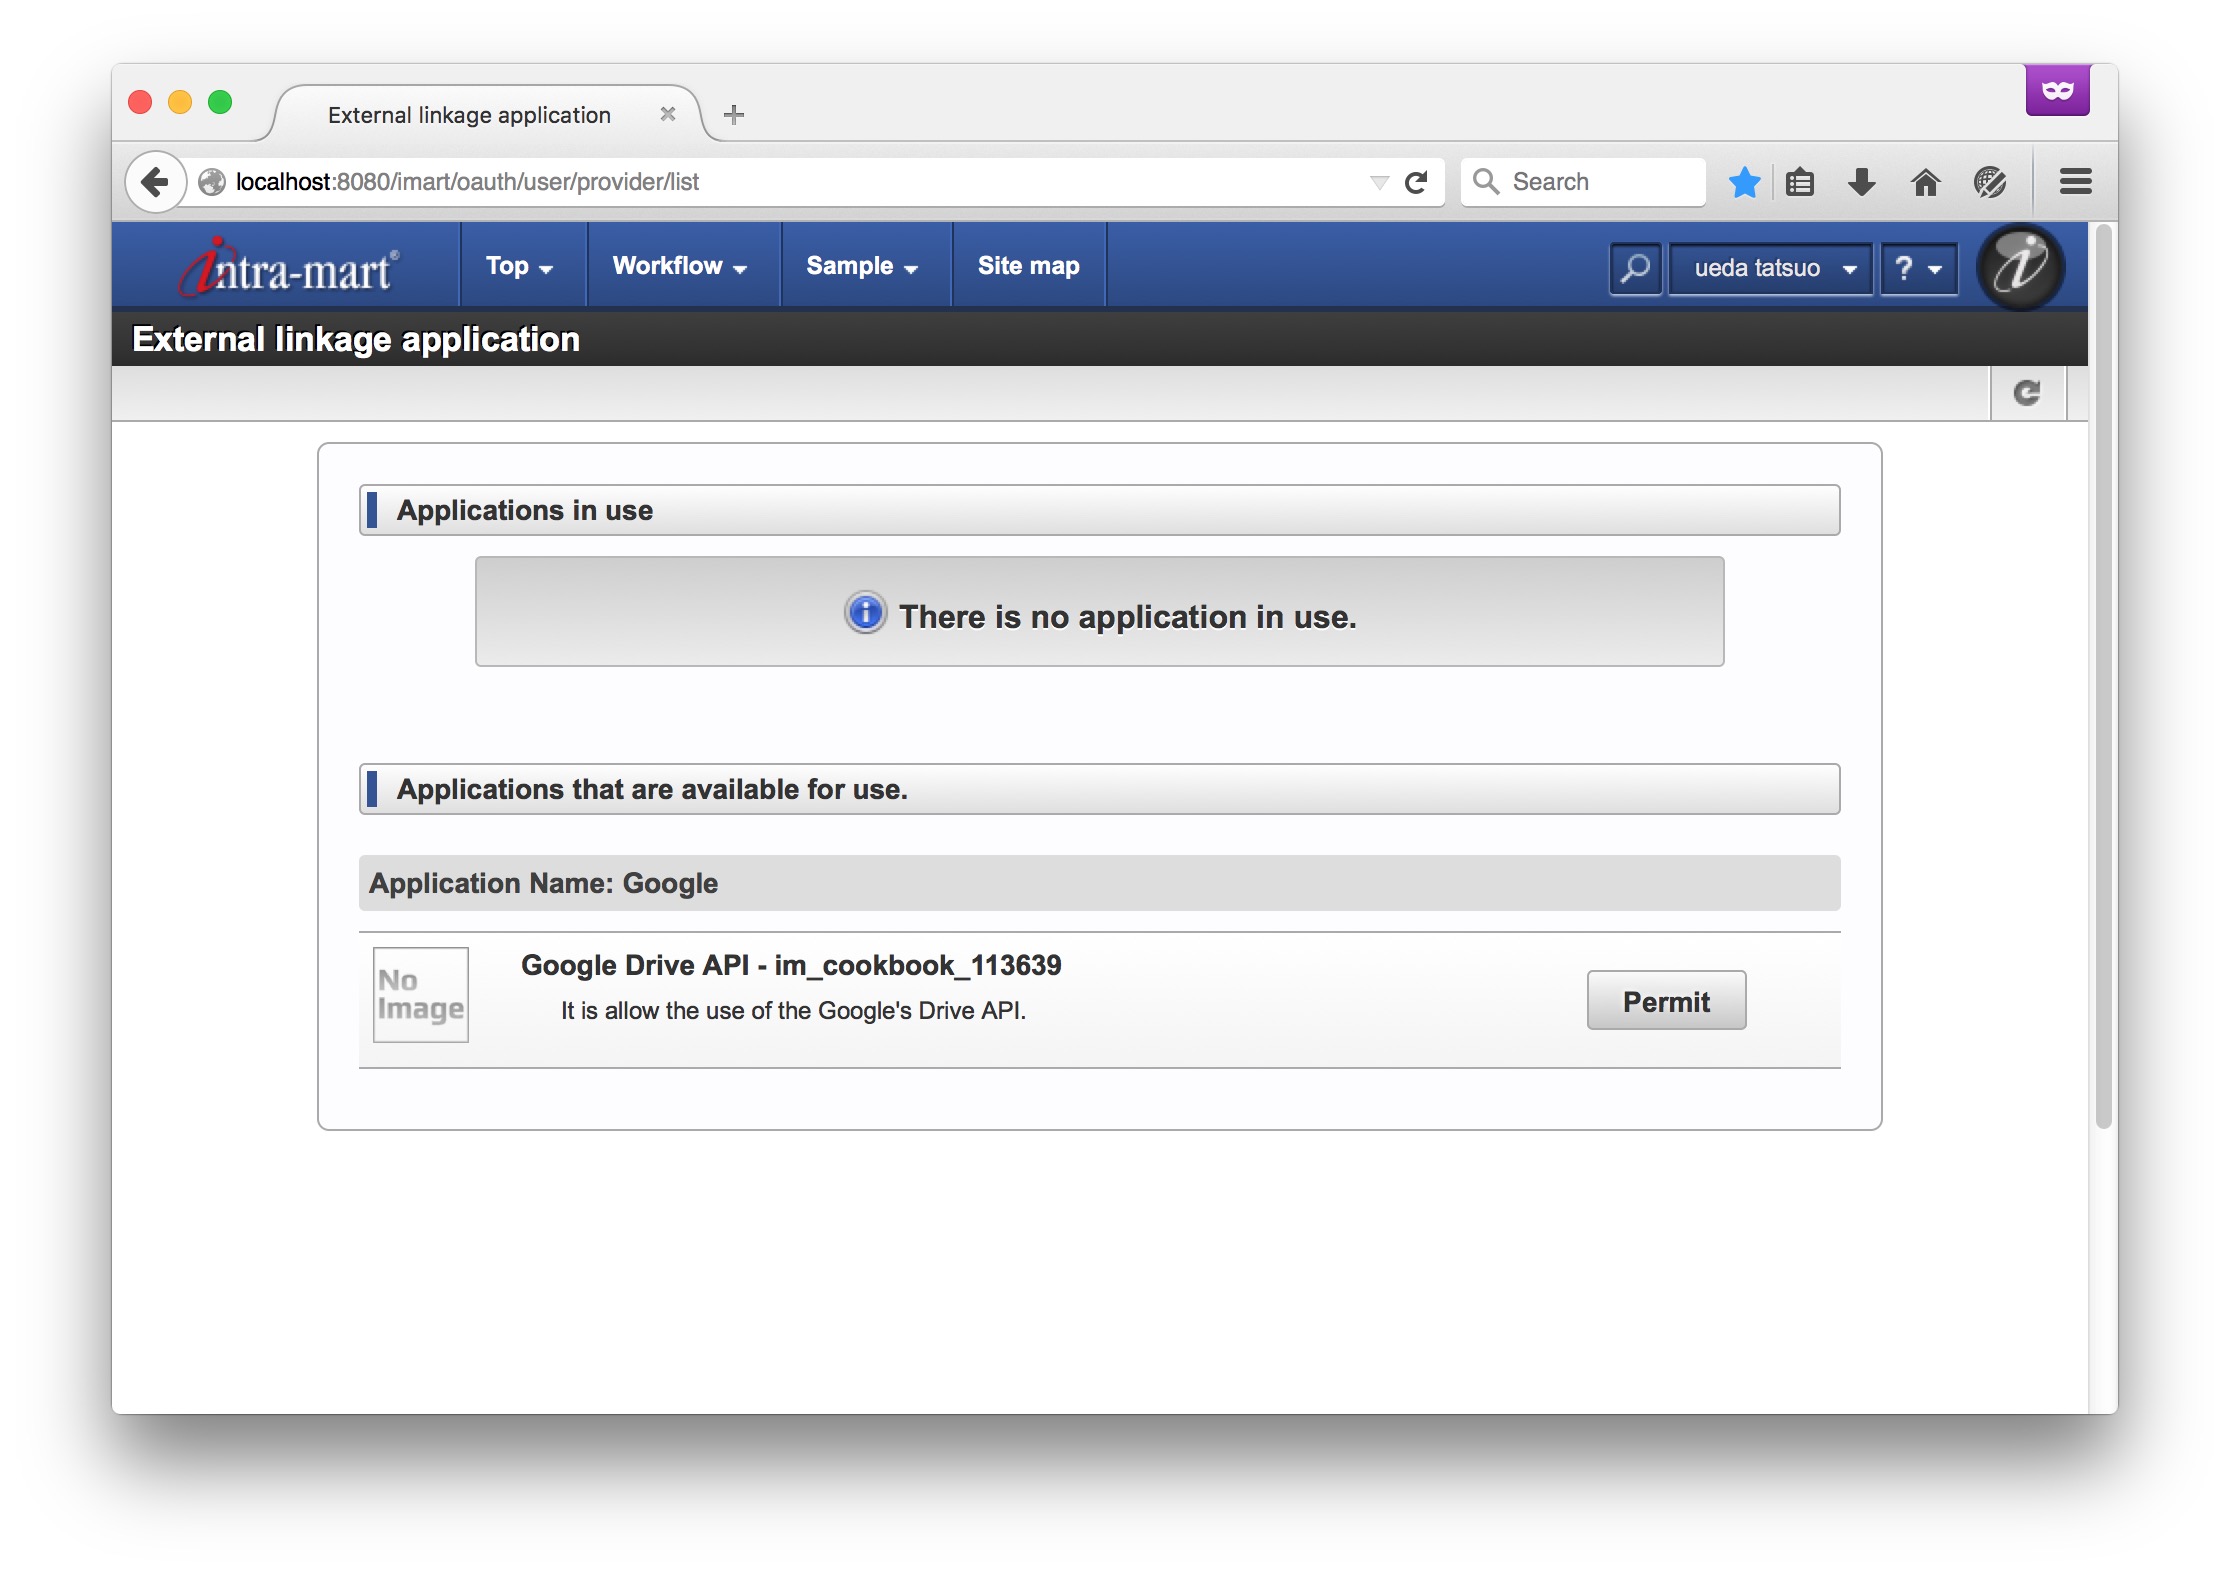
3. 「Google Drive API - im_cookbook_113639」を [許可] します。
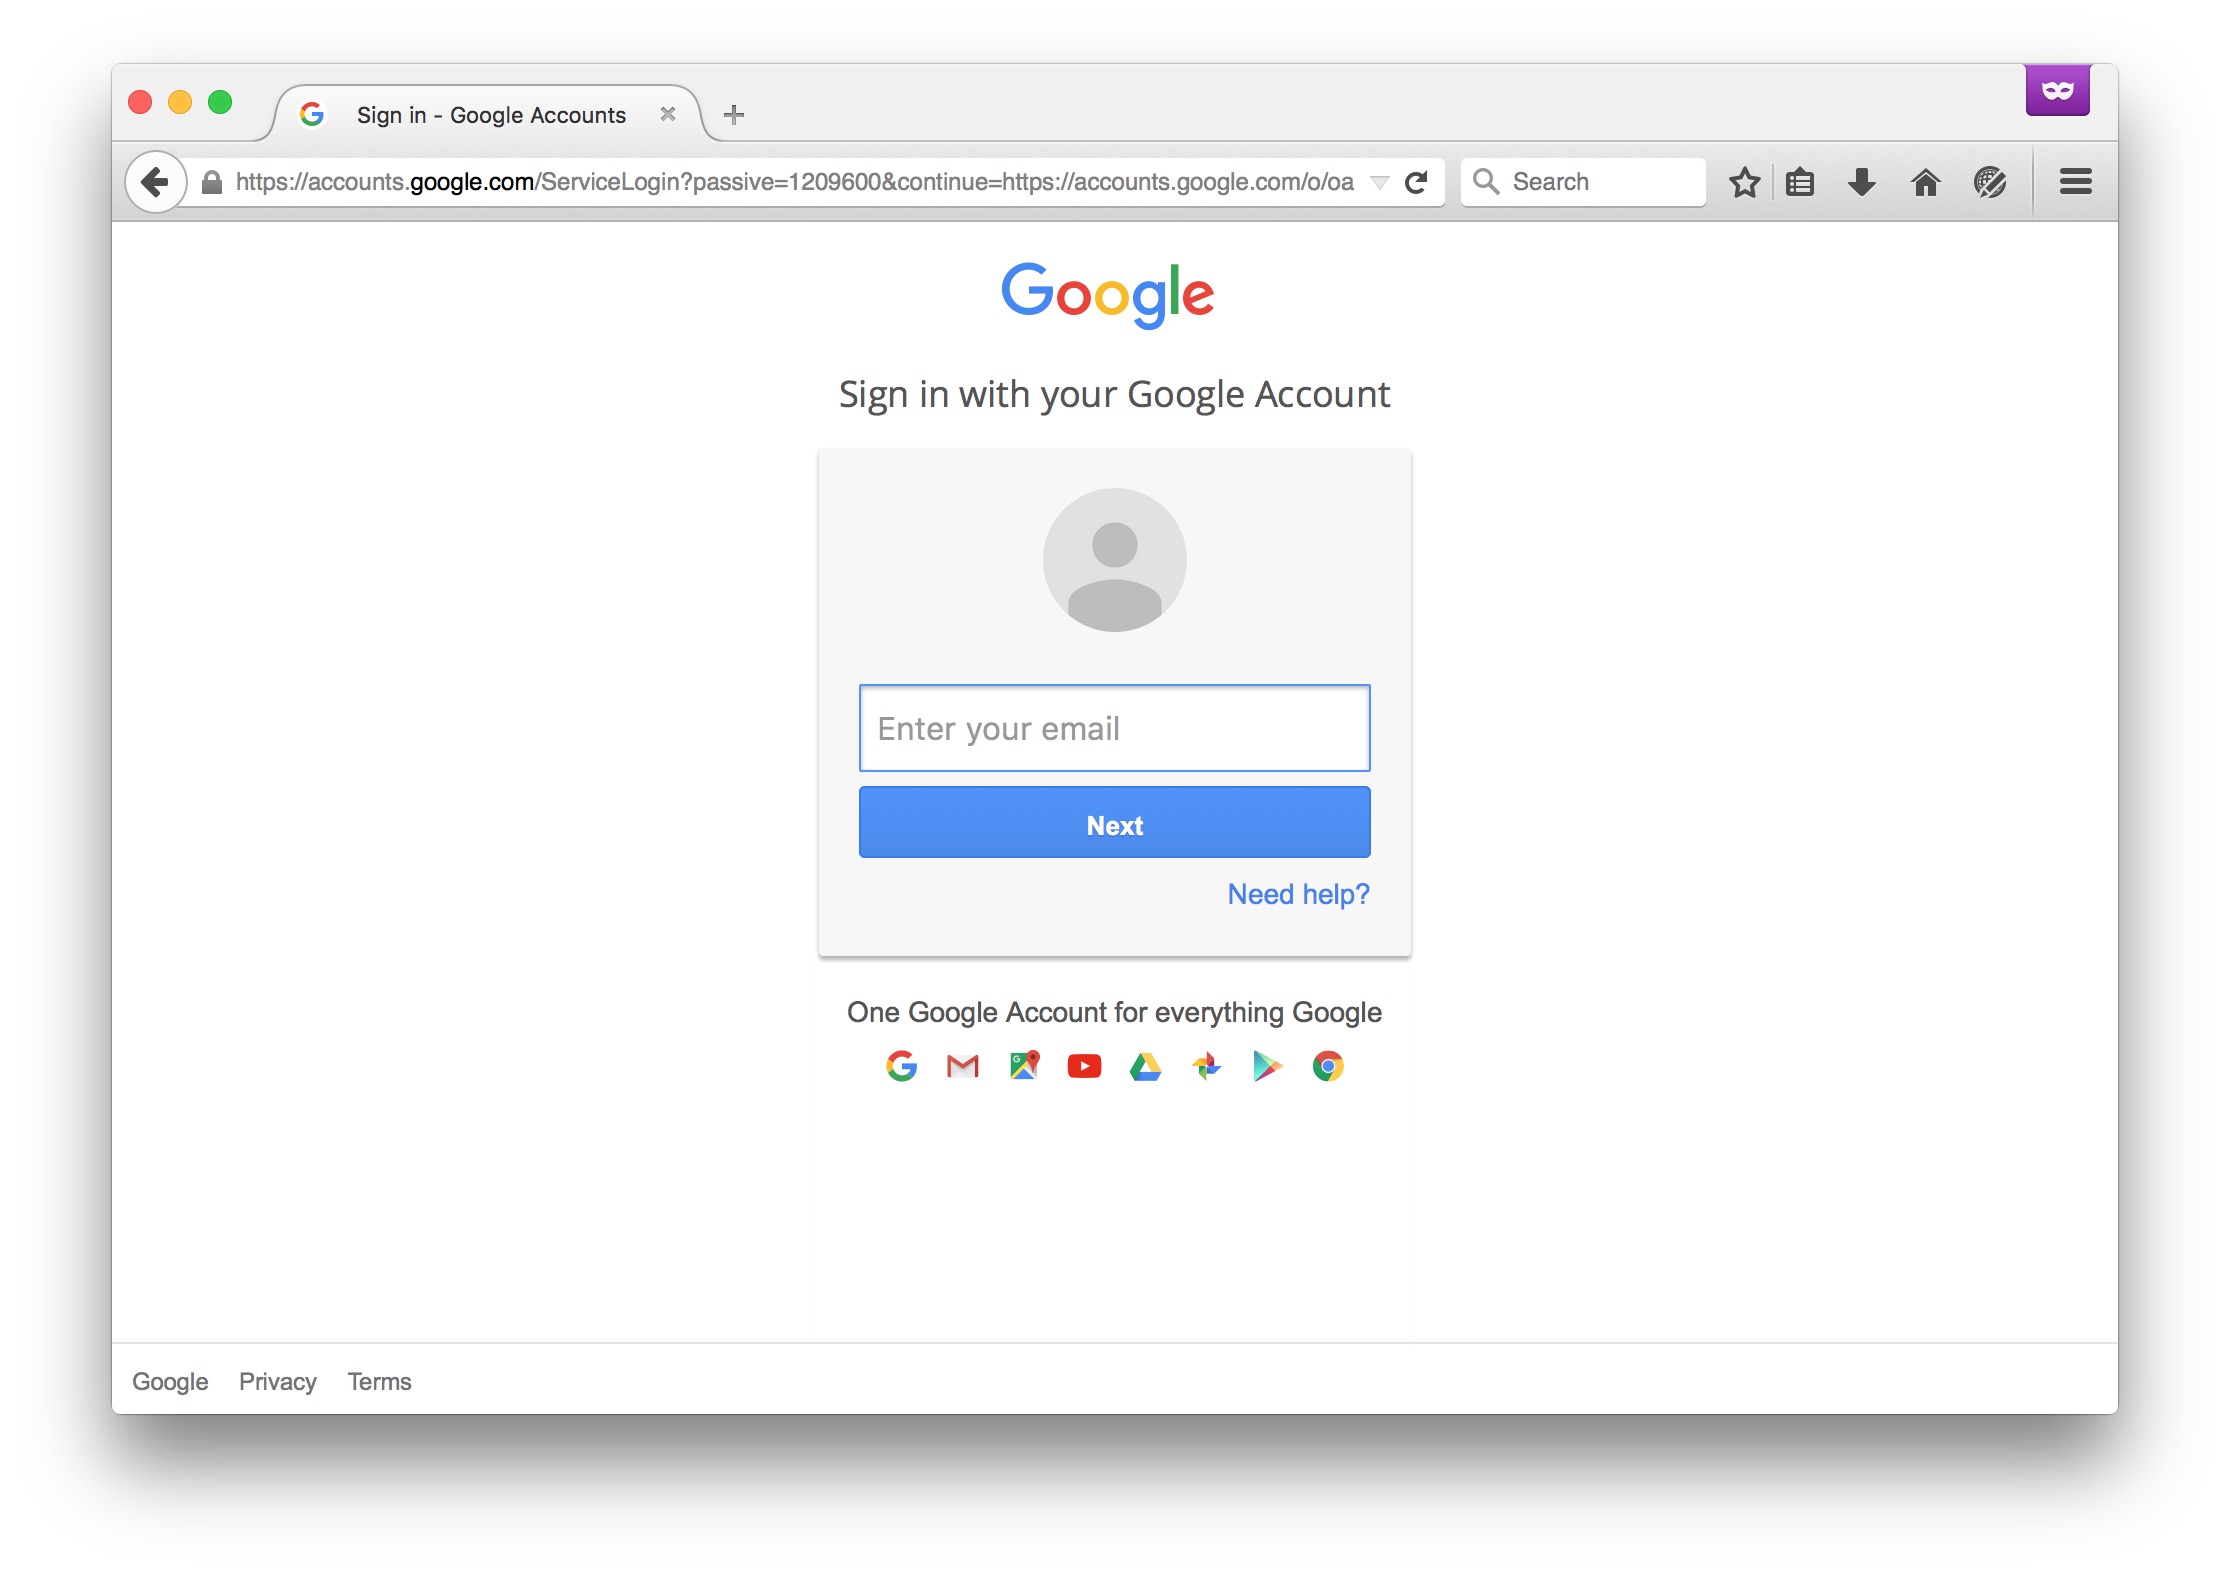
4. Google アカウントでログインします。
5. サービスを許可します。
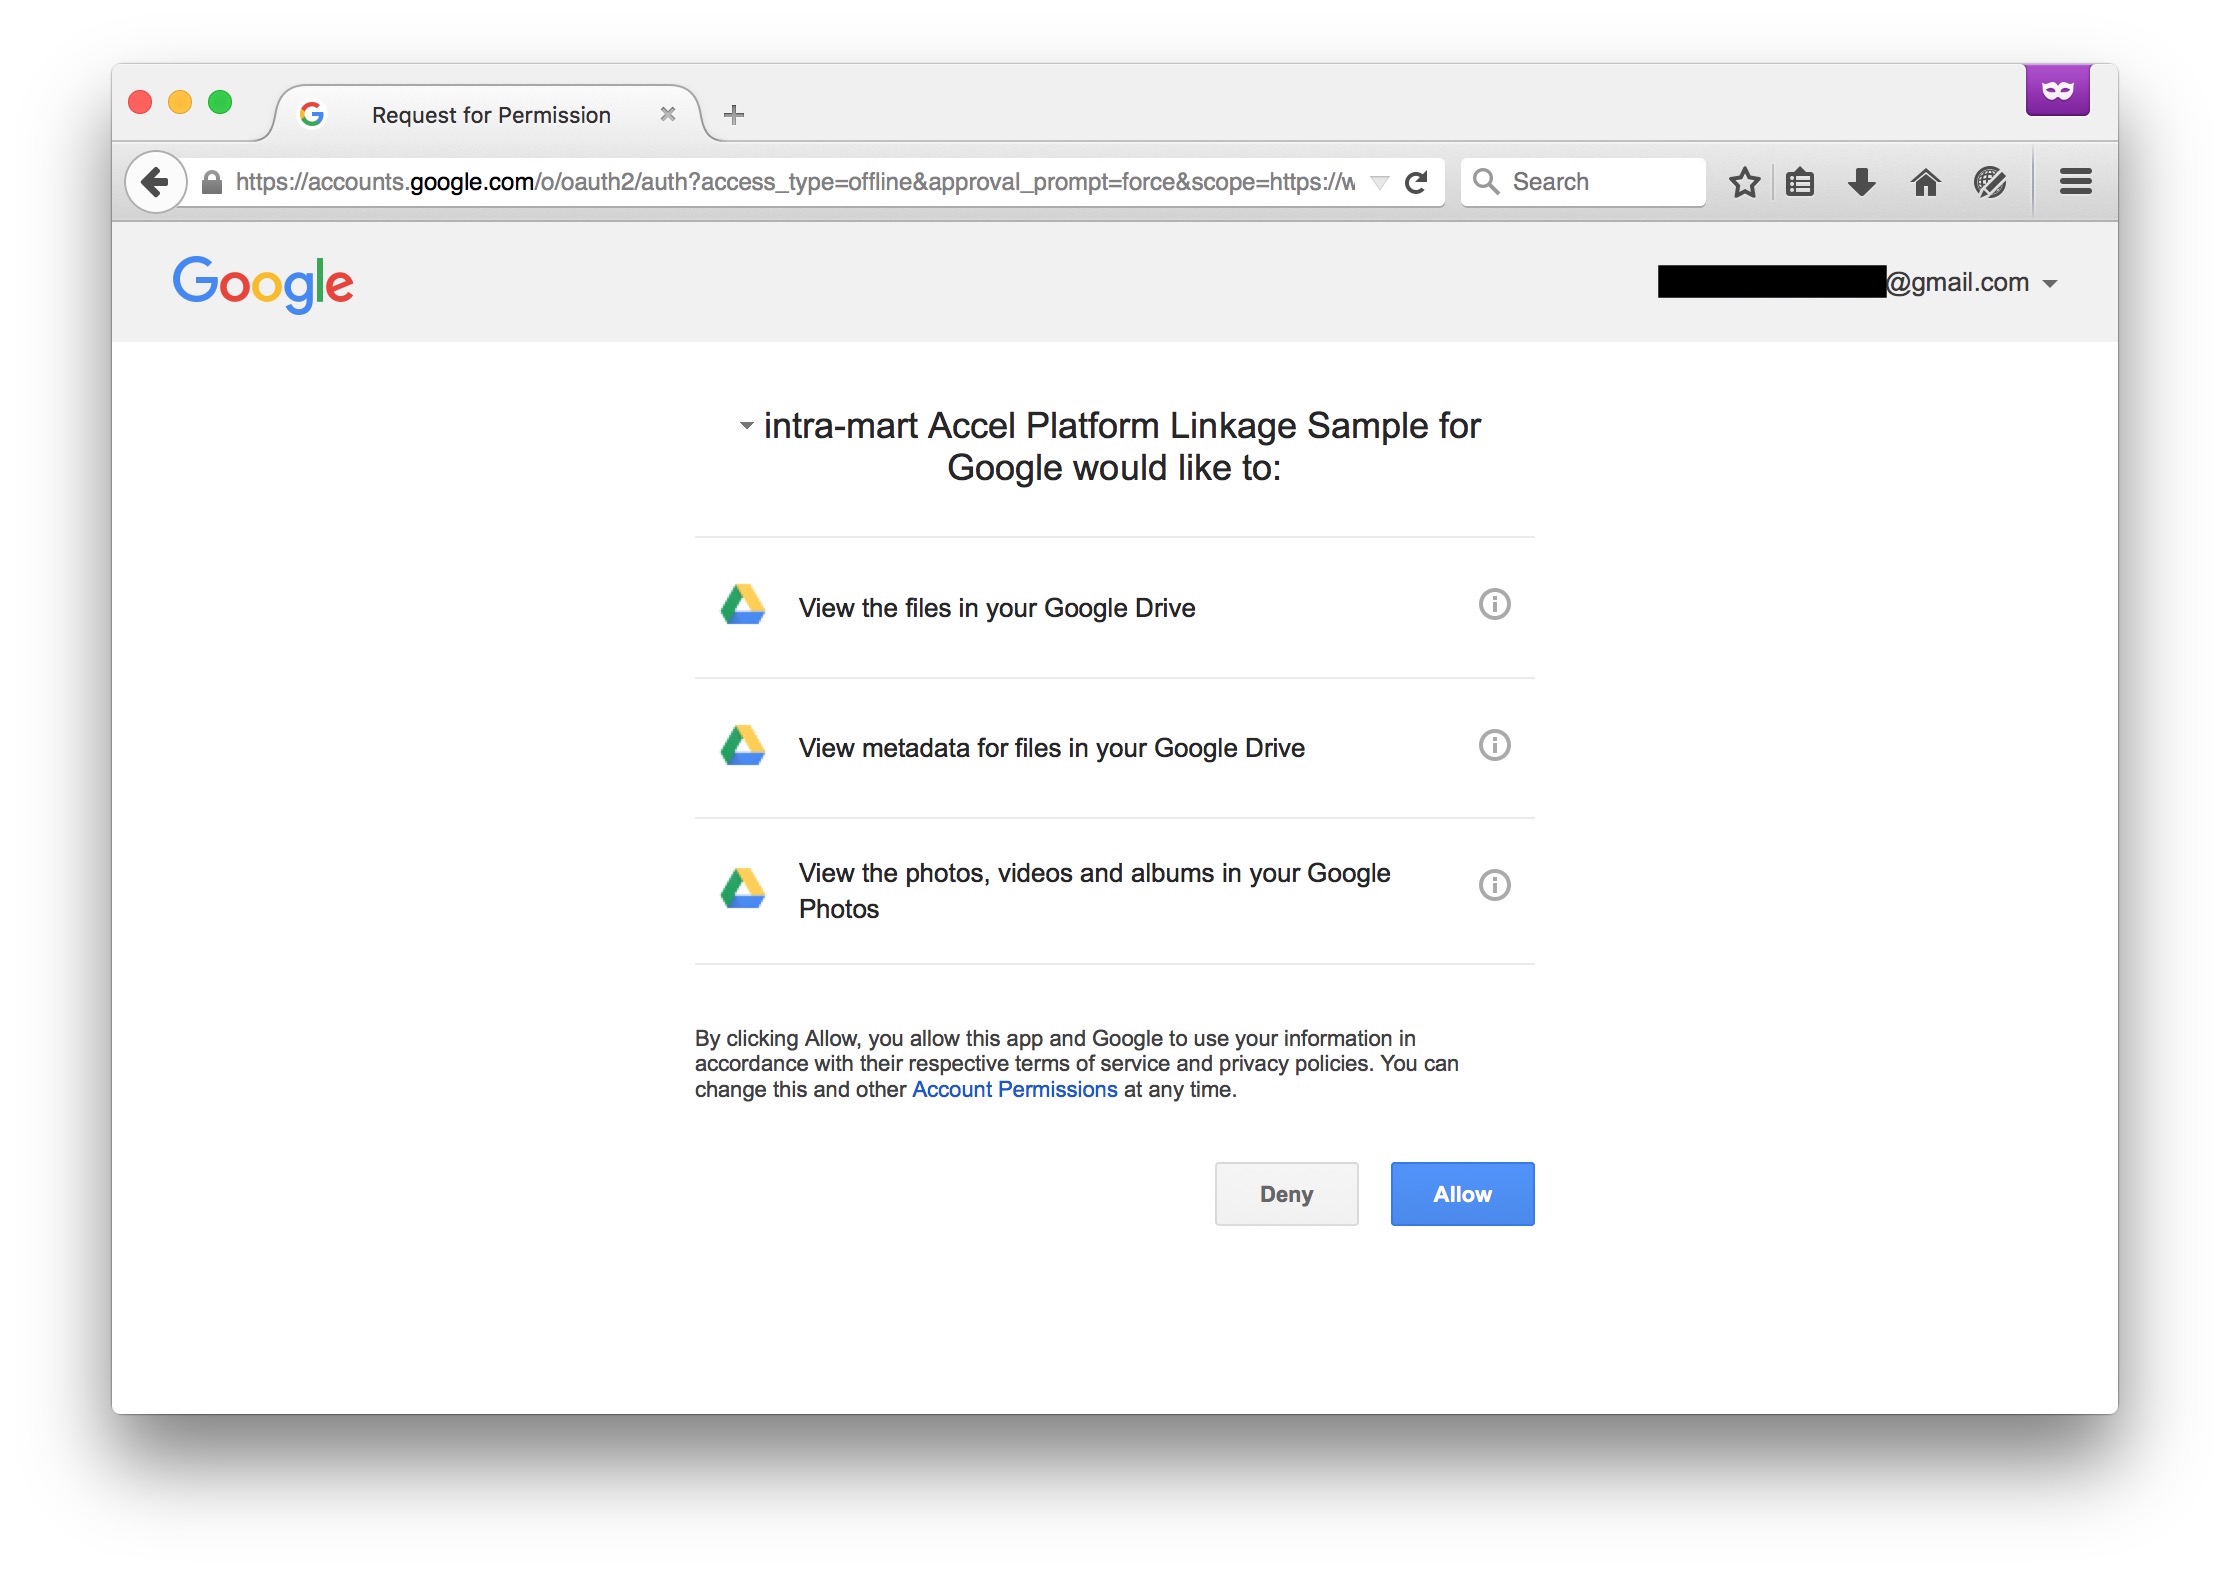
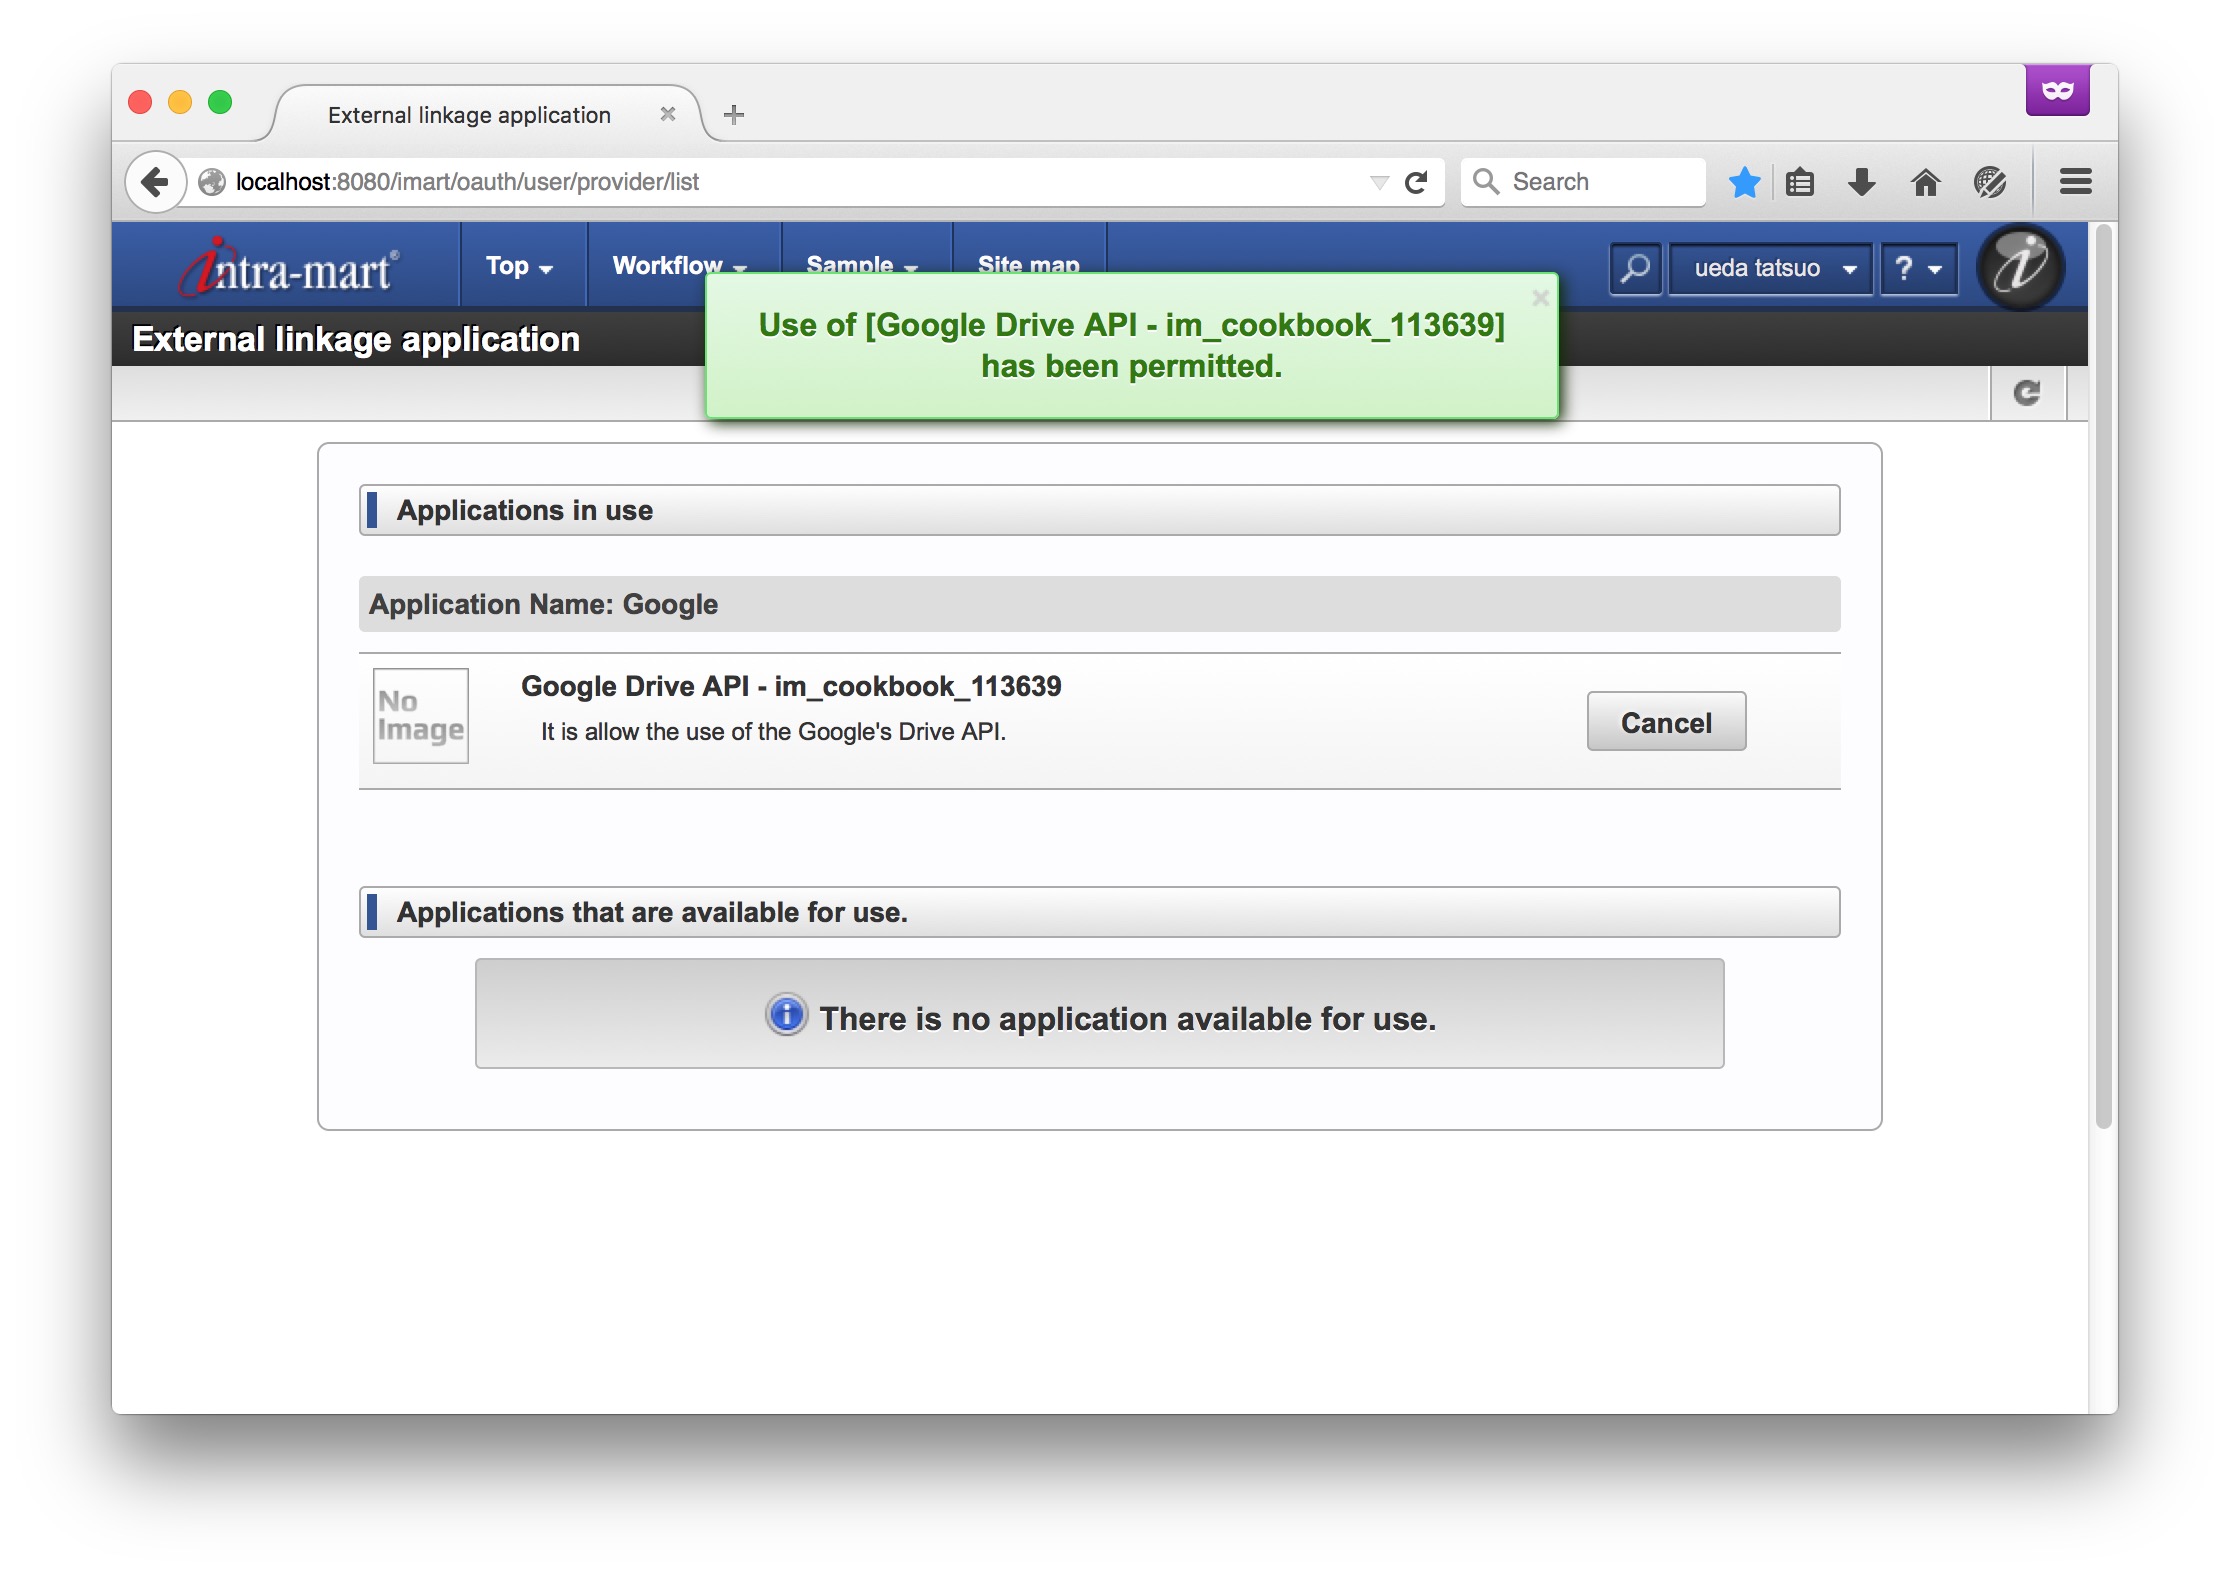
6. サンプル画面「google_drive_file_lists.jsp」にアクセスします。
http://localhost:8080/imart/im_cookbook_113639_oauth_client_google/google_drive_file_lists.jsp にアクセスします。
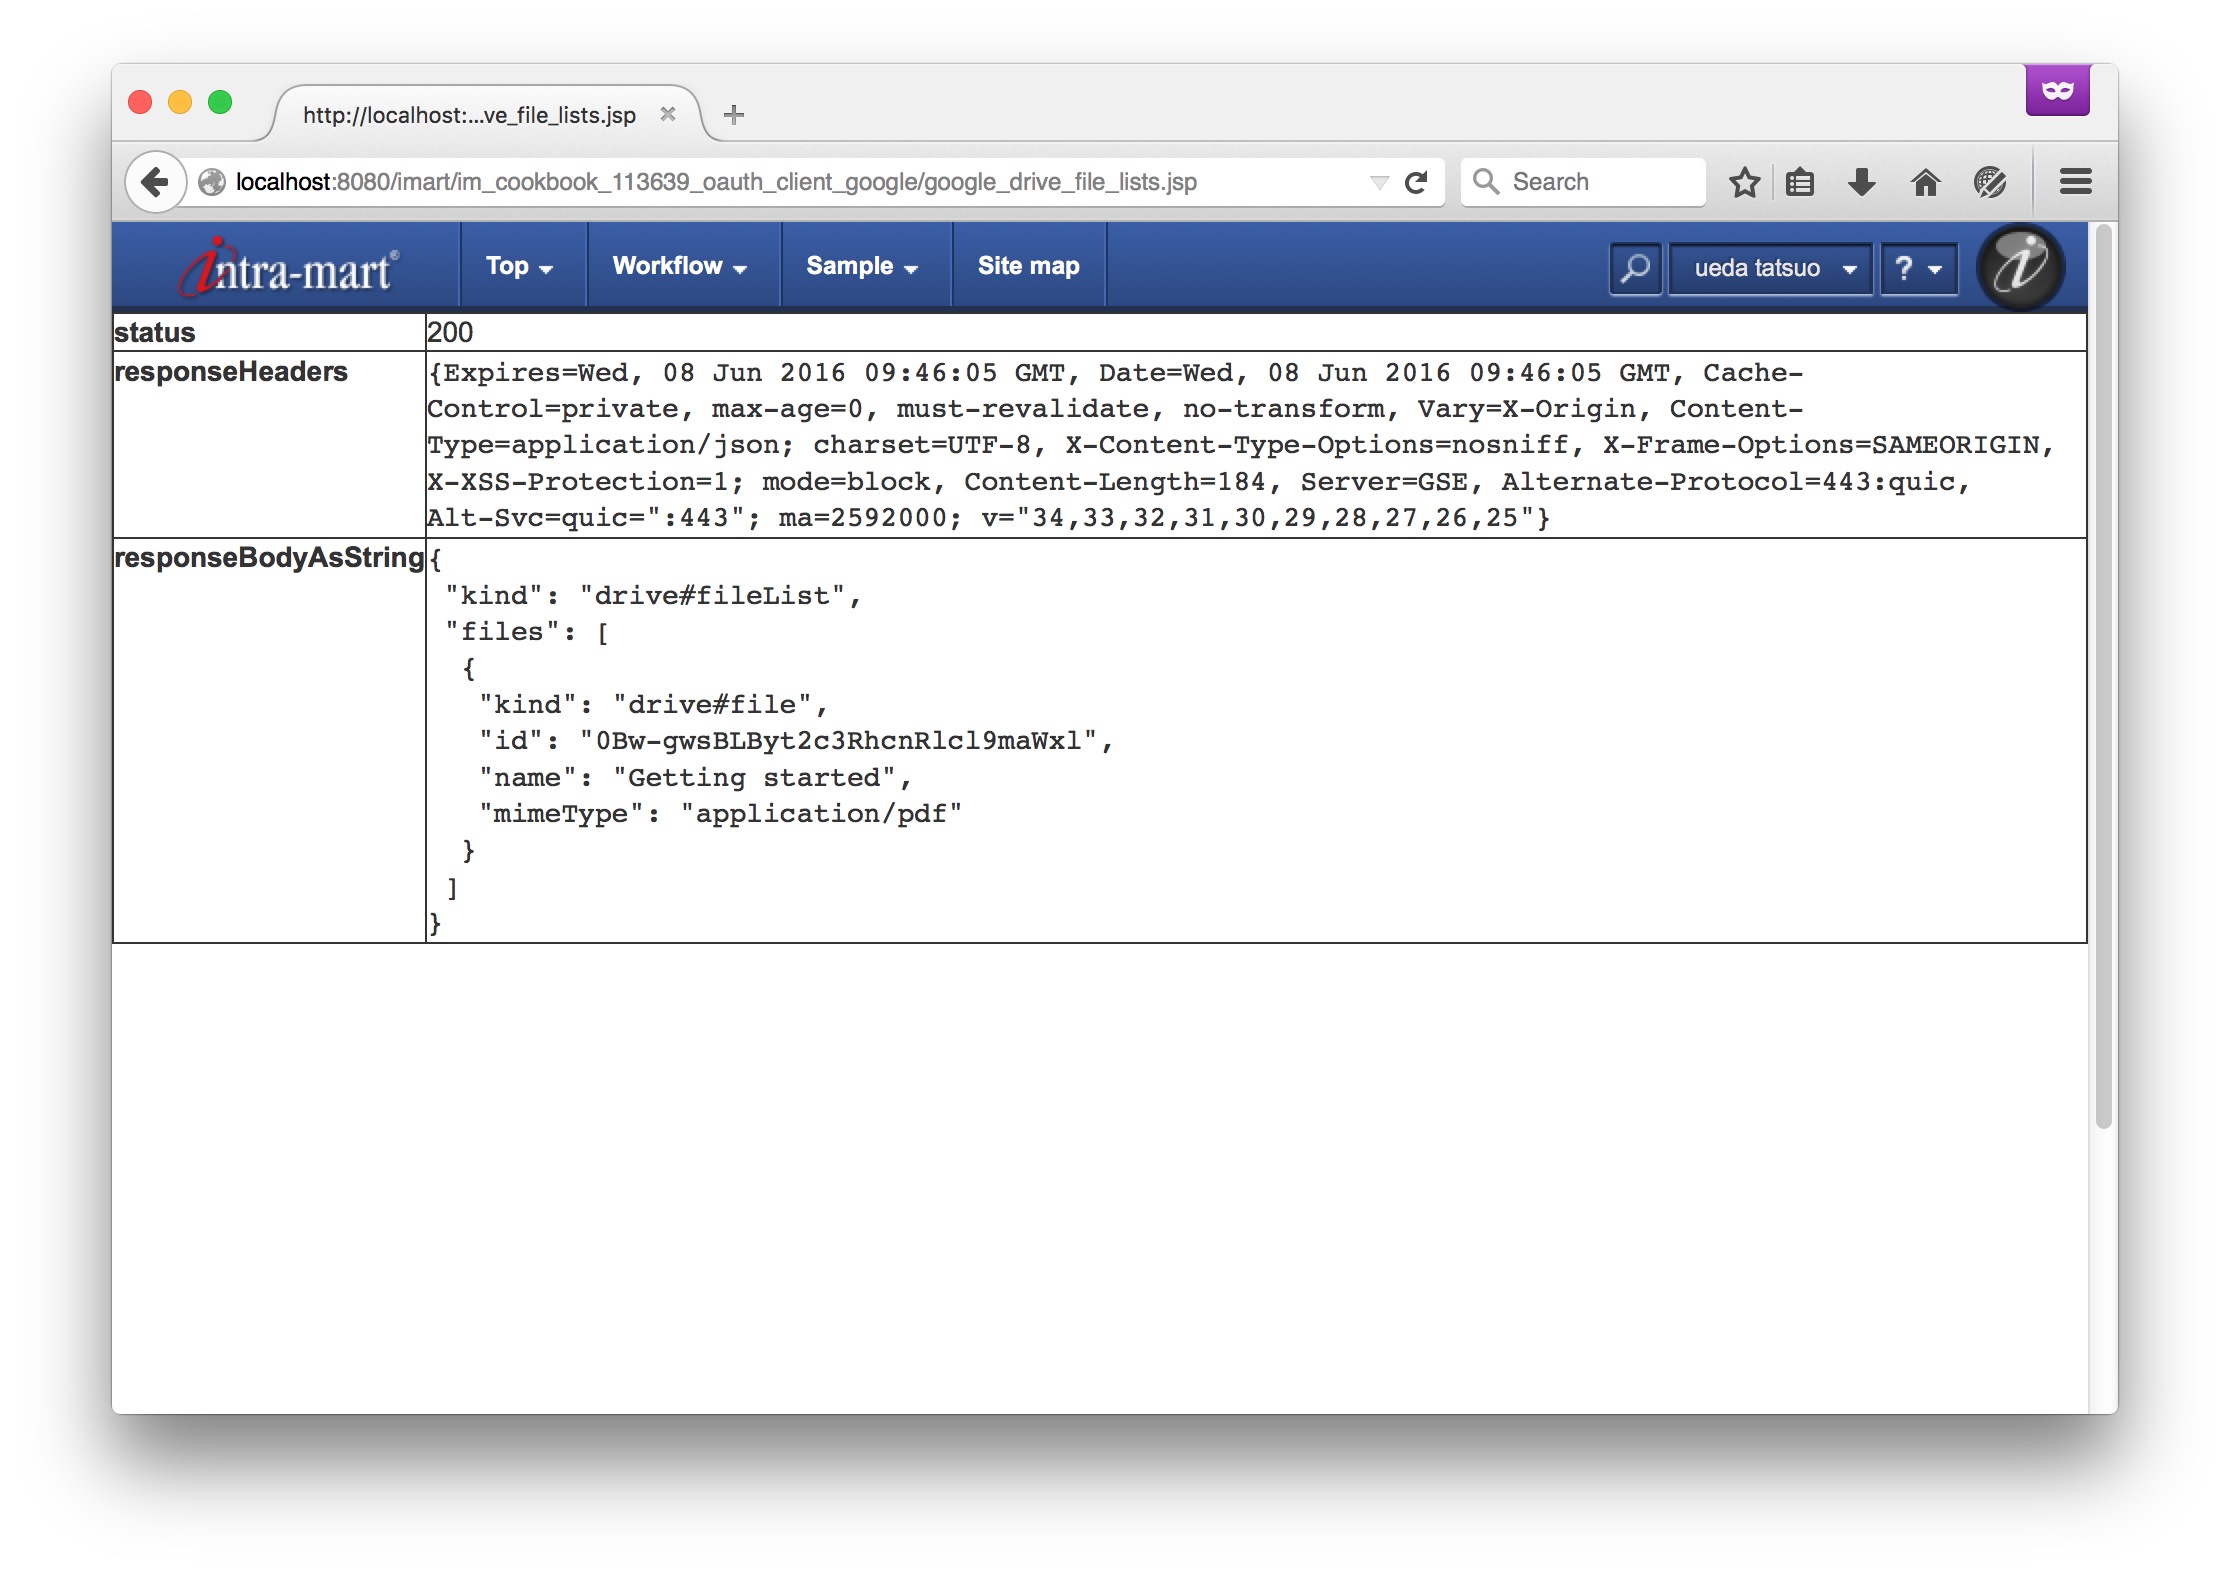
このGoogleユーザは、Google Drive上のファイルがひとつしか存在しないようです。
試しに、Google Driveにファイルを2つアップロードしてみます。
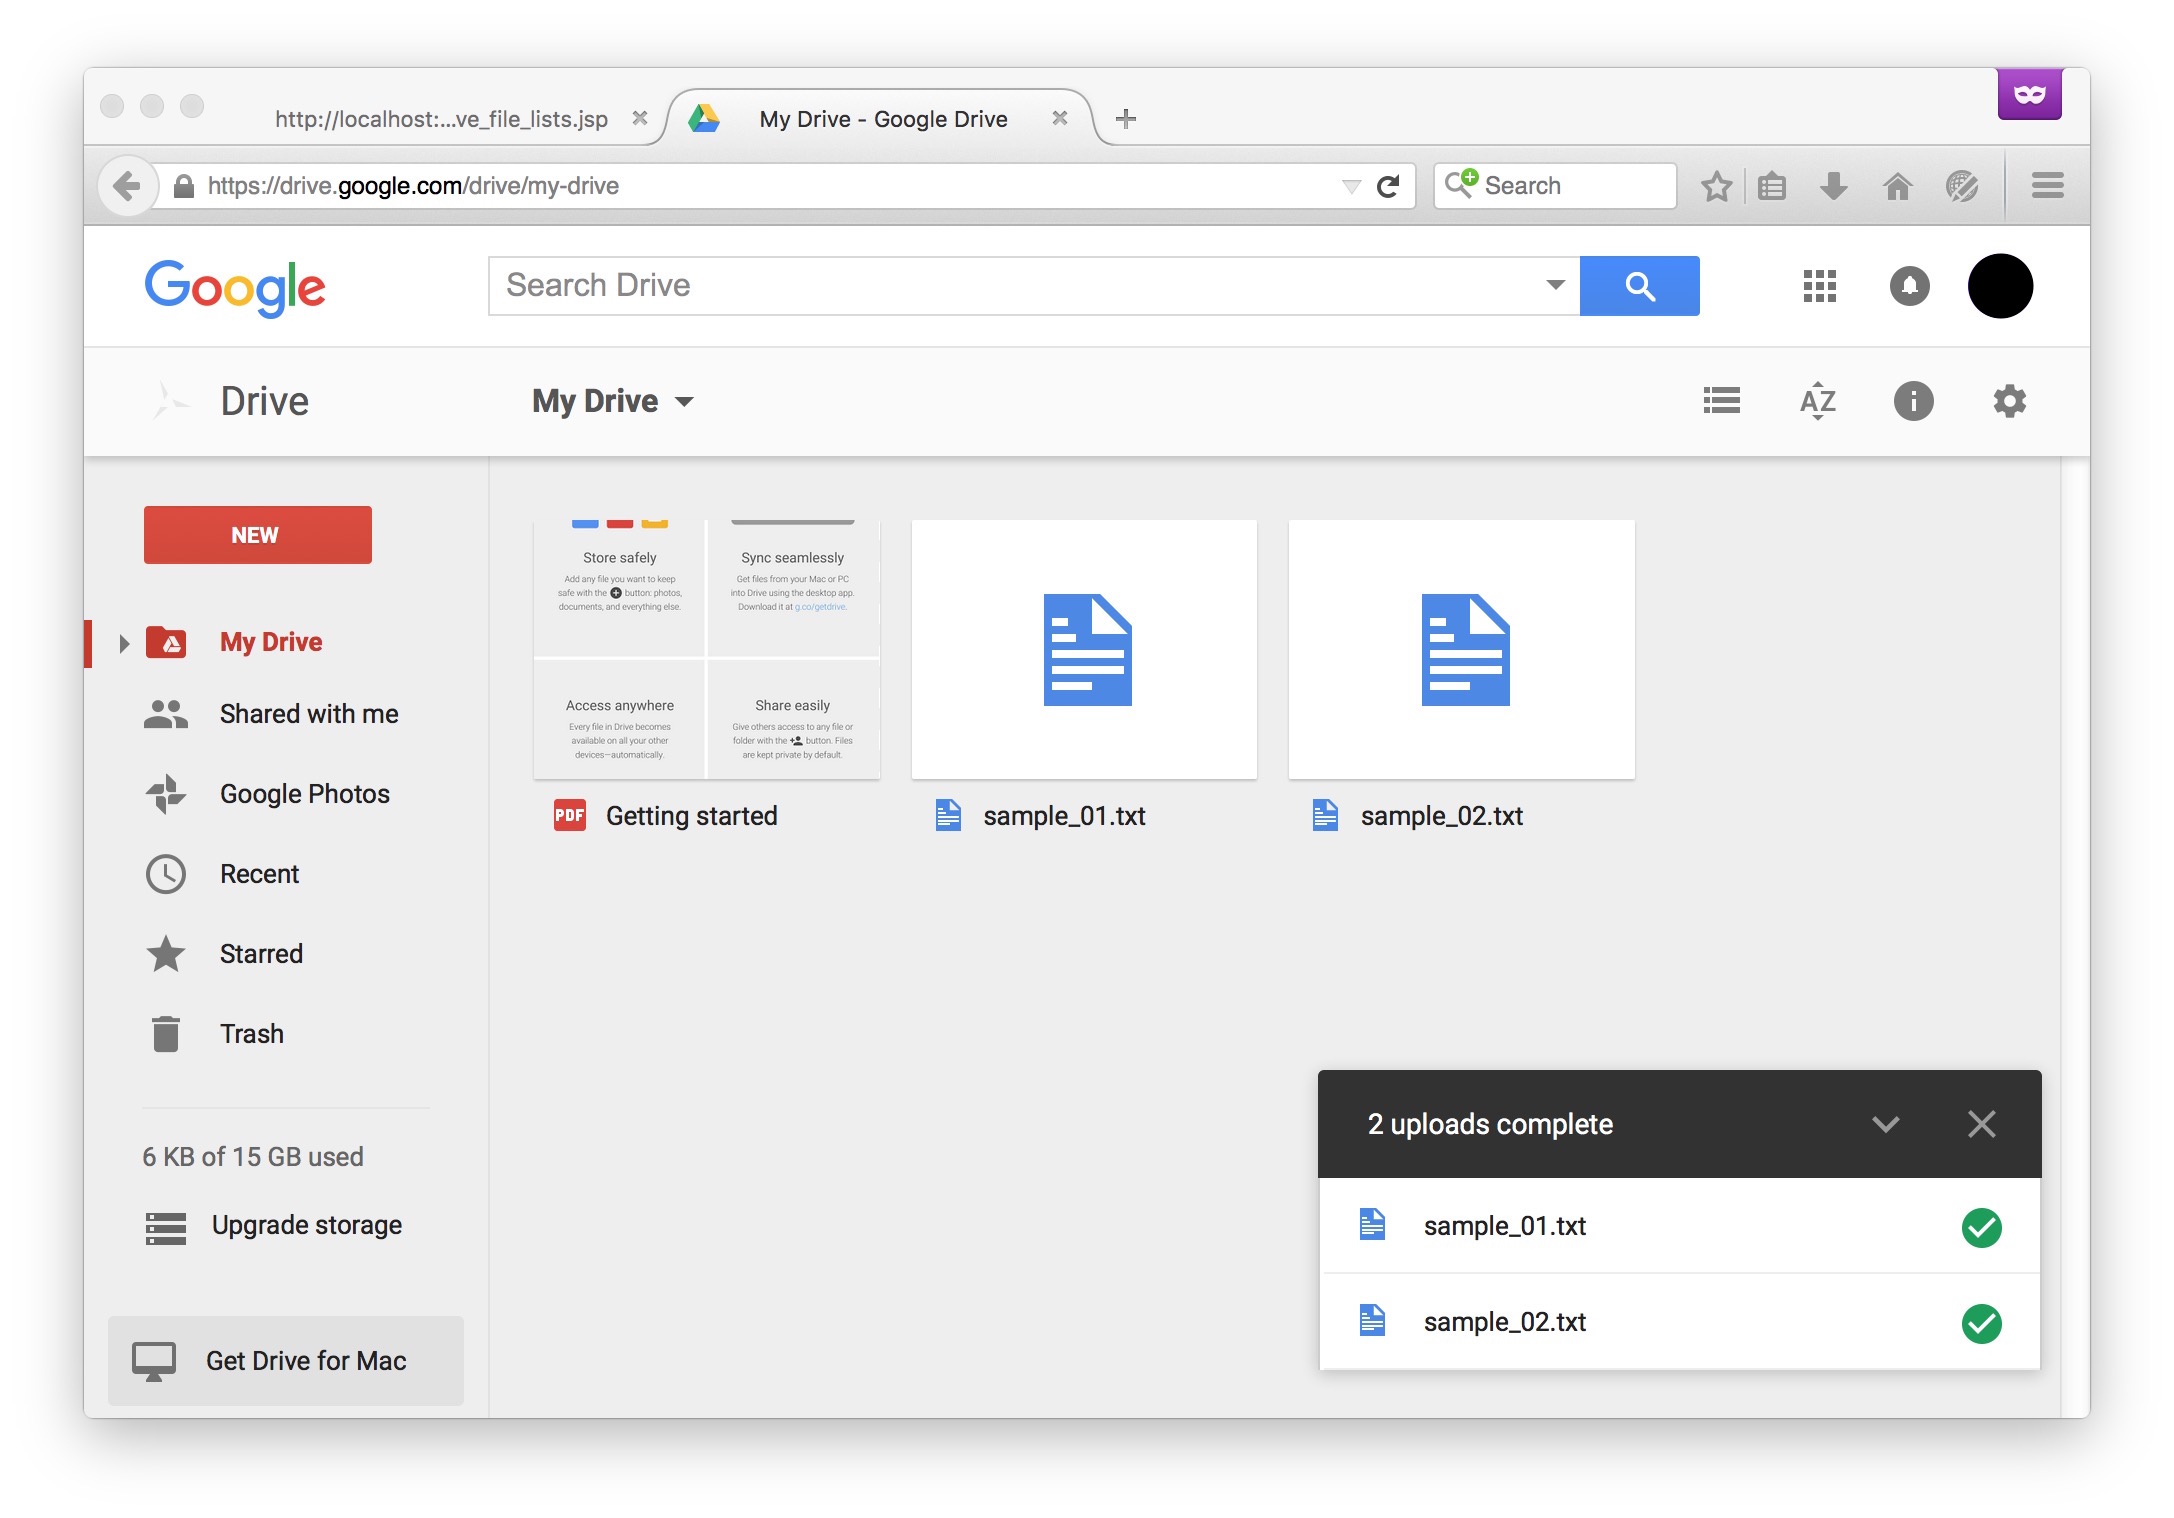
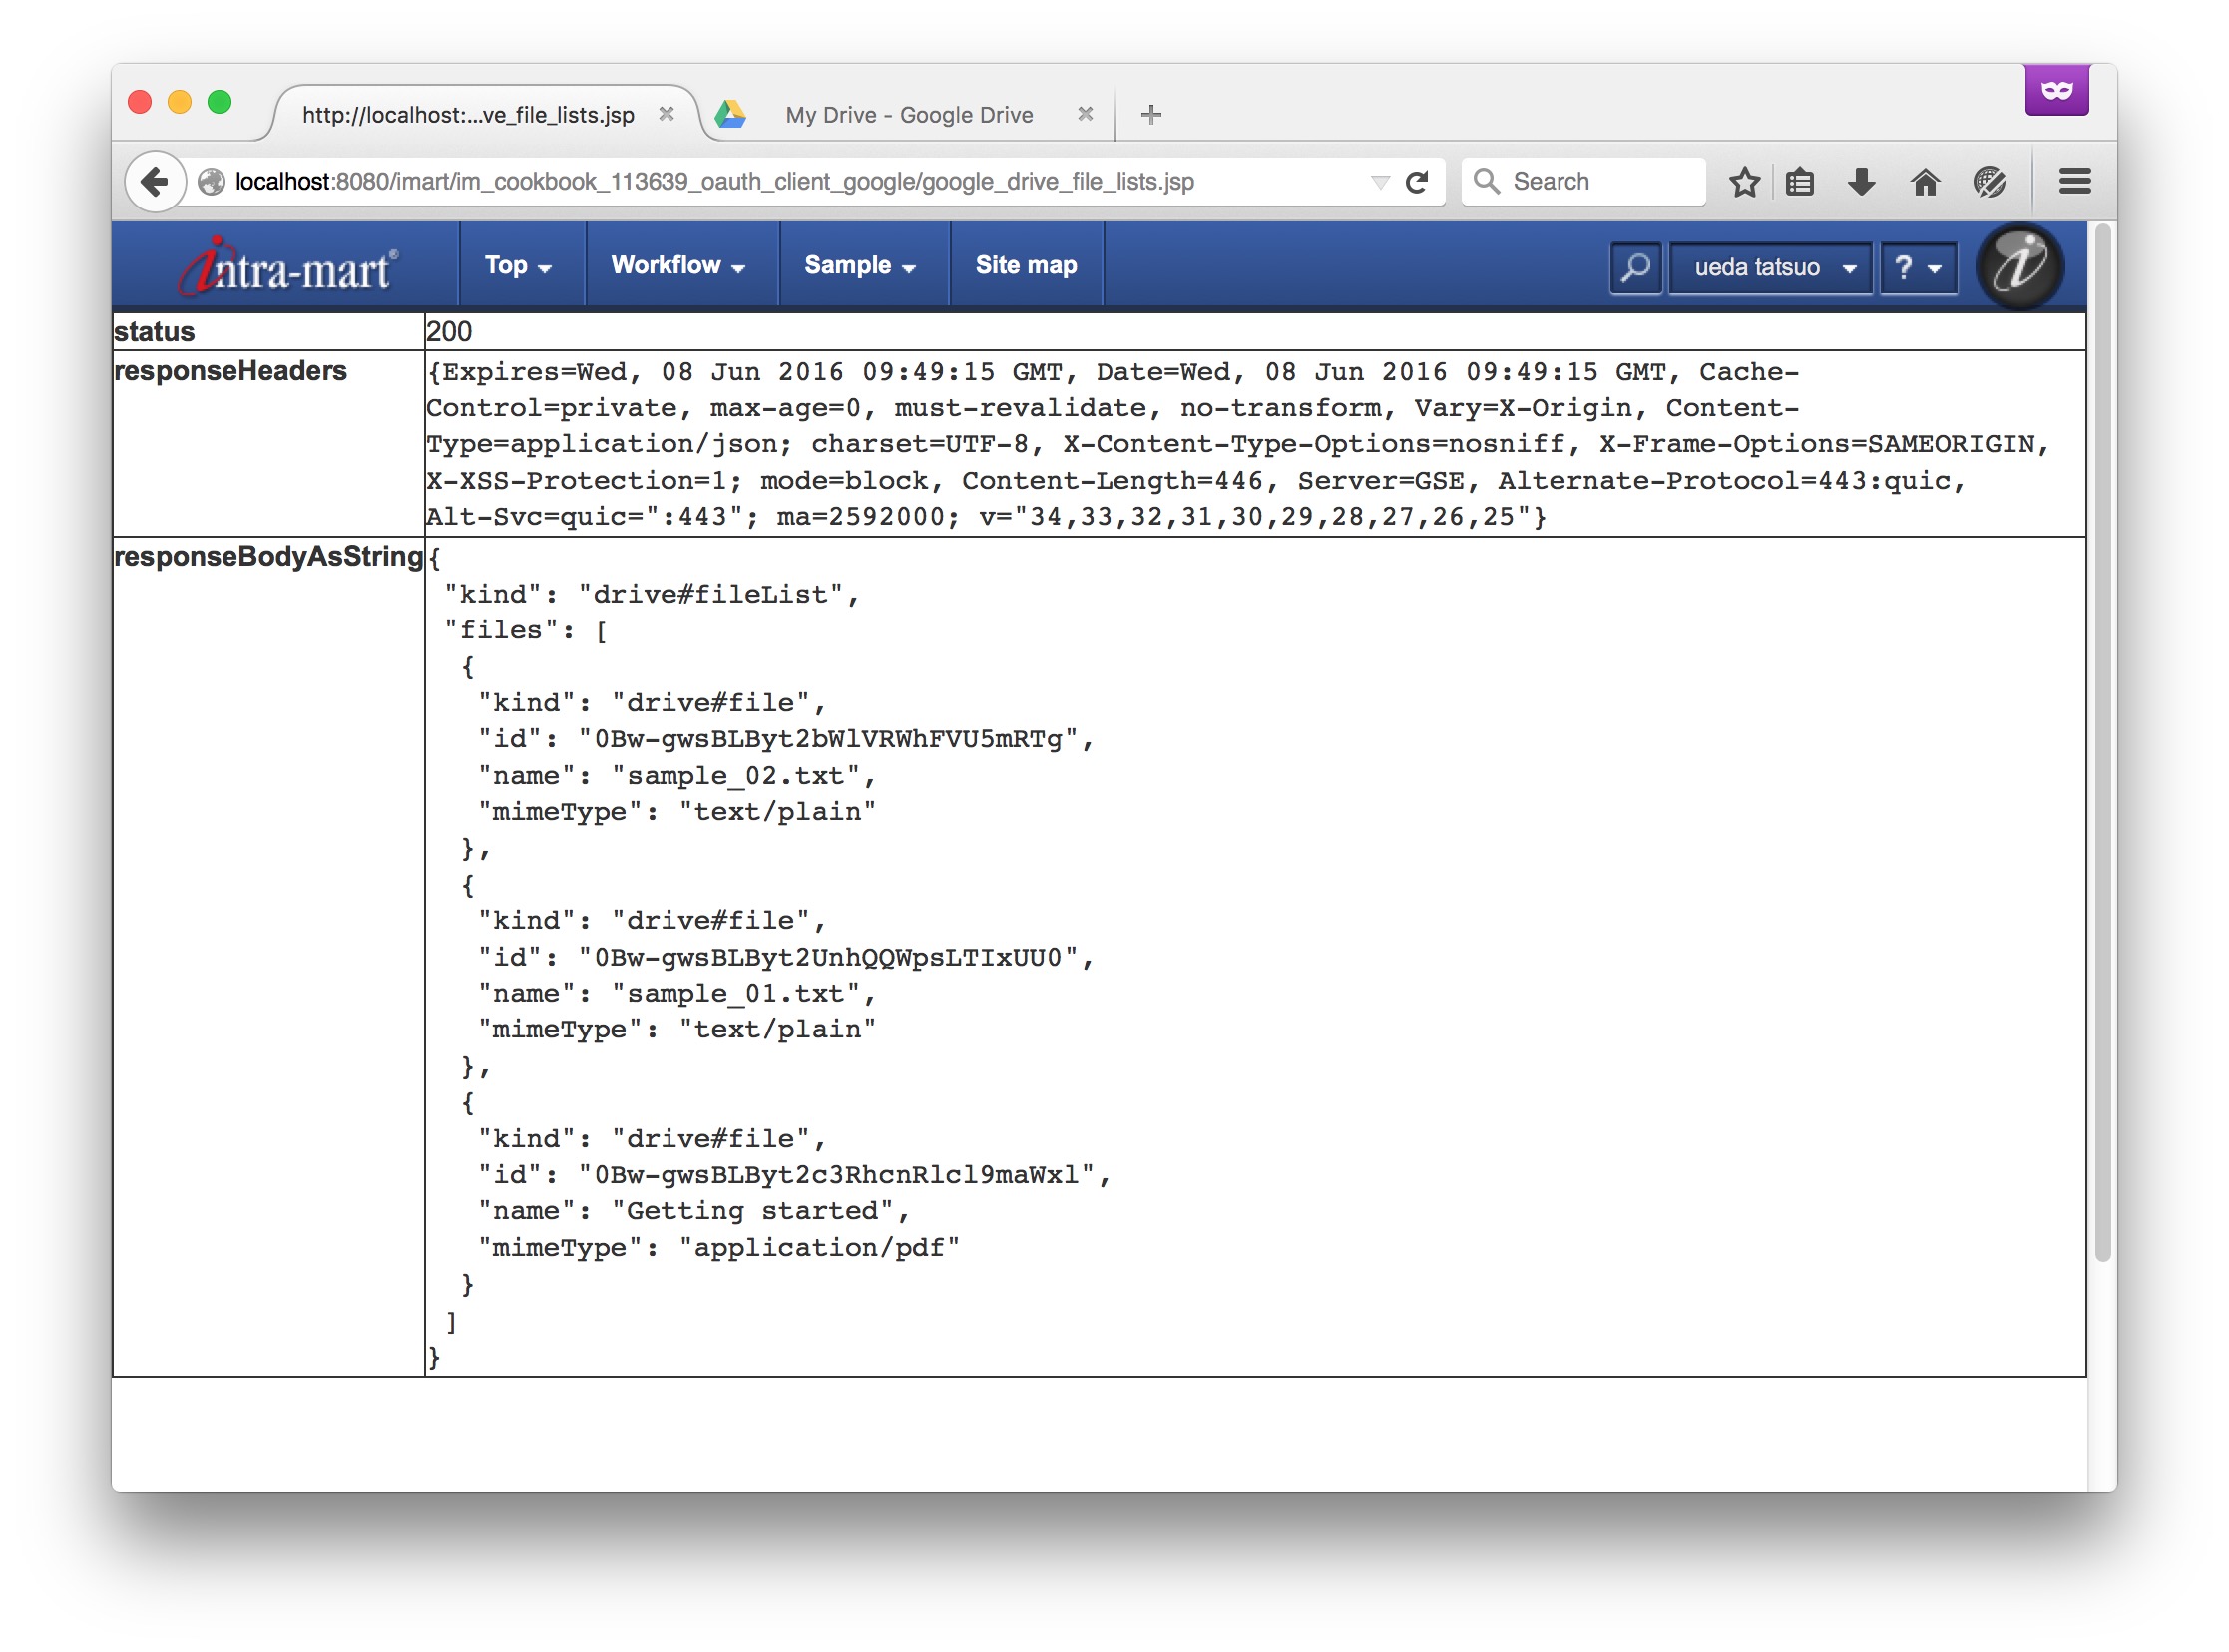
再度、http://localhost:8080/imart/im_cookbook_113639_oauth_client_google/google_drive_file_lists.jsp にアクセスします。
ファイルの一覧が取得できました。
まとめ
この CookBook では、OAuth2.0 の アクセストークンを Google から取得する方法を紹介しました。
Google以外でも、OAuth 2.0対応の認可サーバであれば、この CookBook と同様の方法でアクセストークンを取得することが可能です。
お客様の用途にあわせて是非ご活用ください。

[…] は、Box のファイル一覧を取得することを例として、詳細な手順を説明します。 また、Google Drive™ の OAuth2.0 については他にクックブックがあります。詳細はこちらを参照してください。 […]